Order Online
- Straight to your door!
Straight to your door


Before you grab a single tool, the first job is to play detective. Rushing in and sanding down the wrong spot can make things worse, but most of the time, the real reason your door is sticking is surprisingly simple to fix.
Figuring out the why is the key to a repair that actually lasts. Here in the UK, our damp, humid climate is usually the prime suspect. It's notorious for making wooden doors swell up and jam in their frames, especially during the wetter months.
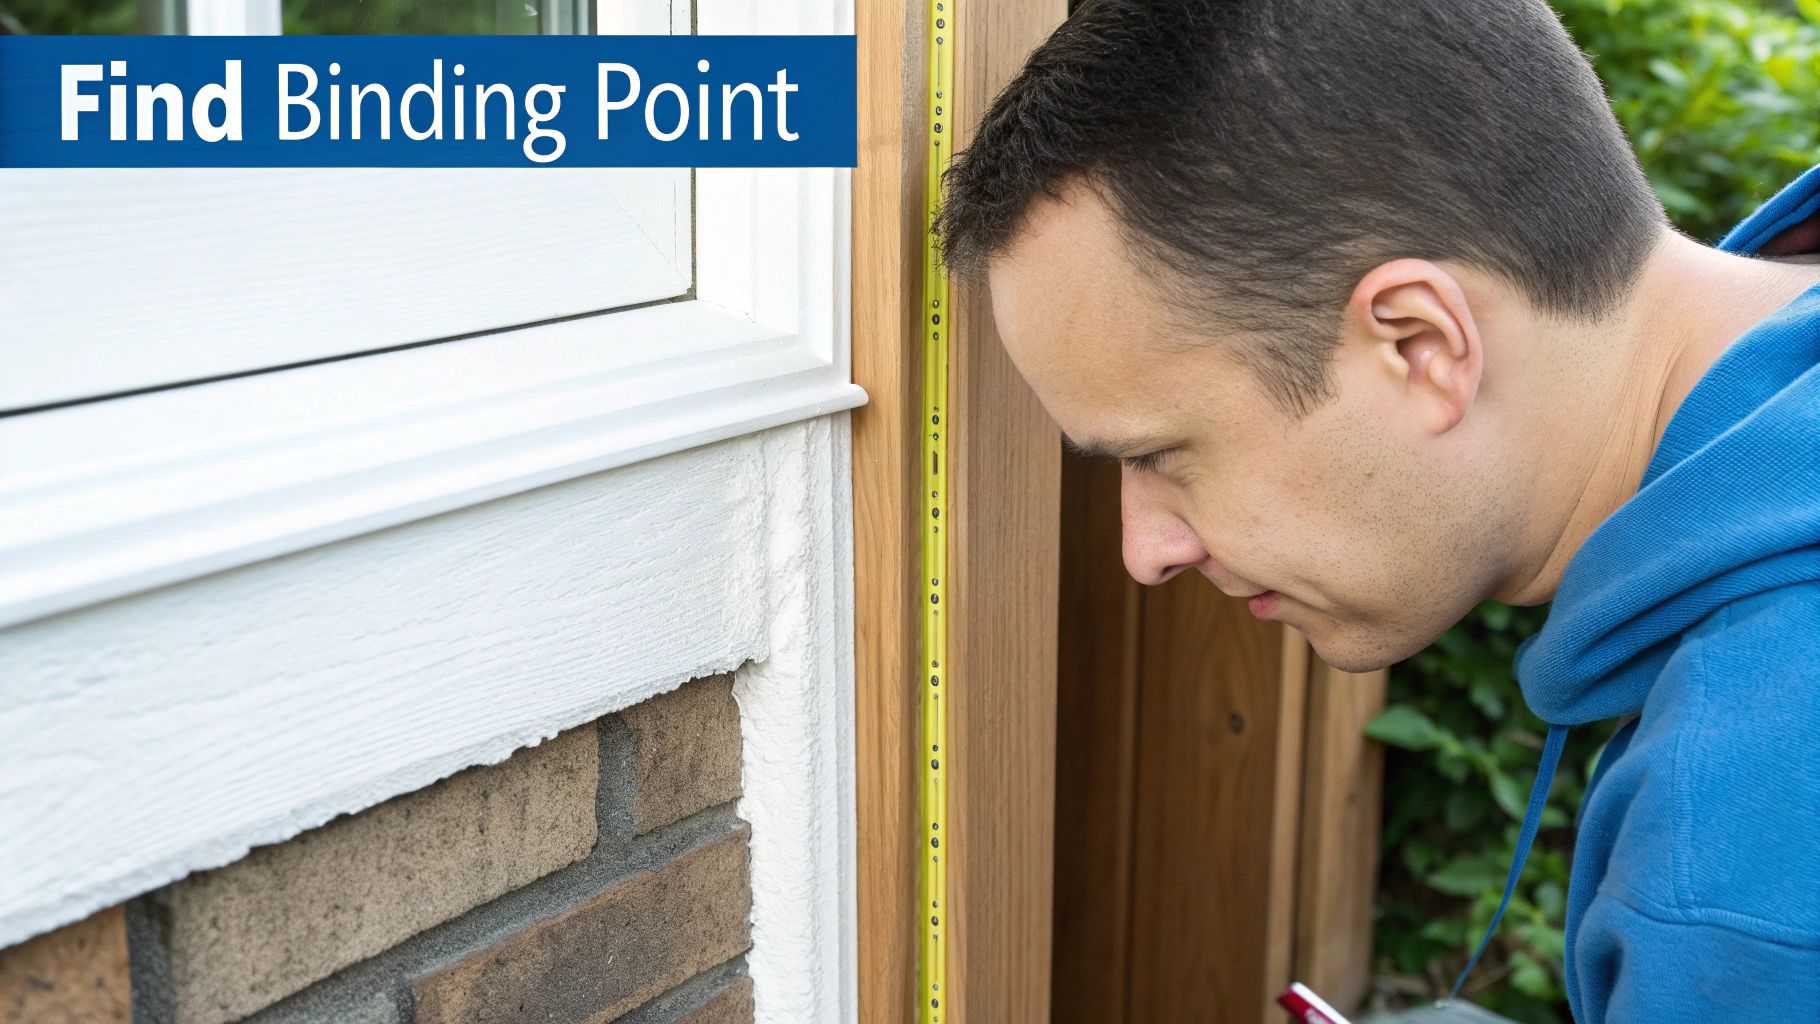
To find the sticking point, just close the door slowly and watch where it makes contact first. You’re looking for scuffed paint or worn patches of wood—these are the dead giveaways. Is it dragging along the top? Scraping the floor? Or is it binding up near the latch?
I’ve seen it all over the years, but it almost always boils down to one of these common culprits:
To help you get straight to the cause, I've put together a quick diagnostic table. Just find the symptom that matches your door to see what's likely going on and what you should try first.
| Where It Sticks | The Likely Cause | Your First Step |
|---|---|---|
| Top edge, near the latch side | The door is sagging due to loose top hinge screws. | Get your screwdriver and tighten the screws on the top hinge. |
| Latch side of the door | The hinges are loose, or the door has swollen from humidity. | Check all hinge screws first. If they're tight, it's likely swelling. |
| Bottom edge, dragging on the floor | The bottom hinge screws are probably loose, letting the door drop. | Tighten the screws on the bottom hinge. |
| All around the frame | This is often caused by too many layers of thick paint. | You may need to sand or strip the paint from the door edges. |
Once you've got a good idea of the problem, you'll be ready to tackle the fix with confidence.
A sticking door isn't just an annoyance; it's a sign that your home is responding to its environment. Learning how to read these signs and make small adjustments is one of the most useful DIY skills you can have.
Understanding the rhythm of your home's needs is a big part of being a homeowner. You can learn more about these fundamentals with these essential home maintenance tips for new homeowners to help you stay ahead of common issues.
It's a more common problem than you might think. The UK door market was valued at around £1.95 billion in 2023, with a huge chunk of that involving renovations where sticking doors are a top complaint. This is largely thanks to our seasonal humidity, which creates a constant demand for simple door maintenance know-how.
You don’t need a professional workshop to tackle a sticking door. In fact, most common fixes only require a few key items you probably already have lying around. The goal is to be prepared with a small, effective toolkit, not to go on a shopping spree.
For the majority of jobs, a good set of screwdrivers is your starting point. You’ll also find a hammer and some medium-grit sandpaper invaluable for making minor tweaks. A simple block of wood is surprisingly useful, too—it protects the door's surface when you need to gently tap things into place.
Beyond the absolute basics, a few other items can make a world of difference:
The infographic below gives you a quick visual of how these tools come into play when solving common door problems.
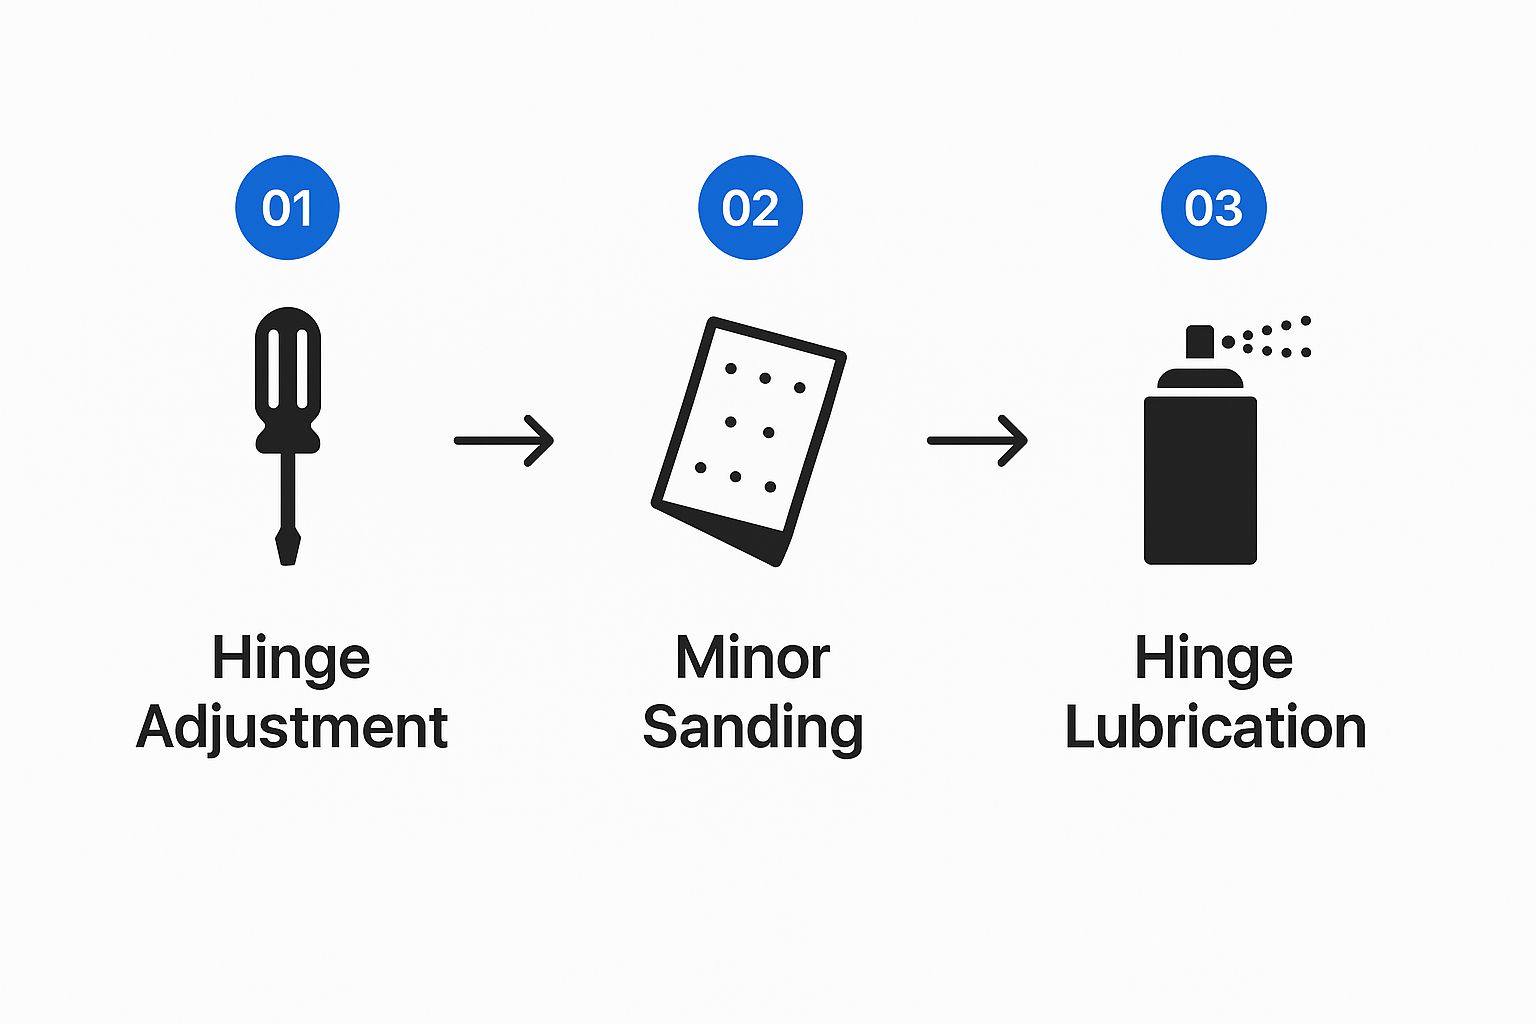
As you can see, fixing a sticking door usually follows a logical progression. You start with the simple mechanical adjustments before moving on to sanding or lubrication. If you're looking to build up your collection from scratch, a basic set like this Stanley Essential Toolkit covers all the essentials for door repairs and plenty of other DIY projects around the home.

More often than not, the problem isn't with the door itself, but with the hardware that's meant to be holding it up. Over time, that constant swinging motion can work hinge screws loose. It's the number one reason I see for a door suddenly sagging and catching on the frame.
Before you even think about reaching for a plane or sander, just grab a screwdriver. Open the door wide and methodically check every single screw on all the hinges—both on the door side and the frame side. You'll often find one or two have backed out slightly. Just tightening them up firmly can be all it takes to pull the door back into its proper position.
What if the screws just spin without biting down? This means the wood holes are stripped. An old carpenter's trick is to pop a couple of wooden matchsticks (with the heads snapped off) or a wooden golf tee into the hole before driving the screw back in. This gives the threads some fresh wood to grip.
Sometimes, just tightening the existing screws isn't quite enough, especially with heavier doors where the top hinge takes all the strain. When this happens, a slightly longer screw can work wonders.
Swap out one of the screws on the top hinge—specifically, one on the frame side—with a longer 75mm (3-inch) screw. This new screw will bypass the softer door casing and bite firmly into the solid timber behind it. As you tighten it, you'll feel it physically pull the whole hinge and the top corner of the door upwards and inwards, correcting the sag.
Pro Tip: Don't go overboard tightening the long screw. Drive it in just enough to close the gap at the top of the door. If you overdo it, you can pull the door too far and cause it to bind on the hinge side instead.
For doors that need a more delicate touch, a technique called 'packing' is incredibly effective. It's all about placing a small shim behind one of the hinges to subtly shift the door's position.
Here's a common scenario I see all the time:
This is a fantastic, precise way to fix a sticking door caused by minor misalignment, and it means you don't have to reach for the sander. Getting the hang of these adjustments is a great skill to have. If you want to understand the hardware better, it's worth learning more about the different types of hinges and how they function.
Here in the UK, our damp, humid climate is the usual suspect when a perfectly good door suddenly decides to stick. Wooden doors are a bit like sponges; they absorb moisture from the air, causing the wood fibres to expand. This swelling can be just enough to make the door jam tightly in its frame, a problem that often pops up during the wetter seasons.
Luckily, tackling this is usually a straightforward DIY job. The first thing you need to do is pinpoint exactly where the door is catching. There’s an old trick for this that works a treat: just slide a sheet of paper between the door and the frame. As you move it around the edges, you'll feel it drag or stop where the door is binding—that’s your target area.
Once you know where the high spots are, you can start removing a tiny amount of wood. For very minor sticking, a piece of medium-grit sandpaper wrapped around a block of wood is often all you need. Using a block gives you a flat, firm surface to work with and helps you sand evenly.
If the door is binding more seriously, you might need to reach for a hand plane. The secret to using a plane without taking off too much is to set the blade for a very shallow cut. You want to shave off slivers, not chunks.
Key Takeaway: Always aim to remove less wood than you think is necessary. Shave off a wafer-thin layer, hang the door back on its hinges, and test the swing. It's far easier to take a little more off than it is to put wood back on.
After sanding or planing, the most crucial step is to seal the exposed, bare wood. A couple of coats of paint, primer, or varnish will create a protective barrier against moisture. This stops the wood from swelling up again the next time it rains, making your repair a lasting one. Properly sealing the door can also improve its insulation, and for extra protection, consider adding a good quality Schlegel Aquamac 21 draught excluder to really keep the elements out.
The need for weather-resistant solutions is a huge driver in the home improvement market. It’s no surprise that the UK garage door market is the largest in Europe; our variable climate causes such frequent expansion and contraction in all sorts of doors. This constant movement really highlights why it’s so useful to know how to fix these common issues yourself. For a bit more context, understanding how weather affects door functionality offers some great insights for different types of doors.
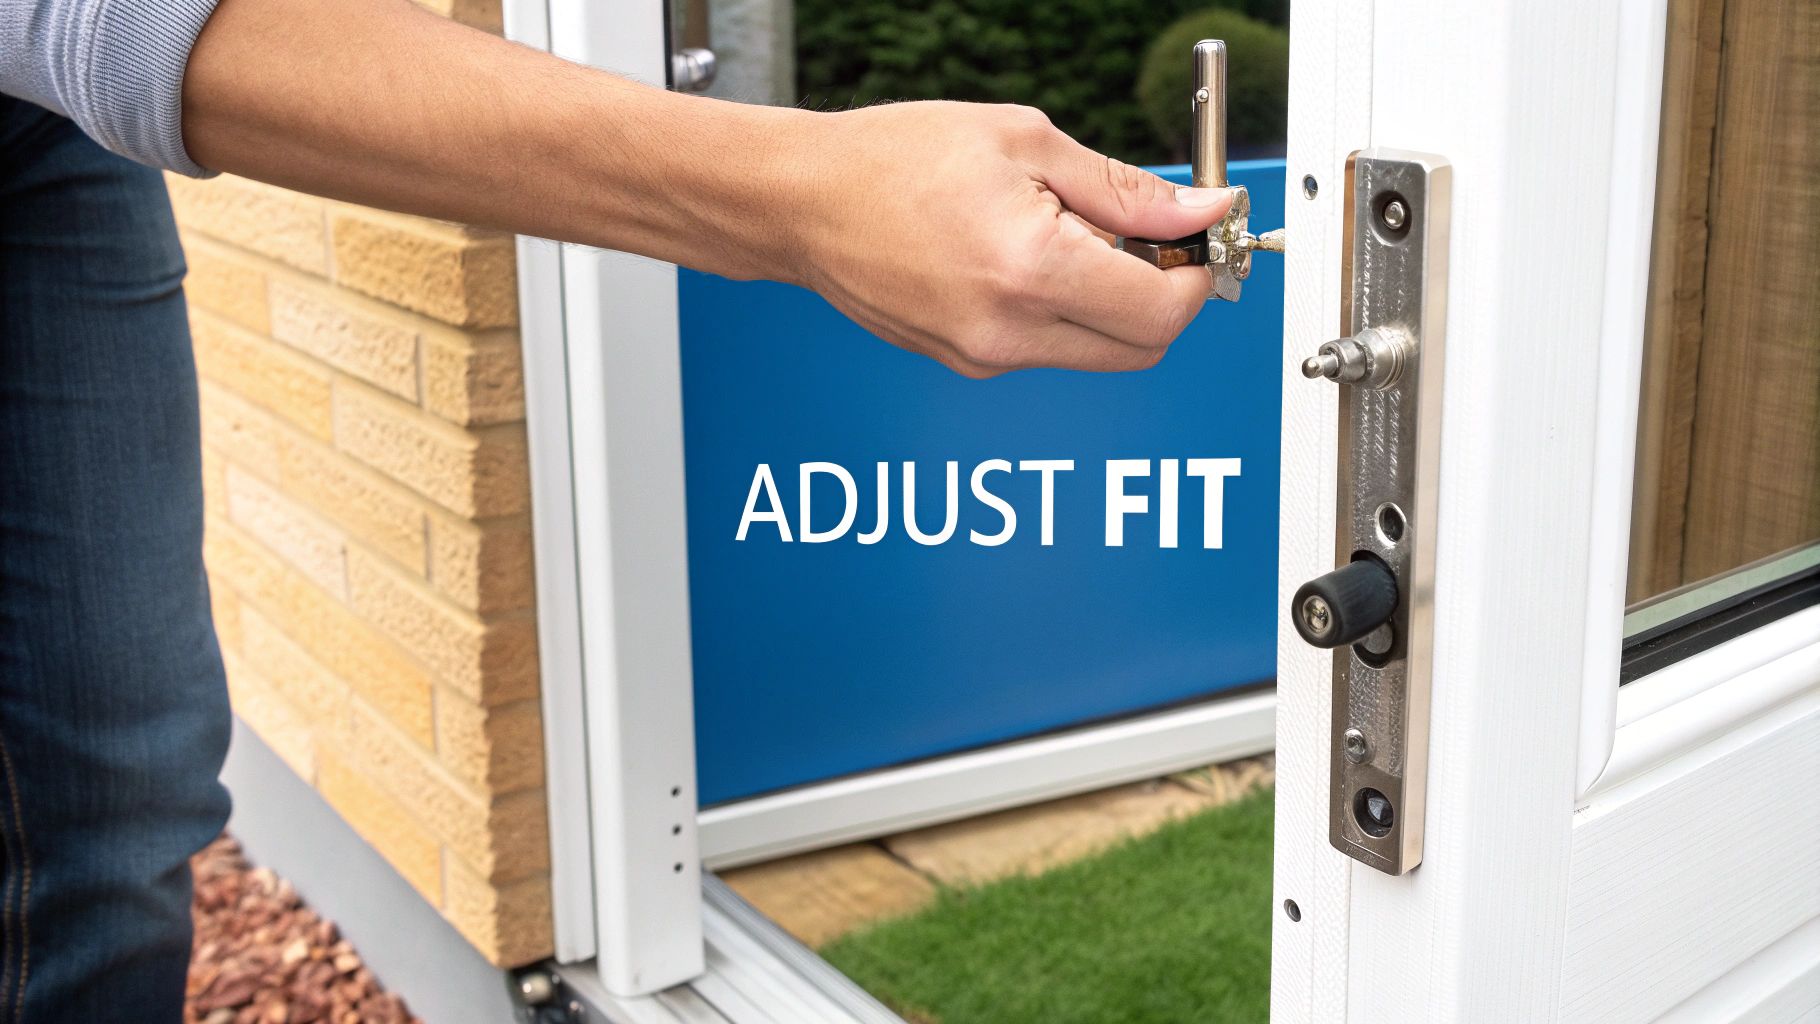
If you've got a modern composite or uPVC door that’s started to stick, your first instinct might be to reach for the sandpaper. Don't do it. Unlike timber doors, you can’t just plane or sand down these materials – you’ll end up damaging the surface and ruining its weather-resistant seal.
The good news is, the fix is usually much simpler. Sticking issues with these doors are almost always down to alignment, which can be corrected by adjusting their specialised hinges. Often, all you'll need is an Allen key and a bit of patience. With a few careful turns, you can fine-tune your door's fit, sorting out the sticking and making sure it has a perfect, energy-efficient seal against the frame.
This is a skill worth having, especially as modern materials have taken over UK homes. Composite doors now make up 54% of the market as of 2023. While they’re built to last, even these sturdy doors can shift with temperature changes, and with over 758,000 sold each year, knowing your way around a hinge is essential. You can find more UK door industry trends on sheerwaterglass.co.uk.
Most uPVC and composite doors are fitted with either 'flag' or 'butt' hinges, which have adjustment screws built right in. The exact layout can vary a bit from brand to brand, but they generally offer three ways to move the door.
Before you start, pop off the plastic caps covering the hinges. You'll likely see three screws, each controlling a different axis of movement. The trick is to make small, quarter-turn adjustments and then test the door. Slow and steady wins the race here.
Here’s what each screw typically controls:
We get a lot of the same questions from homeowners wrestling with this classic DIY headache. To help you sort out those nagging issues and finally fix that sticking door, here are some quick answers.
Ah, the classic British summer humidity problem. This is almost always caused by the wood in your door swelling up. The best way to tackle it is to find the exact spot where the door is binding and carefully sand it down. Go slowly here – remove a tiny amount of wood at a time and keep testing the fit.
The most important part? You absolutely have to seal the sanded area with paint or varnish afterwards. If you don't, it'll just soak up moisture again and you'll be back to square one next year.
Always, always work on the door, never the frame. Adjusting the door is much easier, and it's completely reversible if you get a bit carried away and take off too much. Messing with the frame is a structural change that can create permanent gaps and lead to much bigger headaches down the line.
If you've tightened the original screws and the door still sags, chances are the wood they're screwed into has become stripped. The next logical step is to swap out one of the screws in the top hinge (on the frame side) for a much longer one, around 75mm (3 inches).
This longer screw is designed to bypass the stripped wood of the frame and bite into the solid timber behind it. This pulls the whole hinge – and the top of the door – upwards and back into its proper place.
Lots of people grab the WD-40, but it’s actually a degreaser and won't provide a lasting solution. For a proper fix that keeps working, you'll want to use a silicone spray or white lithium grease. These products don't attract as much dust and will keep your hinges swinging smoothly for a lot longer.
At Neasden Hardware, we provide everything from the right screws and hinges to the perfect sealant for the job. Explore our full range of ironmongery and decorating supplies to get your project started.