Order Online
- Straight to your door!
Straight to your door


Swapping out a door lock is one of those satisfying DIY jobs that most people can handle. If you're just replacing an old lock with a similar new one, you could be done in less than an hour with tools you probably already have lying around the house.
Your front door lock is the first line of defence for your home, so getting it right is non-negotiable. Learning how to install door locks properly is a brilliant skill to have, whether you're upgrading a tired, sticking lock or fitting one from scratch on a new door. This guide is here to give you the confidence to tackle the job yourself.
Doing it yourself puts you in complete control of your home’s security, so you know the job is done to your standards. It also means you can avoid the cost of hiring a professional, which can easily set you back £100-£200 for a simple installation.
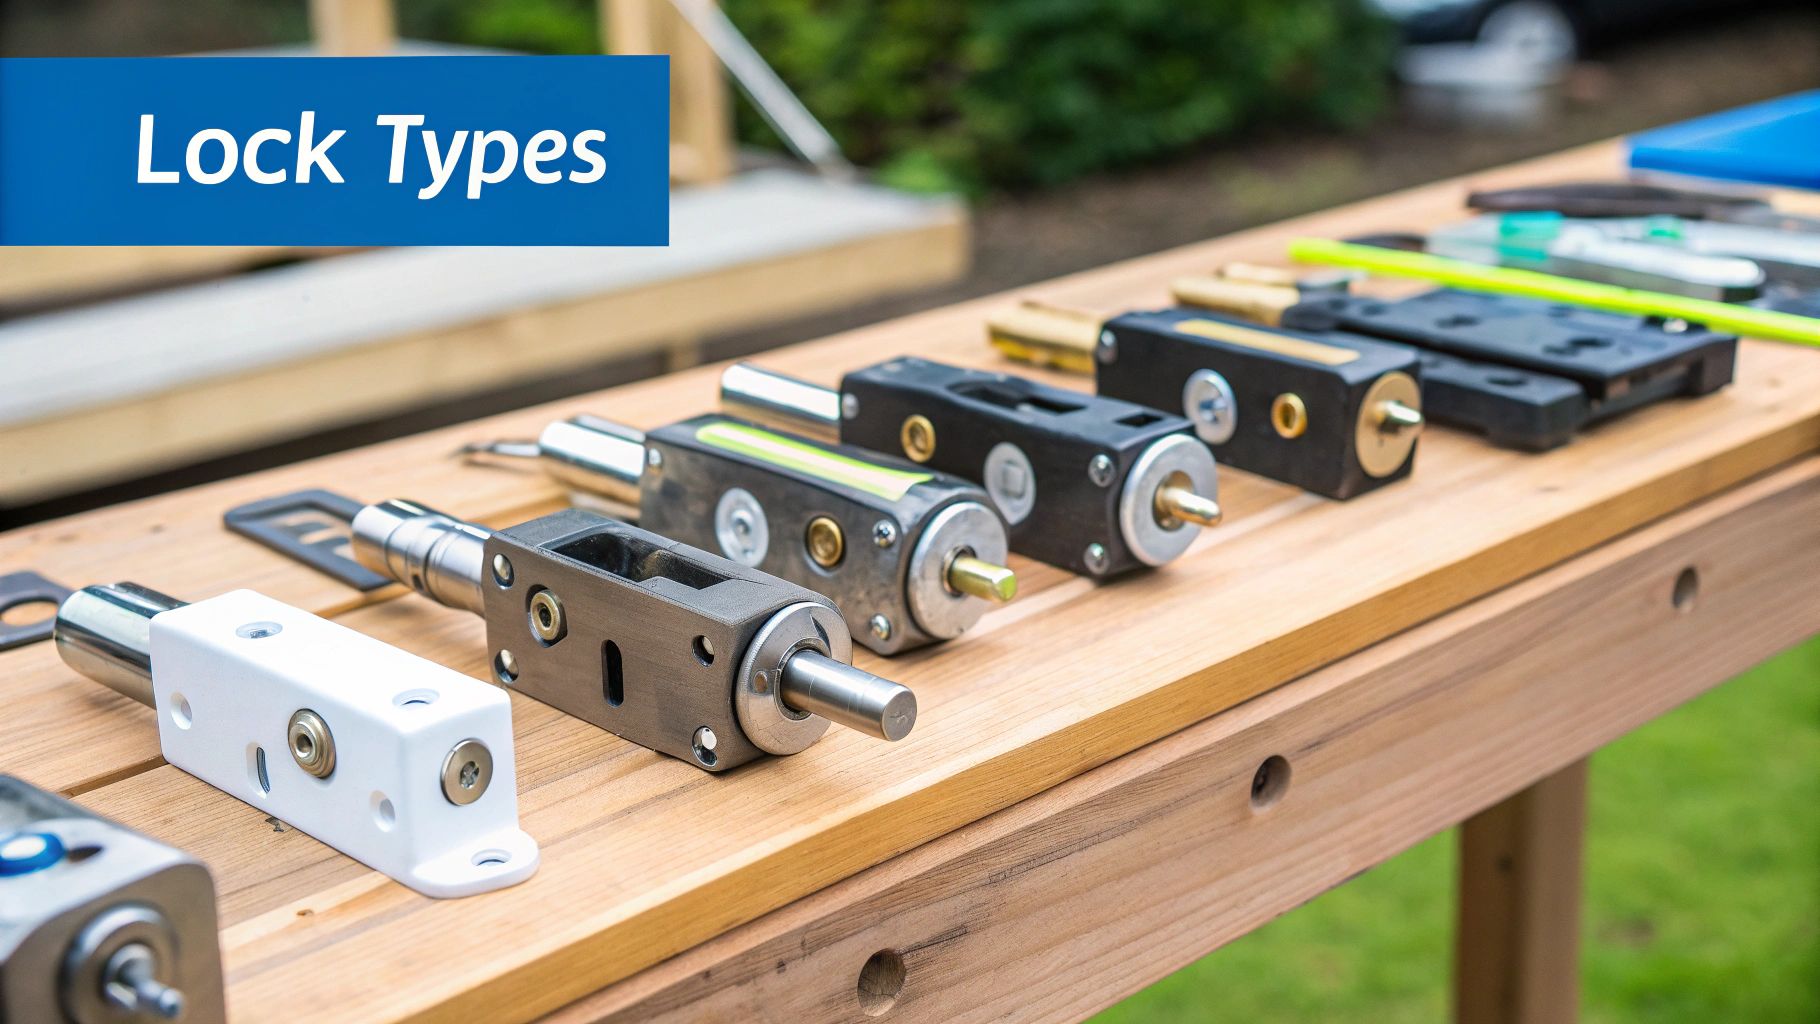
We’ll walk you through the whole process, from the tools you'll need to the different types of locks you'll find in the UK, like mortice and sashlocks. Getting your head around these differences is the first step to choosing the right product for your door.
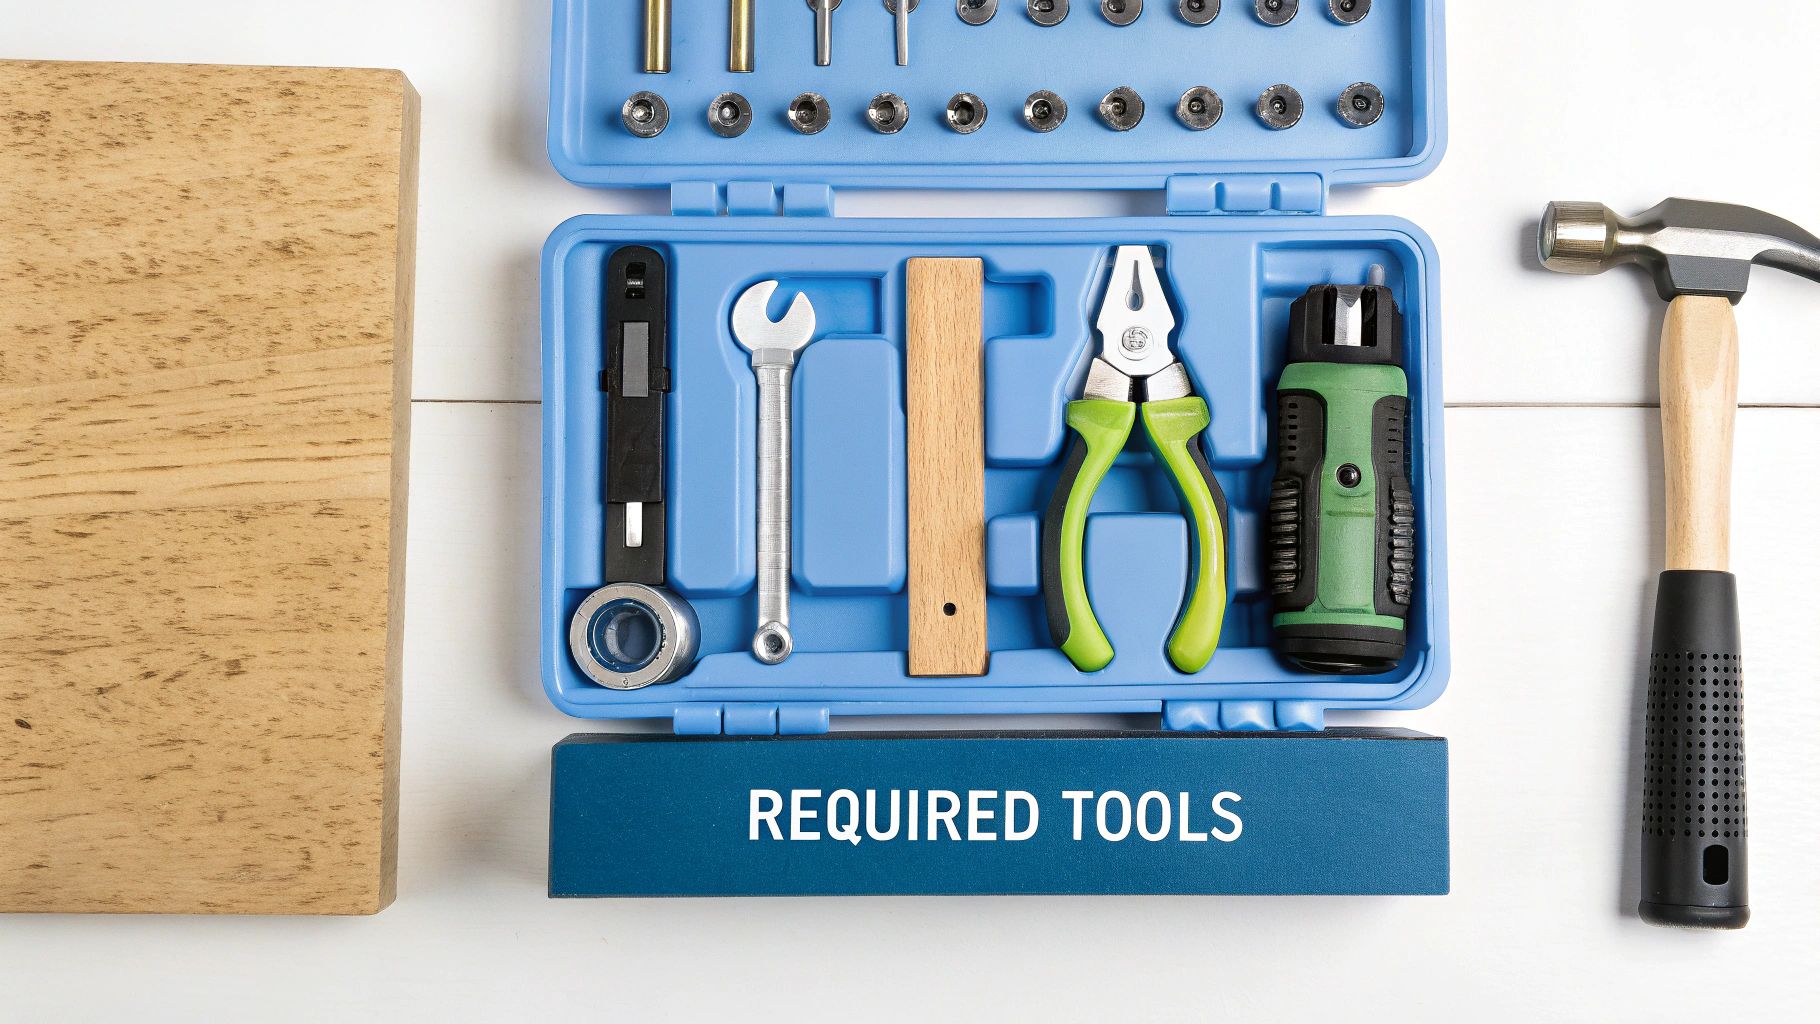
Before you start unscrewing anything, it’s best to have all your tools laid out and ready to go. There’s nothing worse than having your door in pieces only to realise you’re missing a specific drill bit. Having the right equipment makes the job smoother, safer, and ensures a professional-looking finish.
Here’s a quick rundown of the essential tools you’ll need for most door lock installations in the UK.
| Tool | Primary Use | Pro Tip |
|---|---|---|
| Tape Measure | Measuring backset, door thickness, and hole placement. | Double-check your measurements before you drill. "Measure twice, cut once" definitely applies here. |
| Drill & Bits | Creating holes for the lock cylinder and fixing screws. | Use a spade bit or hole saw for the main lock body and smaller twist bits for screw holes. |
| Screwdriver Set | Tightening the lock's fixing screws. | A set with both Philips and flat-head options is a must. An electric screwdriver can save your wrist! |
| Chisel & Mallet | Carving out the recess for the lock faceplate and strike plate. | Keep your chisel sharp. A sharp chisel cuts cleanly and is much safer to use than a dull one. |
| Pencil | Marking out measurements and drilling points. | A sharp pencil is essential for accurate marking. Keep a sharpener handy. |
| Safety Goggles | Protecting your eyes from wood shavings and dust. | Don't skip these. It only takes one stray splinter to cause a serious eye injury. |
Having these tools on hand will set you up for success and help you avoid any last-minute trips to the hardware shop.
The world of door locks isn’t standing still. While the classic mechanical lock is still the bedrock of home security, we’re seeing a big shift towards integrating them with smart technology. This blend offers modern convenience without cutting corners on safety.
The scale of this industry is huge. In the UK, the door lock market is a vital part of the global mechanical locks sector, which was valued at over £6 billion and is still growing. This isn't just about new houses needing new locks; innovation is a massive driver. For example, nearly 38% of new lock designs are now built to work with smart home systems, a clear sign that homeowners want advanced features alongside proven mechanical strength. You can dive deeper into the mechanical locks market data to see these trends for yourself.
A correctly fitted lock doesn't just protect your belongings; it gives you invaluable peace of mind. Taking the time to do it right is a real investment in your family's safety.
Our goal is to give you a complete walkthrough, helping you sidestep common mistakes and achieve a finish you can be proud of. Here’s what we’ll get into:
By the end of this guide, you’ll have everything you need to boost your home’s security with a perfectly installed new lock.
Before you even think about picking up a drill, let's talk about the most important step in fitting a new door lock: the preparation. Honestly, a few minutes spent measuring and marking now will save you a world of frustration later. It’s the difference between a lock that works smoothly from day one and one that just never feels right.
If you’re replacing an old lock, the first job is to get it out carefully. Start by unscrewing the handles, then the faceplate on the edge of the door, and finally, slide the main lock body out. Take your time here—it’s easy to scratch the paintwork or gouge the wood if you rush.
Once the old hardware is out, give the area a good clean. Get rid of any dust, old wood shavings, or built-up grime. This gives your new lock a clean, flush surface to sit on, which makes a surprising difference to how well it operates.
Accuracy is everything when you're fitting a lock. Get this bit wrong, and you'll end up back at the shop with a lock that doesn't fit. There are two measurements you absolutely have to get right: the backset and the door thickness.
Jot these numbers down. Having them with you when you buy your new lock ensures it’s actually designed for your door, preventing a lot of potential headaches.
A lock that doesn't fit correctly isn't just an inconvenience; it's a security risk. Taking precise measurements ensures the bolt aligns perfectly with the frame, providing maximum protection.
With your shiny new lock in hand, it’s time to mark its position. Most new locks come with a paper template—this little piece of paper is your best friend for getting the placement spot-on.
Line the template up on the door, making sure it aligns with your backset measurement. Use a sharp pencil to mark the keyhole and screw positions clearly. If you’re installing a mortice lock, you’ll also need to mark out the slot for the lock body on the door’s edge. Other lock types, like deadlocks, follow a similar process but might have different marking points. It's good to understand these little differences, and you can learn more about what makes deadlocks a solid choice for security in our detailed guide.
This whole prep stage, from measuring to marking, really does set the foundation for the entire job. I've seen it time and again—rushing this part almost always leads to problems like a misaligned latch or wobbly handles down the line.
The mortice lock is a classic feature of British home security, and for good reason. It's strong, reliable, and because it's embedded within the door itself, it offers fantastic protection. Fitting one correctly is a really satisfying skill to have, and it will seriously boost your home's security. It definitely requires more precision than a simple cylinder lock, but with the right approach, it's a very manageable job.
The first big task is carving out the pocket for the lock body, which we call the mortice. This is the cavity inside the door where the lock will sit snugly. Getting this part right is absolutely fundamental. If the mortice is too tight, the lock mechanism can bind and fail. If it’s too loose, the lock's stability and security are compromised.
For this job, your best friends will be a drill with a sharp spade bit and a good set of chisels. The goal is to remove the wood cleanly without splitting the door. Start by marking the depth and outline of the lock body on the door's edge. You can use the lock itself or the template that came with it as your guide.
Drill a series of overlapping holes inside your marked outline. Remember to go slowly and keep your drill perfectly straight. These holes will clear out most of the wood, which makes the next step much easier. Once that's done, grab a sharp chisel and a mallet to carefully clear out the remaining wood, creating a clean, rectangular pocket for the lock.
Pro Tip: Wrap a small piece of masking tape around your drill bit to mark the correct depth. This is a simple but effective trick that stops you from accidentally drilling too deep and possibly right through to the other side of the door.
Next up, you need to create a recess for the faceplate—that’s the metal plate that sits on the edge of the door. The aim here is for this plate to sit perfectly flush with the wood for a neat, professional finish.
Hold the faceplate in position over the mortice pocket and trace around its outline with a sharp pencil. Then, using your chisel, carefully pare away the wood inside that outline to a depth that matches the thickness of the faceplate. This step requires patience; take your time and remove thin layers for the best result. This kind of precision is a core skill in joinery and something you'll find in many other projects. You can read more about how butt hinges are essential in quality projects to see how it all connects.
With all the prep work done, it's time to slide the lock body into the mortice. It should be a snug fit, but you shouldn't have to force it. If it’s a bit too tight, take it out and carefully chisel away a tiny bit more material. Once it slides in smoothly, you can secure it with the screws provided.
This infographic breaks down the crucial prep steps you need to get right for perfect alignment before you even start drilling.
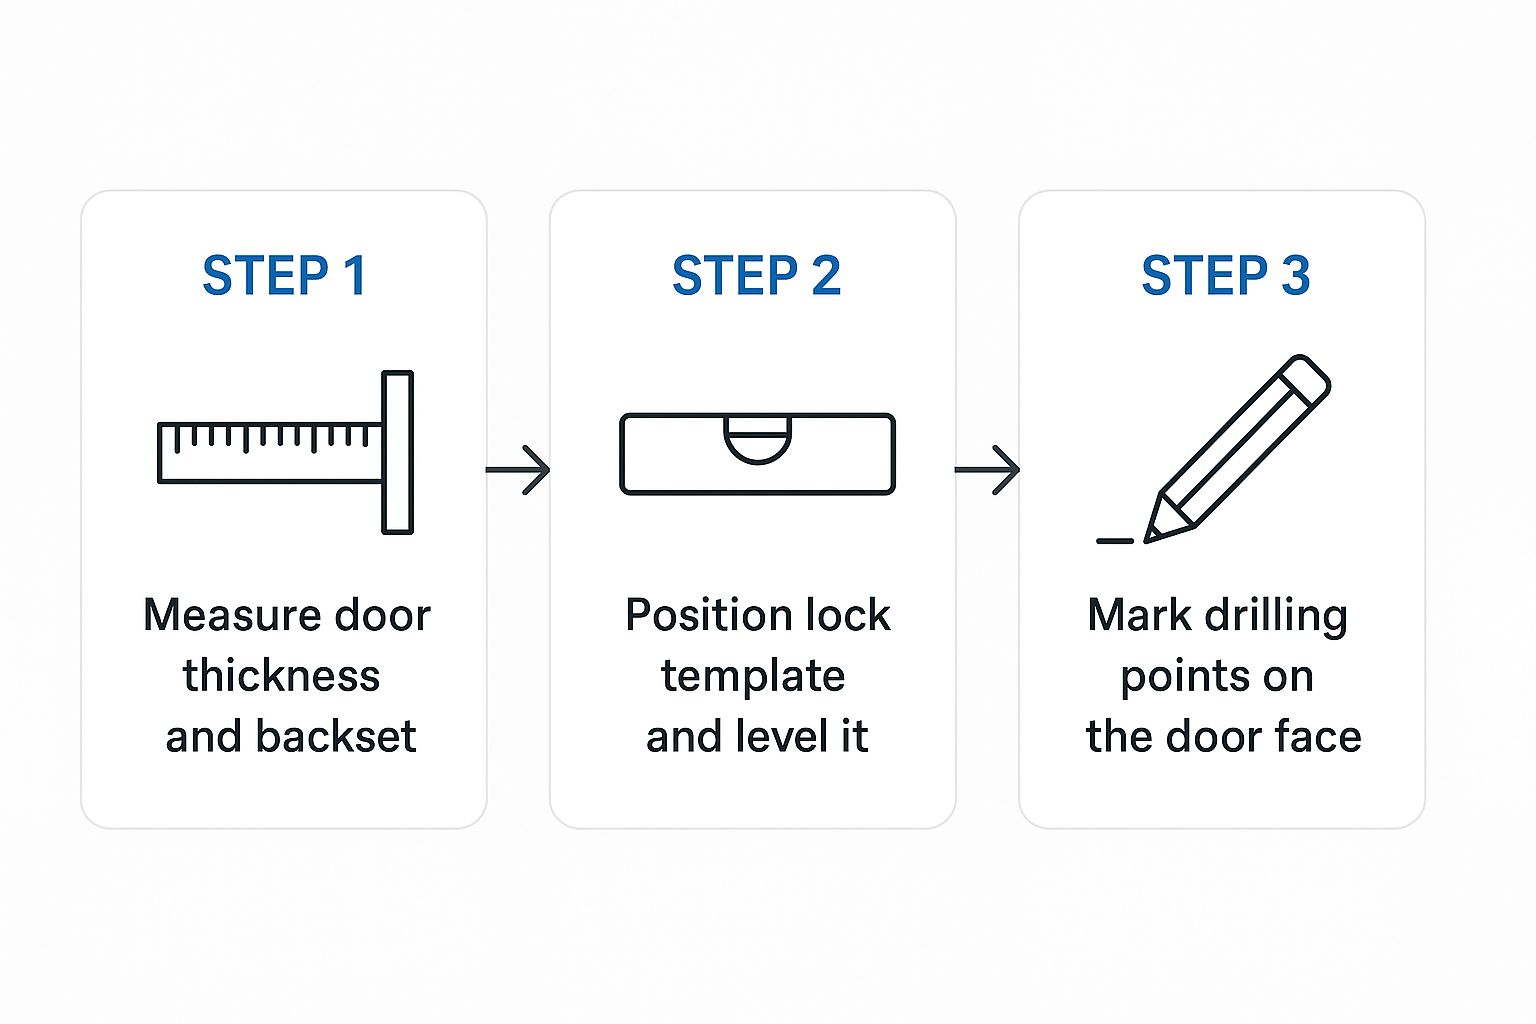
As the visual shows, accurate measuring, levelling, and marking are completely non-negotiable. They form the foundation for a lock installation that works perfectly and looks great.
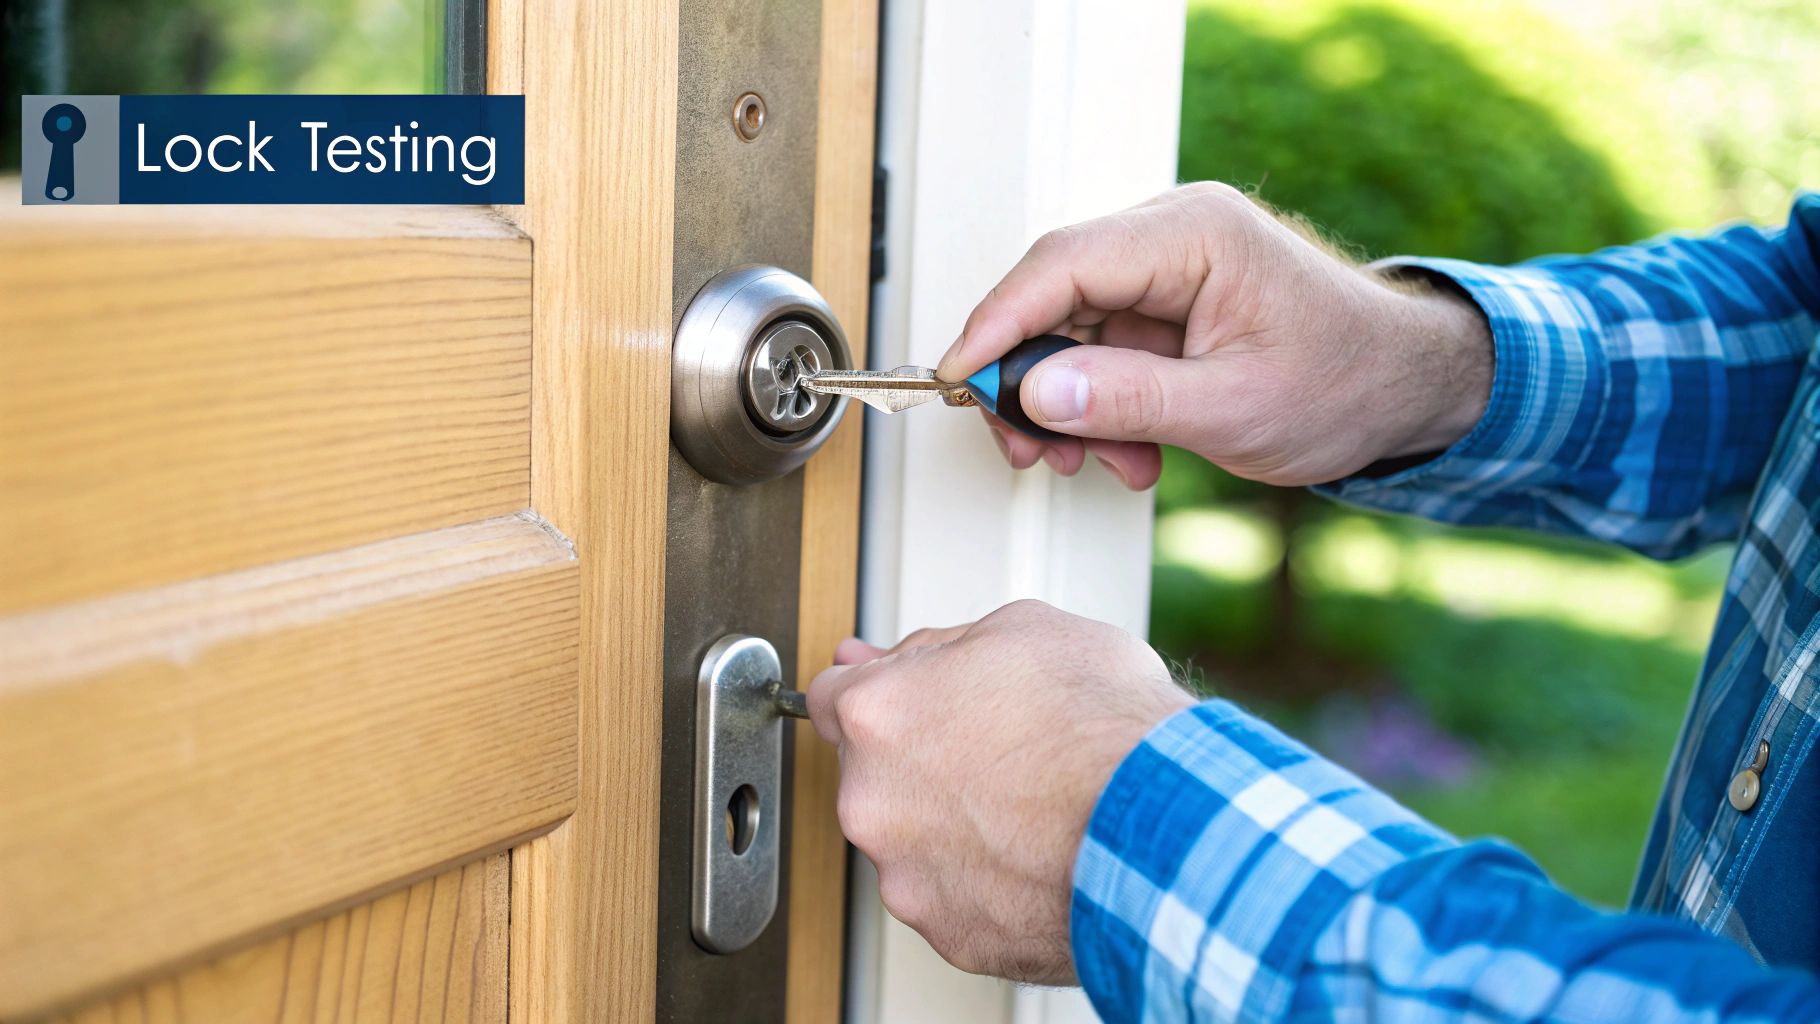
The final stage is fitting the strike plate to the door frame. Close the door and mark exactly where the lock bolt touches the frame. This spot is where you'll cut a recess for the bolt and fit the strike plate. Start by chiselling out the recess for the plate itself, making sure it sits flush. Then, drill a deeper hole for the bolt to slide into. Screw the strike plate into place, and give the lock a test. The bolt should slide smoothly into the frame without any resistance at all.
Moving into the world of smart locks is an exciting step, and you’ll find that installing one is a satisfying blend of traditional fitting skills and modern tech setup. Unlike a purely mechanical lock, there’s a physical and a digital side to the job. Don't let that put you off, though—many are designed to be surprisingly straightforward for a DIY project.
The very first thing you need to do, before you even think about buying a lock, is check for compatibility. Make sure the model you have your eye on will actually work with your door. Most smart locks are designed to replace an existing Euro cylinder or a standard night latch, so they slot right into common UK door types without needing any major surgery. Just as important, check your home's Wi-Fi signal at the door. A weak or unstable connection will lead to endless frustration down the line.
Once you've got a compatible lock, the physical part of the installation often feels quite familiar. In most cases, it’s a simple job of removing your old cylinder or night latch and fitting the new smart lock in its place. The process is usually clean, with no need for new drilling or chiselling, especially if you've picked a model designed for retrofitting.
For a lot of popular smart locks, the job boils down to just a few steps:
This simplicity is a huge plus, making it accessible for anyone comfortable with a few basic tools. While many smart locks are straightforward, some advanced models might require more traditional skills, like fitting a new deadlock from scratch. For those jobs, knowing your way around components like a ZUKDEAP Euro Profile Deadlock is a real advantage.
With the lock physically in place, the next part of the job happens on your smartphone. This is where you bring your new hardware to life by connecting it to your digital world. Every smart lock has its own companion app, which becomes the control centre for all its features.
You’ll need to download the app and follow the on-screen instructions. This usually involves pairing the lock with your phone via Bluetooth or connecting it directly to your home's Wi-Fi network. The whole process is guided and typically only takes a few minutes.
A key benefit of this digital setup is the ability to grant access remotely. You can create temporary digital "keys" for visitors or tradespeople, set access schedules for a dog walker, and receive notifications every time your door is locked or unlocked, offering incredible peace of mind.
The growth in this area has been massive. Smart lock installations are gathering pace, with 39% of UK households already using at least one smart home device—a figure set to climb to over half by 2027. This trend is fuelling a market expected to be worth £248 million by 2030, showing just how much features like remote monitoring are becoming a standard expectation for homeowners. You can read more about the momentum of multi-point door locks and their integration with smart technology.
As a final step, you can link the lock with your wider smart home ecosystem. Connecting it to voice assistants like Amazon Alexa or Google Assistant lets you lock your door with a simple voice command, tying your home's security seamlessly into your daily routine. It’s this final piece of the puzzle that transforms a simple piece of hardware into a fully integrated part of your modern, connected home.
Even with the best planning, a DIY project can hit a bump in the road. When you're learning how to install door locks, a few common problems can pop up. But don't worry—they're almost always straightforward to fix. This is your practical guide to getting past those little hitches without any fuss.
Two of the most frequent issues I see are a misaligned latch that just won't click shut and a key that feels stiff or refuses to turn smoothly. Both problems are a security risk, and frankly, they're just plain annoying in day-to-day life.
With a little detective work and some minor tweaks, you can get your new lock working like a dream. Let's break down the most common culprits and how to sort them out.
This one's a classic. You've installed the lock, you go to close the door, and the latch bolt just scrapes against the strike plate instead of sliding neatly into the hole. This not only stops the door from closing properly but also puts a lot of unnecessary strain on the lock mechanism.
Thankfully, the fix is usually a simple adjustment of the strike plate. Here’s how to handle it:
A stiff key is a clear warning sign that something is binding up inside. Whatever you do, don't force it. You could damage the internal mechanism or even snap the key clean off in the lock. The cause is often that the mortice pocket is just a fraction too tight for the lock body.
When the lock case is under pressure, it can stop the internal parts from moving as they should. To fix this, you'll need to take the lock out and carefully chisel away a tiny sliver of wood from inside the mortice where it feels tight. Pop the lock back in and test the key again before you screw it back in place. It's also worth checking for any sneaky wood shavings or debris that might have fallen into the lock during the installation.
A small puff of graphite powder is a fantastic lubricant for a stiff lock mechanism. Never use oil-based products like WD-40, as they attract dust and will eventually gum up the works.
Another common headache is a lock bolt that doesn’t throw all the way into the door frame. This seriously compromises the security of your lock because it isn't properly engaged. The culprit is almost always the hole (or 'keep') in the frame behind the strike plate.
The solution here is simple: the keep just isn't deep enough. Take the strike plate off and use your drill to deepen the hole in the door frame. Make sure it’s deep enough to take the entire length of the bolt when it's fully thrown. Screw the strike plate back on, and your lock should now secure your door perfectly.
Even with the best guide in hand, it’s natural for a few questions to pop up when you’re in the middle of a DIY project. We get it. Here are some of the most common queries we hear about fitting new door locks, with straightforward answers to help you get the job done right.
You’ll see BS 3621 stamped on a lot of locks, and for good reason. It’s a British Standard that certifies a lock as "thief-resistant." To earn that mark, the lock has been put through its paces and tested against common break-in methods like drilling and picking.
More importantly, many UK home insurance policies actually require external doors to be fitted with BS 3621-compliant locks. It's a non-negotiable for them. So, checking for this standard isn't just about beefing up your security—it’s crucial for making sure your insurance policy is valid.
Yes, sometimes you can, and when it works out, it makes the job incredibly simple. If you're swapping an old lock for the exact same model or one with identical dimensions, you can often reuse the existing drill holes without any trouble at all.
However, if your new lock has a different backset or the case is a different size, you'll need to get the drill out and make some new holes. To keep things looking tidy and professional, it's best to fill the old ones with a good wood filler, sand it down until it's smooth, and then touch it up with a bit of paint.
If you have more specific questions, you might find the answer in our complete frequently asked questions section.
It's not just traditional locks seeing an upgrade. Global trends show a massive surge in smart lock adoption. While detailed UK installation data is still emerging, markets like China saw sales jump from 2 million units in 2015 to over 18 million by 2023. This mirrors the growth we're seeing here in the UK, where the door market is set to climb from £2.41 billion in 2023 to £3.06 billion by 2029, driving demand for both classic and smart lock installations. You can read more about these global smart lock statistics.
Not necessarily. A lot of today's smart locks are designed with the DIYer in mind, especially the ones made to replace an existing Euro cylinder or a standard night latch. The physical fitting can be surprisingly straightforward with just a few basic tools.
The part where you might want to call in a professional is if your door needs significant adjustments to accommodate the new lock, or if you're not confident with the tech side of things. This includes getting the lock connected to your home Wi-Fi and configuring the app for secure access. If you're feeling a bit out of your depth, a locksmith will make sure it's fitted and set up perfectly.
For all your security and ironmongery needs—from robust mortice locks to the latest smart solutions—you can trust Neasden Hardware. With over thirty years of family-run experience, we provide expert advice and a huge range of high-quality products. Explore our collection and get free next-day delivery on orders over £100 at https://neasdenhardware.co.uk.