Order Online
- Straight to your door!
Straight to your door


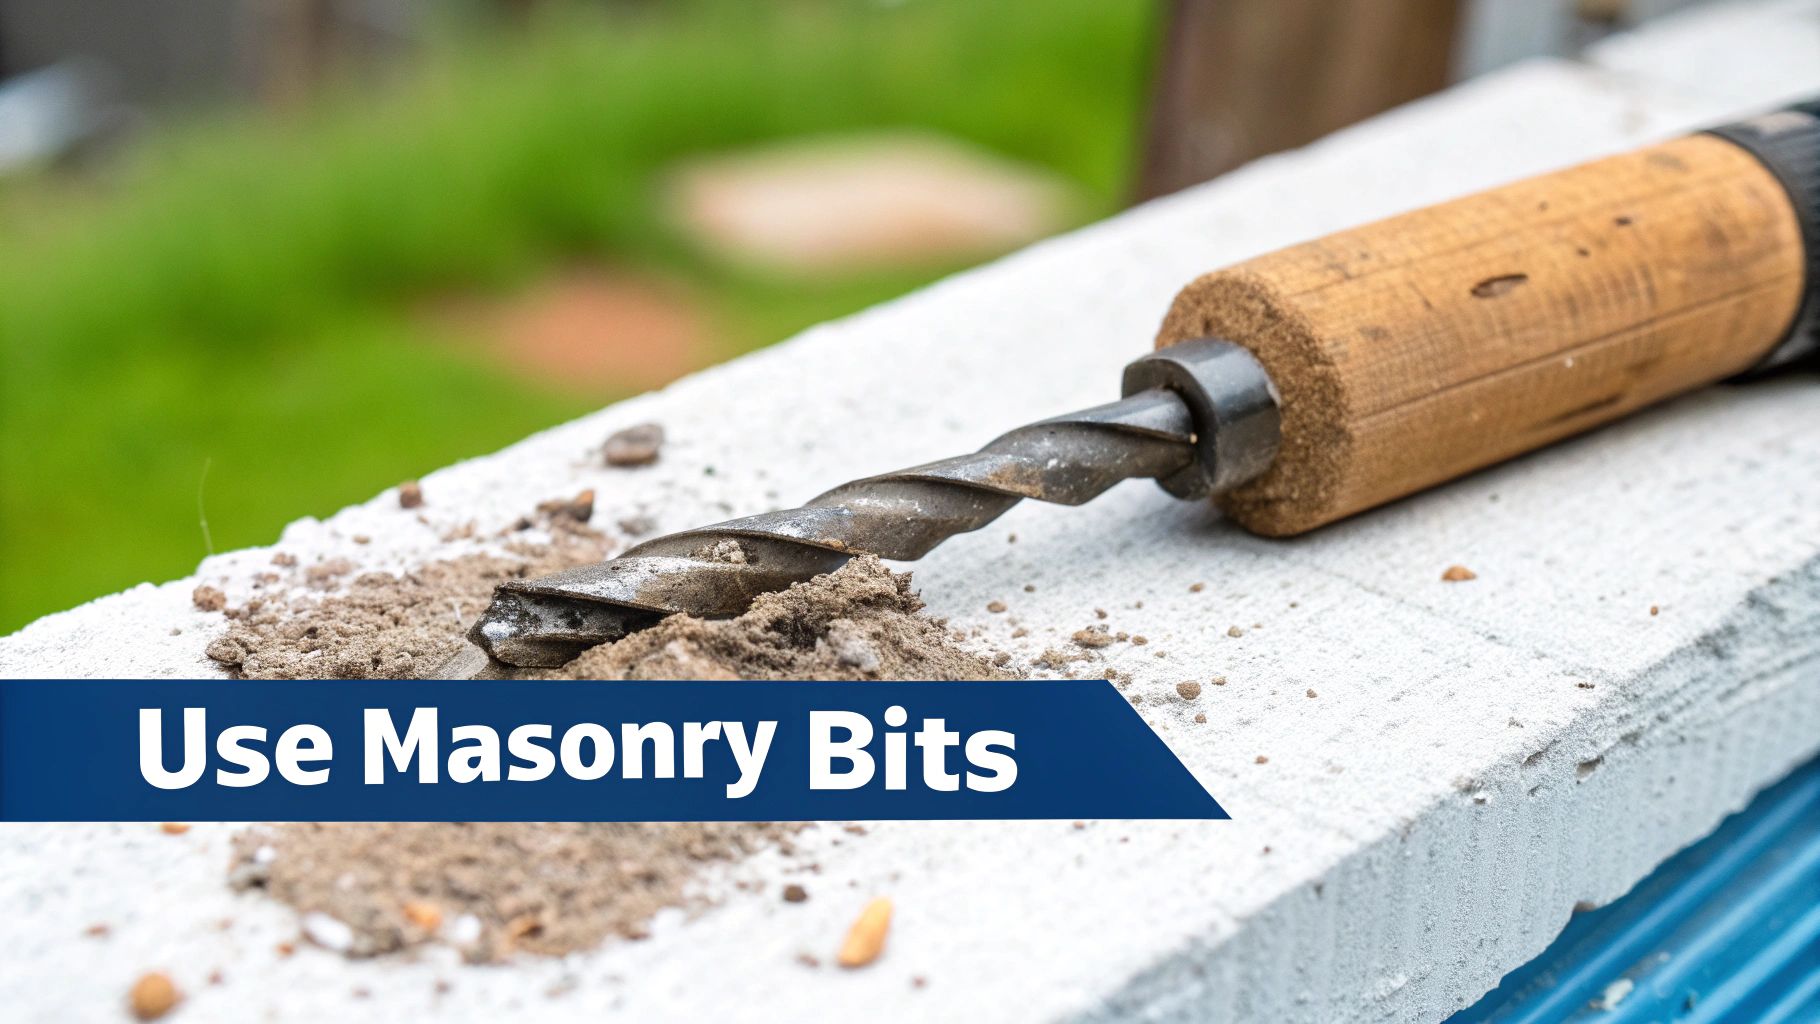
Ever tried drilling into concrete with a standard wood or metal bit? It’s a frustrating, pointless exercise. For a material this tough, you need a specialised masonry drill bit for concrete, built to pulverise and grind rather than cut. The secret is its ultra-hard tungsten carbide tip, designed to hammer its way through stone and cement.
Imagine trying to slice a granite worktop with a butter knife – that’s pretty much what happens when you use the wrong bit on concrete. Bits for wood or metal are designed with sharp cutting edges to shear away fibres or shave off curls of metal. Concrete, being a rough composite of sand, aggregate, and cement, is incredibly hard and abrasive.
Bring a standard bit to this fight, and its sharp edges will be obliterated in seconds. You’ll generate a lot of heat and smoke, but you won't make a dent in the wall. You'll just burn out the bit and could even damage your drill. This is why a purpose-built drill bit for concrete is non-negotiable for any masonry task.
Instead of cutting, a concrete bit works by pulverising. Its hardened tungsten carbide tip acts like a tiny, powerful chisel. Paired with a drill that has a hammer function, this tip repeatedly strikes the concrete, shattering it into fine dust. The deep spiral grooves on the bit, known as 'flutes', then carry this debris up and out of the hole.
A specialised masonry bit doesn’t cut; it pulverises. The tungsten carbide tip shatters the concrete, and the flutes clear the resulting dust. This fundamental difference is why it succeeds where other bits fail.
This hammer-and-clear method is the only effective way to get through such a dense, unforgiving material. The job gets even tougher with things like reinforced concrete, which has steel bars (rebar) hidden inside. Successfully drilling into reinforced concrete requires even tougher bits and a bit more technique to avoid wrecking your gear.
Before you buy a new bit, it’s worth thinking about the job ahead to make sure you get the right tool. Here are a few things to consider:
The demand for high-quality concrete drill bits has shot up in the UK, thanks to a boom in construction and home renovation projects. In fact, Europe makes up over 30% of the global market revenue, with the UK playing a huge part due to ongoing investment in infrastructure. By understanding these core factors, you can walk into your project confident you’ve got the right tool for the job.
What gives a specialised drill bit for concrete its incredible strength? It’s not just about tough materials; the real secret is in its purpose-built design. To really get a feel for its power, we can break it down into three key parts: the tip, the flutes, and the shank.
Each part has a distinct job, and they all work together like a well-drilled team to pulverise hard materials. Understanding how these parts function will help you appreciate why a quality bit makes such a difference on the job.
Think of the tip as the spearhead of the whole operation. It’s the part that makes first contact with the concrete, and it does all the heavy lifting. On a masonry drill bit, this isn't just sharpened steel; it’s a small, brazed-on insert of tungsten carbide.
Tungsten carbide is an exceptionally hard, heat-resistant compound, perfect for the brutal, high-impact work of shattering aggregate and cement. It doesn't cut the material like a wood bit. Instead, it pulverises it on impact, chipping away tiny fragments with each rotation and hammer blow from the drill.
Once the tip has done its job pulverising the concrete, all that dust and debris needs to go somewhere. This is where the flutes come in. These are the deep spiral grooves running up the body of the drill bit, and their role is far more important than just looks.
The flutes act as a 'debris motorway', rapidly channelling dust and rubble out of the hole you're drilling. Efficient debris removal is essential to prevent the bit from overheating, binding, or getting stuck.
A clogged hole ramps up friction and heat, which can quickly ruin the bit and even damage your drill. Most standard bits feature a two-flute design, which works well for general tasks. However, more advanced bits often have a four-flute (or quad-helix) design. This provides better stability inside the hole and clears debris even more efficiently, leading to faster, cleaner drilling—especially on deeper holes.
Finally, we have the shank. This is the smooth or slotted end of the bit that fits into your drill's chuck. Its primary job is to transfer the immense rotational and hammering force from the drill to the tip without slipping.
The type of shank determines which drill the bit is compatible with. A simple round shank is for a standard drill chuck, while a hexagonal shank offers a much better grip in a combi drill. Heavy-duty SDS bits have a special slotted shank that locks securely into an SDS drill, allowing for maximum power transfer. This connection is vital; a poor fit means wasted energy and poor performance, which is why matching the shank to your drill is a crucial first step.
Picking the correct drill bit for concrete is more than just a small detail; it's what separates a smooth, professional job from a frustrating, expensive mess. With a few different types out there, each built for a specific job and drill, getting the match right is absolutely essential. This breakdown will walk you through the main options so you can choose with confidence.
Whether you're hanging a simple picture frame or anchoring a heavy-duty cabinet, your first step is understanding the basic kinds of masonry bits. We'll look at the three most common types you'll find on any UK job site or in a DIYer's toolbox: standard masonry bits, percussion bits, and the heavy-hitting SDS bits that the pros swear by.
For light-duty jobs in softer materials like brick, mortar, or breeze blocks, a standard masonry bit is often all you'll need. These are the most common and affordable options, and you'll easily spot them by their spear-like tungsten carbide tip.
They're designed to be used in a standard combi drill without the hammer function switched on. While they're great for simple tasks like drilling holes for wall plugs, they just aren't built for dense concrete or hours of use. Trying to force one through hard materials will only lead to an overheated, blunt bit.
The moment you flick your combi drill over to its hammer setting, you need a bit that can take the punishment. A percussion bit is the answer. It looks a lot like a standard masonry bit but is engineered with a tougher carbide tip and a stronger body to handle the rapid chiselling action.
These are the real workhorses for most DIY projects that involve drilling into masonry. They fly through house bricks and concrete blocks, making them perfect for putting up shelves, installing curtain rails, or mounting outdoor lights. They do have their limits, though, and will struggle against very dense or reinforced concrete.
Key Takeaway: For a standard combi drill, use a percussion bit with the hammer action on for drilling into brick and block. For seriously hard concrete, you'll need to step up to a more powerful system.
The infographic below shows the basic anatomy of a concrete drill bit, from the tip that does the pulverising to the shank that locks into your drill.
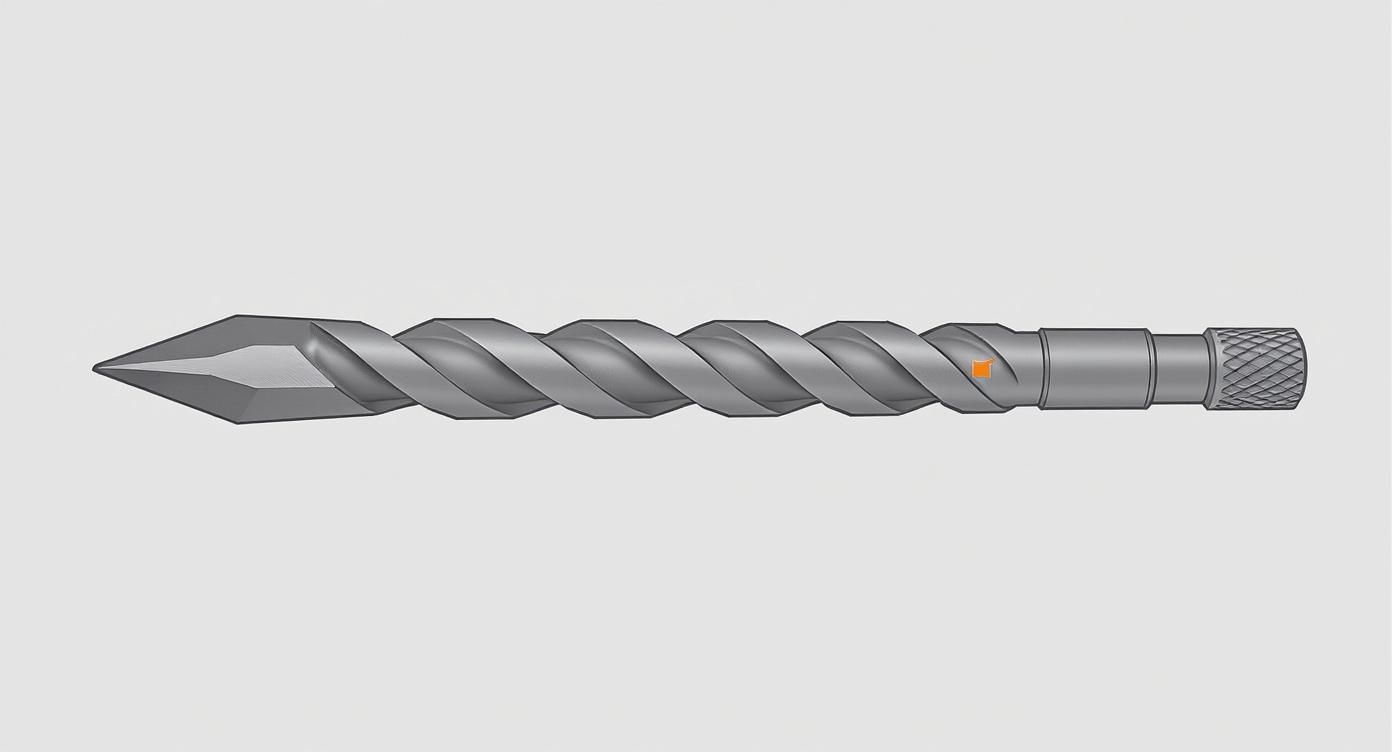
This visual helps you see how each part—the hardened tip, the debris-clearing flutes, and the power-transferring shank—works in harmony to chew through tough materials.
To make it even clearer, here's a quick reference table to help you decide.
| Bit Type | Compatible Drill | Best For | Common UK Projects |
|---|---|---|---|
| Standard Masonry | Combi Drill (rotary only) | Soft brick, mortar, breeze blocks | Hanging pictures, fitting small wall plugs |
| Percussion Bit | Combi Drill (hammer mode) | House bricks, concrete blocks, medium-density concrete | Mounting shelves, curtain rails, external lights |
| SDS Bit | SDS Rotary Hammer Drill | Dense concrete, reinforced concrete, natural stone | Anchoring heavy fixtures, structural work, demolition |
This table should give you a good starting point. For most household tasks, a percussion bit will do the trick, but for anything more demanding, you'll need to look at the next level up.
When you're up against dense, poured concrete or reinforced slabs, it's time to bring in the professionals' choice: the SDS (Slotted Drive System) bit. These are designed to be used exclusively in powerful SDS rotary hammer drills and are the absolute peak of concrete drilling performance.
You can tell an SDS bit by its unique shank, which has slots and grooves that lock securely into the drill's chuck. This system transfers hammering energy far more efficiently, allowing the bit to pulverise the toughest materials with surprising ease. They come in two main sizes:
The demand for high-performance drilling tools in the UK is closely tied to how busy the construction industry is. As building projects ramp up, so does the need for better bits. You can discover more insights about the UK drill bit market on databridgemarketresearch.com, which highlights how innovations in durability are driving the market forward. Choosing an SDS system for demanding jobs puts you right in line with this trend toward more powerful and efficient tools.
The point where your drill bit connects to your drill is where all the magic happens. Get this connection wrong, and you're not just losing power—you're making a common and costly mistake that can wreck both your expensive bit and your drill. Think of it like a key and a lock: the bit's shank must be a perfect match for the drill's chuck.
Nailing this simple concept is the secret to transferring every bit of rotational force and every hammer blow straight into the concrete. A loose, wobbly fit means you'll lose power, sacrifice accuracy, and risk the bit slipping or snapping. Let's walk through the most common shank types you'll find in the UK so you always get the perfect match.
The two shank types you're probably most familiar with are the smooth round shank and the hexagonal (hex) shank. The classic smooth round shank is designed for the three-jaw chucks on most standard drills and older combi drills. It does the job for basic rotary drilling, but it has a nasty habit of slipping when the going gets tough.
To solve that problem, the hex shank was created. Its six-sided shape gives a much firmer grip inside a three-jaw chuck, stopping it from spinning uselessly when you hit tough material or switch on the hammer function. This design is now the standard for many top-quality multi-material bits, including some of the brilliant options in the Milwaukee SHOCKWAVE multi-material drill bit range, which are built tough enough for both impact drivers and combi drills.
When you step up to serious concrete work with a rotary hammer drill, you need a more specialised system. This is where the Slotted Drive System, or SDS, comes into play. SDS bits have a unique shank with grooves that lock directly into the drill's chuck, creating a rock-solid connection.
The SDS system creates a direct, positive lock between the bit and the drill. This not only prevents any slipping but also allows the bit to move back and forth independently of the chuck, transferring the hammer action's energy with far greater efficiency.
This clever mechanism is what gives an SDS drill its awesome power to pulverise dense concrete. You'll mainly come across two types:
Getting your head around these systems is vital. You can't put an SDS bit in a standard three-jaw chuck, and you can't force a round shank bit into an SDS drill. Choosing the right drill bit for concrete is all about making sure its shank is the correct "key" for your drill's "lock".
Owning the best drill bit for concrete is a great start, but it's your technique that really delivers a clean, professional finish. Drilling into a material this tough isn’t about brute force; it's a process that needs a bit of prep, some precision, and a feel for how your tools work best. Get this right, and you'll avoid frustration, save your bits from burning out, and make sure your fixings are rock solid.
Before you even think about pulling the trigger, the most critical step is checking what’s hiding behind the surface. A simple mistake here can be dangerous and expensive.
Your first move should always be to scan the area with a multi-purpose digital detector. These gadgets are worth their weight in gold for finding hidden electrical wires, water pipes, and metal studs. Hitting a live wire or a pressurised pipe is the last thing you want to do—it can lead to serious injury or major damage to your property.
Once you’ve confirmed the area is clear, mark your drilling spot precisely with a pencil. Good prep is the foundation of a good result. This is also the moment you need to gear up properly.
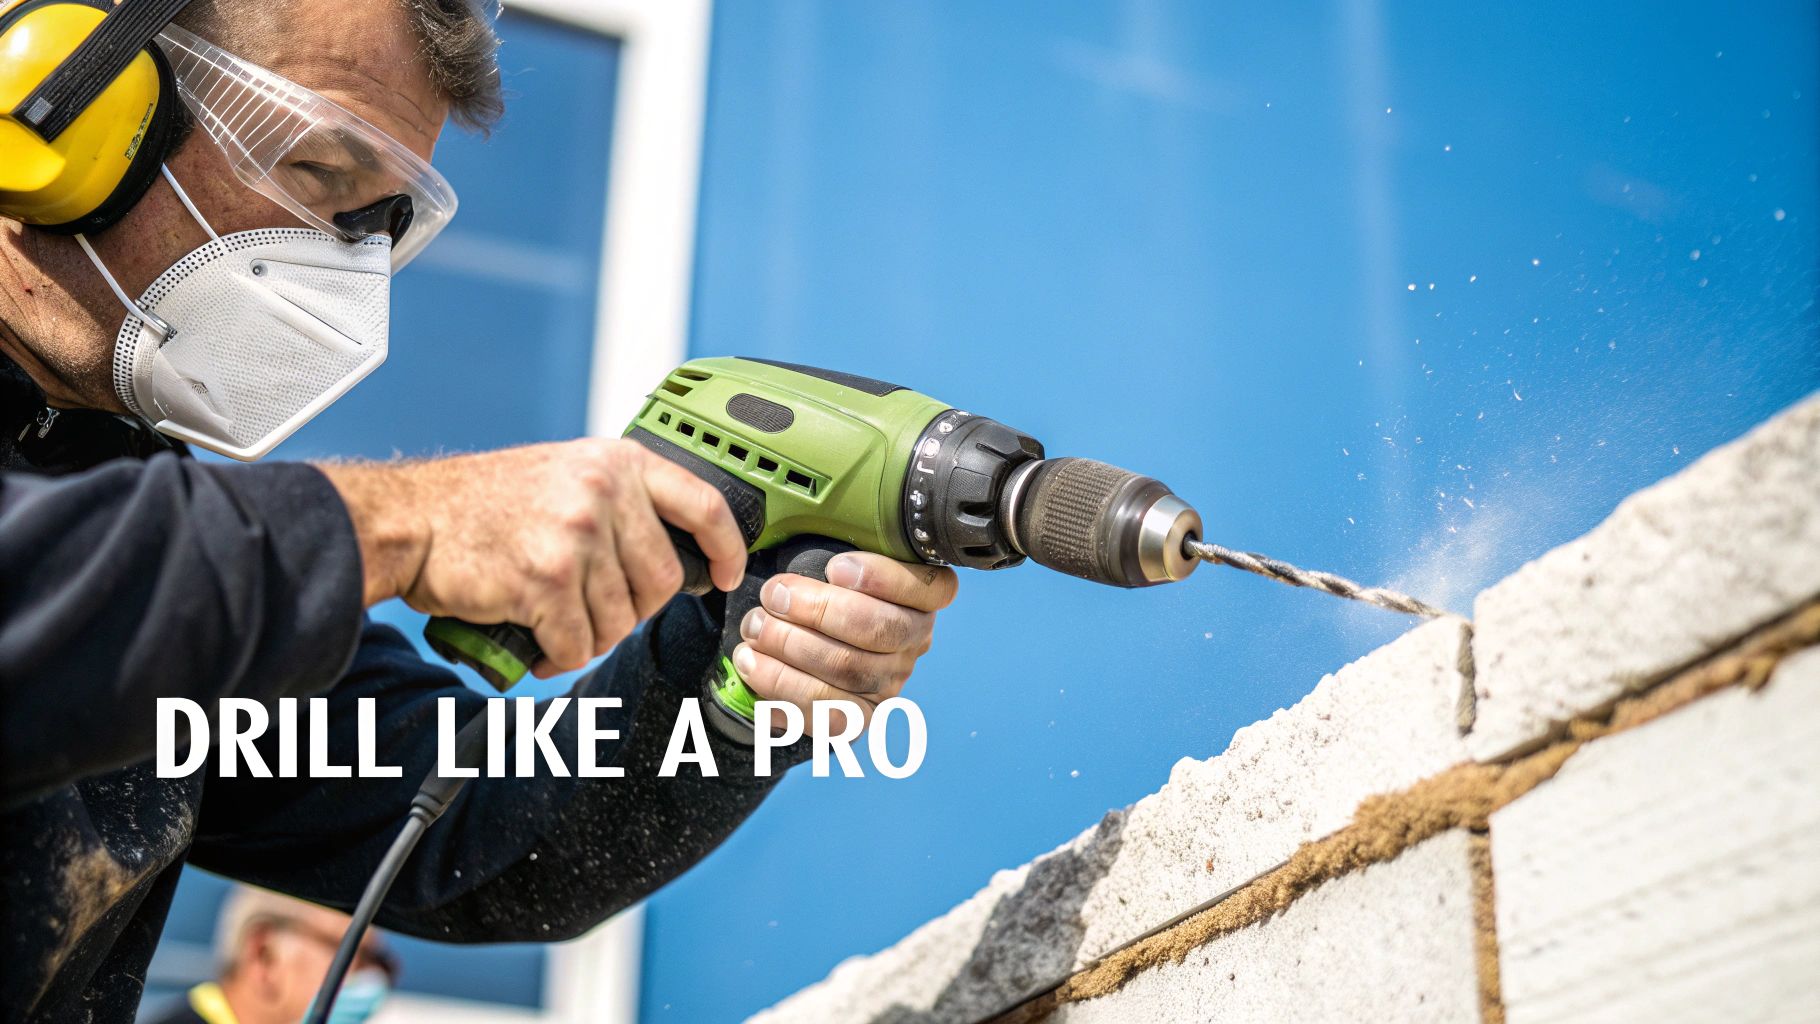
Drilling concrete creates fine silica dust, which is seriously harmful to your lungs. Always wear a correctly fitted dust mask (FFP3 rated is best) and wrap-around safety glasses to protect your eyes from flying debris.
With your spot marked and safety gear on, it’s time to drill. The key is to start slow and steady to stop the bit from "walking" or skipping across the surface.
Create a Pilot Mark: Start drilling at a low speed without the hammer function engaged. Apply just enough pressure to create a small indent. This little pilot hole will keep your bit perfectly centred when you ramp up the speed and power.
Engage Hammer Action and Apply Pressure: Once your pilot mark is set, switch your drill to its hammer setting. Apply firm, steady pressure straight into the wall, letting the drill's powerful hammer action and the carbide tip do the heavy lifting. Don't lean on the drill with all your body weight; too much force can overheat and ruin the bit.
Clear Debris Regularly: As you drill deeper, pull the bit partially out of the hole every now and then while it's still spinning. This action, known as "pecking," helps the flutes clear out dust and debris. A clean hole means less friction and lower temperatures, which will significantly extend the life of your drill bit for concrete. When you're doing serious structural work, like constructing a house basement, these skills become absolutely essential.
Even with the best technique, you can hit a snag. The most common one is hitting steel rebar embedded in the concrete.
If your drill suddenly stops making progress and you feel a distinct metallic resistance, you’ve probably hit rebar. Do not try to force your way through it. You'll destroy your masonry bit in seconds. Stop drilling immediately. Your best bet is to abandon that hole and drill a new one a few centimetres away. For tricky situations where moving isn't an option, you might need specialised rebar-cutting bits, but for most DIY jobs, just moving the hole is the simplest solution. Sometimes you might need other tools to clear an obstruction; our guide on essential masonry tools like the chisel can offer some useful tips.
A quality drill bit for concrete is a solid investment. And like any good tool in your kit, a little care goes a long way. Looking after your bits not only stretches your money further but keeps them performing at their best, giving you clean, accurate holes every time. A few simple habits can make a huge difference to how long they last.
The single most important step is taking a moment to clean your bits after each job. Concrete dust is incredibly abrasive and loves to attract moisture, which is a fast track to corrosion. This rust doesn't just look bad; it can damage the bit's surface and even mess with how it fits in the drill chuck. A quick wipe with a dry cloth is usually all it takes.
Drilling into concrete kicks up a serious amount of fine, gritty dust. This stuff doesn't just clog the hole you're drilling; it coats your drill bit in a layer of grime that can cause real problems down the line. Over time, this buildup can mean a less secure grip in the chuck and will definitely speed up wear and tear.
For a deeper clean, grab a stiff brush and clear out the flutes. This makes sure the bit is ready for the next job and keeps those 'debris motorways' working efficiently. You should also think about managing dust while you're drilling. Using something like a universal dust collector for your drill is a win-win—it protects your lungs and keeps your gear a whole lot cleaner.
Once they're clean, don't just toss your bits back in the toolbox. That's a surefire way to ruin them.
The tungsten carbide tip is extremely hard, but it's also brittle. Banging it against other metal tools can easily chip or fracture it, and a chipped bit is a useless bit.
To stop this from happening, always store them in their original case or a proper bit holder. This simple step protects those fragile tips from impact, making sure they stay sharp and ready for the next tough job.
Even the best-maintained drill bit for concrete won't last forever. Trying to force a dull bit is not only slow and frustrating, but it’s also dangerous. It puts a massive strain on your drill's motor and massively increases the risk of the bit jamming or snapping. Learning to spot the signs of a worn-out bit is a key skill for any tradesperson or serious DIYer.
Here are the tell-tale signs that it’s time for a replacement:
You might hear about sharpening old-school steel bits, but don't try it with modern carbide-tipped ones. The geometry of the tip is surprisingly complex, and a bad sharpening job can ruin its cutting ability and even make it unsafe. For both safety and performance, replacing a worn concrete bit is always the best move.
Even with the best kit and a solid plan, a few questions always seem to pop up when you’re about to drill into something as unforgiving as concrete. To help you feel completely confident on your next job, we’ll tackle some of the most common queries and clear up a few myths about using a drill bit for concrete.
Getting straight answers to these questions will help you sidestep common mistakes, pick the right gear, and get a professional, secure fixing every single time.
This is a really common point of confusion. You'll often hear the terms used interchangeably, but there's a small yet important difference. A masonry bit is more of a general-purpose tool, designed for softer stuff like house bricks, mortar, and breeze blocks.
A true concrete drill bit, especially a quality percussion or SDS bit, is built tougher. It usually features a more robust tungsten carbide tip and a stronger body to handle the intense, repetitive impacts needed to pulverise dense concrete full of aggregate. For the toughest jobs, you should always look for a bit that’s specifically rated for concrete.
In a word: no. A standard drill bit for wood or metal has sharp cutting edges designed to slice or shear through the material. Try using one on concrete, and you’ll destroy the bit in seconds.
The abrasive nature of concrete will instantly dull and overheat those fine edges, making it completely useless. You’ll just end up with a lot of smoke and noise, and you'll have made almost no progress. Always, always use a purpose-built drill bit for concrete with a hardened carbide tip.
Using the wrong bit isn’t just ineffective; it’s a false economy. You’ll ruin the bit, put a huge amount of strain on your drill's motor, and risk the bit snapping, which can be seriously dangerous.
Drilling into concrete isn't about cutting; it's all about pulverising. A standard drill just rotates, which simply isn't enough to break down the hard aggregate. A hammer drill or a rotary hammer adds a rapid, forward-and-back chiselling action into the mix.
This hammering motion works together with the rotation, letting the carbide tip chip away and shatter the concrete into fine dust. Without that hammer action, even the best concrete bit will just spin and struggle to get anywhere.
Yes, absolutely. This is a critical step that so many people skip. As you drill, the flutes on the bit pull out most of the dust, but a fine layer always gets left behind. This leftover debris can seriously weaken the holding power of your fixings.
For chemical anchors, a clean hole is non-negotiable for a proper bond to form. For mechanical fixings like concrete screws, the dust can stop them from threading correctly, leading to a weak or stripped fixing. A quick blast with a dust blower or a scrub with a wire brush makes a world of difference.
The most important rule here is: stop drilling immediately. Trying to force a standard masonry bit through steel rebar will destroy the bit's carbide tip in an instant. It's a fight you will not win.
You have a couple of options:
At Neasden Hardware, we have the tools and expertise you need for any project, big or small. From high-performance SDS bits for heavy-duty work to reliable percussion bits for everyday tasks, we stock the right drill bit for concrete to get the job done right. Explore our full range of power tool accessories and get some expert advice from our team.
Browse our selection of top-quality drill bits at neasdenhardware.co.uk