Order Online
- Straight to your door!
Straight to your door


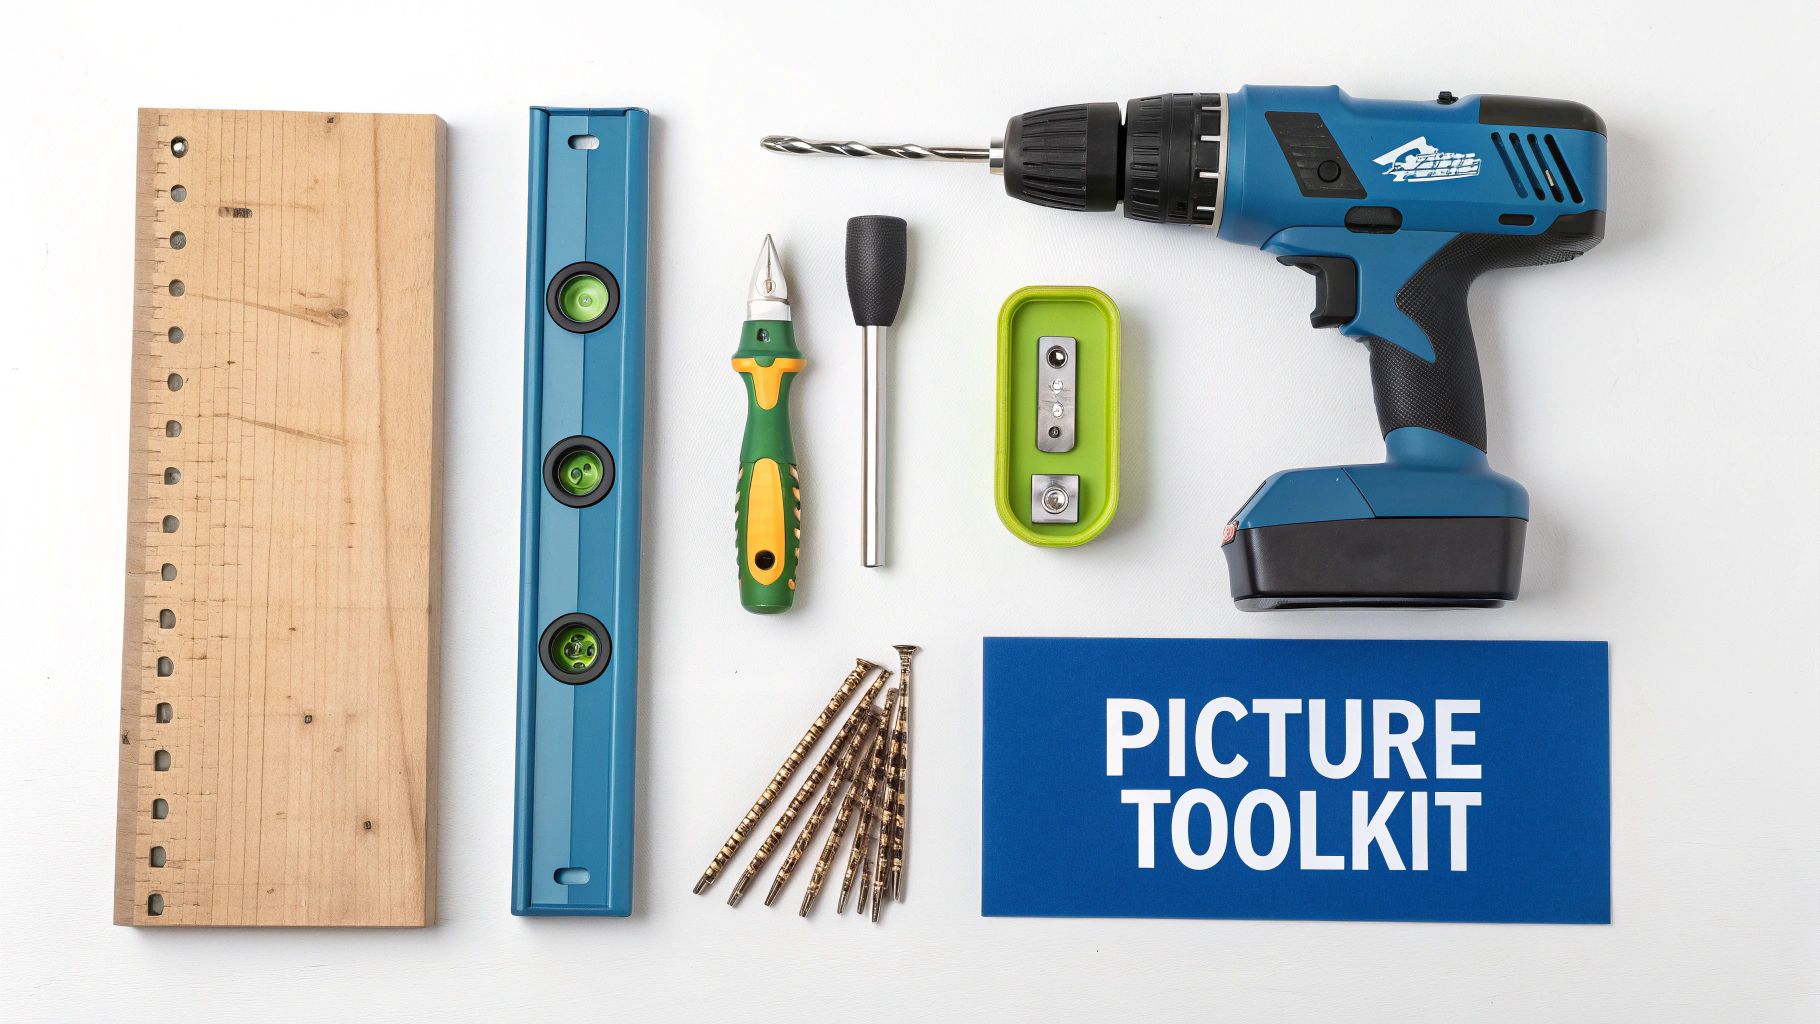
Getting a picture hung correctly starts long before you ever make a mark on the wall; it all begins with having the right tools for the job. Honestly, the single most important step is to gather everything you need before you start.
Having a well-organised toolkit doesn't just make the job easier—it guarantees a professional, secure, and perfectly level finish every time. It’s the difference between a frustrating afternoon full of mistakes and a smooth, satisfying project.
Before you even think about lifting a hammer, take a moment to assemble your equipment. It'll save you countless trips back and forth to the garage or shed. A little preparation prevents guesswork and ensures your artwork will be displayed beautifully and safely. Think of it as your pre-flight check for a flawless installation.
Every picture hanging job, whether it's big or small, needs a core set of tools. These are your non-negotiables for getting it right and avoiding those annoying wonky frames.
When you're dealing with heavier frames or tricky wall types like plasterboard or brick, your toolkit needs a few extra bits. These items give you the extra security and power needed for a really robust fitting.
A stud finder is invaluable for plasterboard walls. Hanging a heavy item directly into a wooden stud gives you the most secure anchor point you can get—far stronger than any hollow-wall fixing. This simple electronic device saves you from blindly tapping the wall and just hoping for the best.
For solid walls like brick or concrete, a power drill with a set of masonry drill bits is an absolute necessity. Trying to hammer a nail into brick will only end with a bent nail and a chipped wall. The drill creates a clean pilot hole for a wall plug and screw, which is the proper way to handle these surfaces. If you're building your collection from scratch, you can often find a complete Stanley Essential Toolkit that contains many of the basics you'll need for this and other DIY projects.
Pro Tip: When drilling into plaster or brick, stick a folded bit of painter's tape or a Post-it note to the wall just below where you're drilling. It’ll catch most of the dust and save you a clean-up job later.
Finally, a few extra items can make the whole process even smoother and more professional.
By making sure you have these tools ready to go, you’re setting yourself up for success. This little bit of prep transforms the task from a potential headache into a simple, straightforward process.
The real secret to hanging a picture so it stays put comes down to one thing: the fixing. Get this wrong, and you’re risking a damaged wall, a shattered frame, or that awful crash in the middle of the night. So, let's demystify the world of hooks, nails, and anchors to help you match the perfect fixing to your wall type and the artwork's weight.
First things first, you need to understand your walls. Most UK homes have either plasterboard (that gypsum board sandwiched between paper, also called drywall) or solid walls made of brick or blockwork with a plaster skim. Each one demands a completely different approach to make sure your art stays exactly where you put it.
Plasterboard is incredibly common in modern homes and extensions. It’s essentially a hollow cavity behind a fairly soft board, which means simply hammering in a nail won’t hold anything heavier than a small calendar. You need a fixing designed to grip the back of the board.
For feather-light frames, say under 2kg, a traditional picture hook tapped gently into the plasterboard will probably do the job. But for anything with a bit more heft, you'll need to bring in the specialists.
It’s always a good idea to have a few different options in your toolkit. For a deeper dive into securing things on this wall type, check out our guide on the best fixings for plasterboard walls.
Solid walls, which you'll find in most older properties, are incredibly strong but require a different technique. You can't just hammer a nail into brick; you need to drill a hole and use a wall plug (often called a Rawlplug) and a screw.
The process itself is pretty straightforward. You use a masonry drill bit to make a hole, push the plastic wall plug in so it sits flush with the surface, and then drive a screw into the plug. As the screw goes in, it expands the plug, wedging it tightly into the brick for an exceptionally strong hold.
The size of the plug and screw you need depends entirely on the weight of your picture. A small, lightweight print might only need a 5.5mm drill bit and a corresponding "brown" plug. A heavy, ornate mirror, on the other hand, will demand a larger 8mm or 10mm bit and a much more substantial "blue" or "grey" plug and screw.
A key takeaway is to always check the weight rating on the packaging of any fixing you buy. If your artwork is close to the maximum limit, it’s always safer to choose the next size up for complete peace of mind.
To make things even easier, I've put together a quick-reference table. Before you head to the hardware shop, weigh your picture frame—a simple set of bathroom scales will do the trick.
This little table should help you pinpoint exactly what you need.
| Wall Type | Frame Weight | Recommended Fixing | Typical Use Case |
|---|---|---|---|
| Plasterboard | Light (Under 2kg) | Picture Hook or small nail | Small photo frames, lightweight canvas prints |
| Plasterboard | Medium (2kg - 10kg) | Self-Drive Plasterboard Plug with screw | A3-A2 sized framed prints, decorative wall plates |
| Plasterboard | Heavy (Over 10kg) | Spring Toggle or Heavy-Duty Hollow Wall Anchor | Large mirrors, oversized artwork, gallery frames |
| Brick/Block | Light (Under 5kg) | 5.5mm (Brown) Wall Plug and Screw | Small-to-medium prints, small decorative mirrors |
| Brick/Block | Medium (5kg - 15kg) | 7mm (Red) Wall Plug and Screw | Large framed posters, medium-sized mirrors |
| Brick/Block | Heavy (Over 15kg) | 8mm (Blue) or 10mm (Grey) Plug and Coach Screw | Very heavy mirrors, large statement art pieces |
Honestly, choosing the right fixing is the most critical part of the job. It’s the foundation of a safe, professional-looking display. If you take a moment to identify your wall type and the weight of your frame, you can select the perfect hardware and hang your art with total confidence.
You've got your tools sorted and the right fixings picked out. Now for the creative part: deciding exactly where everything goes. That polished, gallery-quality look comes down to thoughtful placement, not just winging it. One of the most common mistakes I see is people hanging art way too high, making it feel completely disconnected from the room and its furniture.
Let's dive into a few pro techniques to sidestep that common pitfall. This is about more than just putting a nail in the wall; it’s about creating a harmonious relationship between your art, your walls, and the furniture around them to elevate your whole space.
The single most important guideline for hanging art is the gallery eye-level rule. The idea is simple: the centre of your artwork should hang about 145cm (around 57 inches) from the floor. This height represents the average human eye level, which means the art is comfortable to view without having to crane your neck or stoop down.
Of course, this is a starting point, not a strict command. In a room with very high ceilings, you might want to go slightly higher to fill the space. On the flip side, if you have lower ceilings, bringing the art down a touch can feel more balanced. Think of 145cm as your default, then adjust it to fit your specific room.
The eye-level rule works beautifully for a piece on a blank wall, but what happens when you’re hanging art above a sofa, a bed, or a console table? In these cases, the relationship between the art and the furniture takes priority.
A classic error is leaving too big a gap, which makes the two items feel like separate, floating elements.
Remember, these are guidelines to get you started. The best way to be certain is to have someone hold the picture in place while you step back and have a look. Your own eyes are the final judge of what feels right in your space.
Creating a gallery wall can feel a bit daunting, but there's a simple planning trick that will save you from a wall full of misplaced holes. Instead of trying to visualise it all in your head, map it out on the floor first. This is my personal go-to method for getting it right every single time.
This hands-on method lets you see the final result and make adjustments easily, ensuring a balanced and cohesive display. For a deeper dive, you can explore some excellent pro tips for arranging pictures on the wall that cover different styles and layouts.
This infographic is a great shortcut for deciding which fixing to use based on your wall type and the weight of your frame.
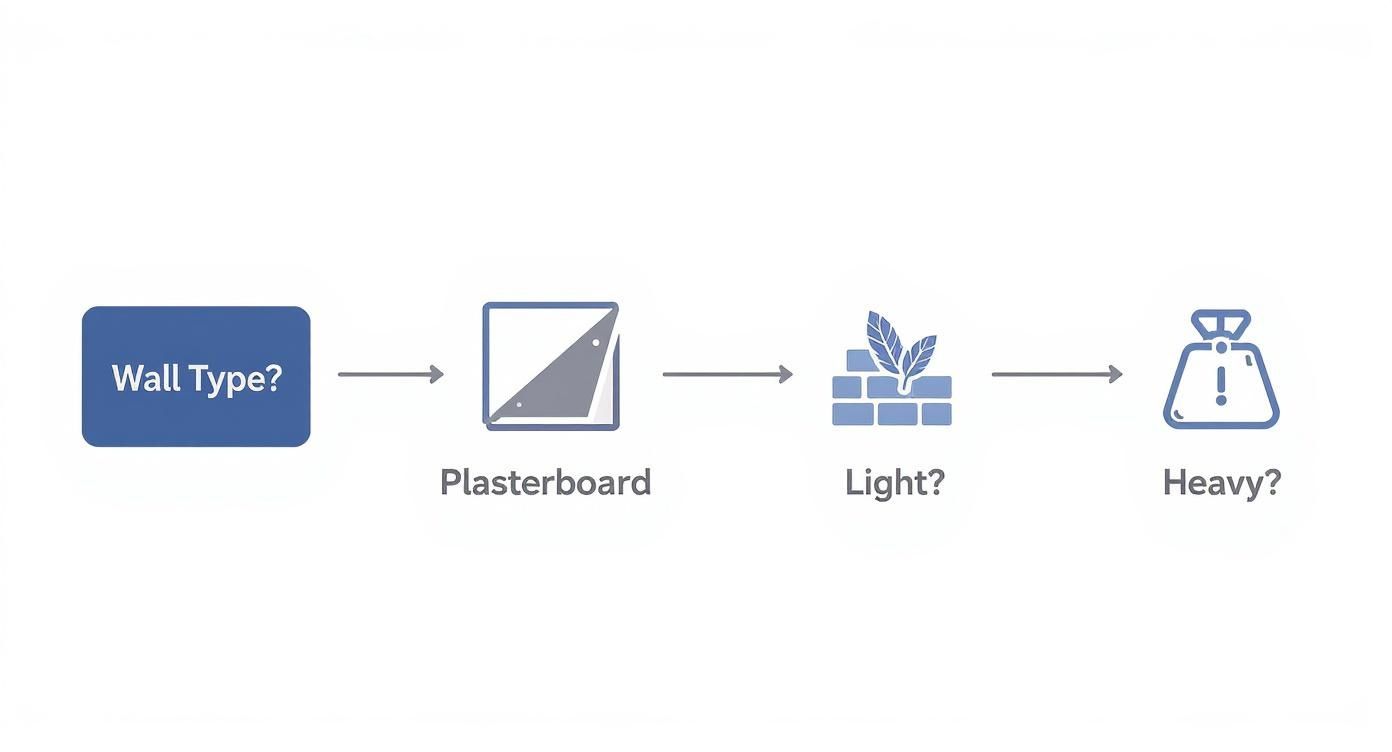
As you can see, the first crucial question is always identifying your wall material—plasterboard or brick—before you even start thinking about the weight of your artwork.
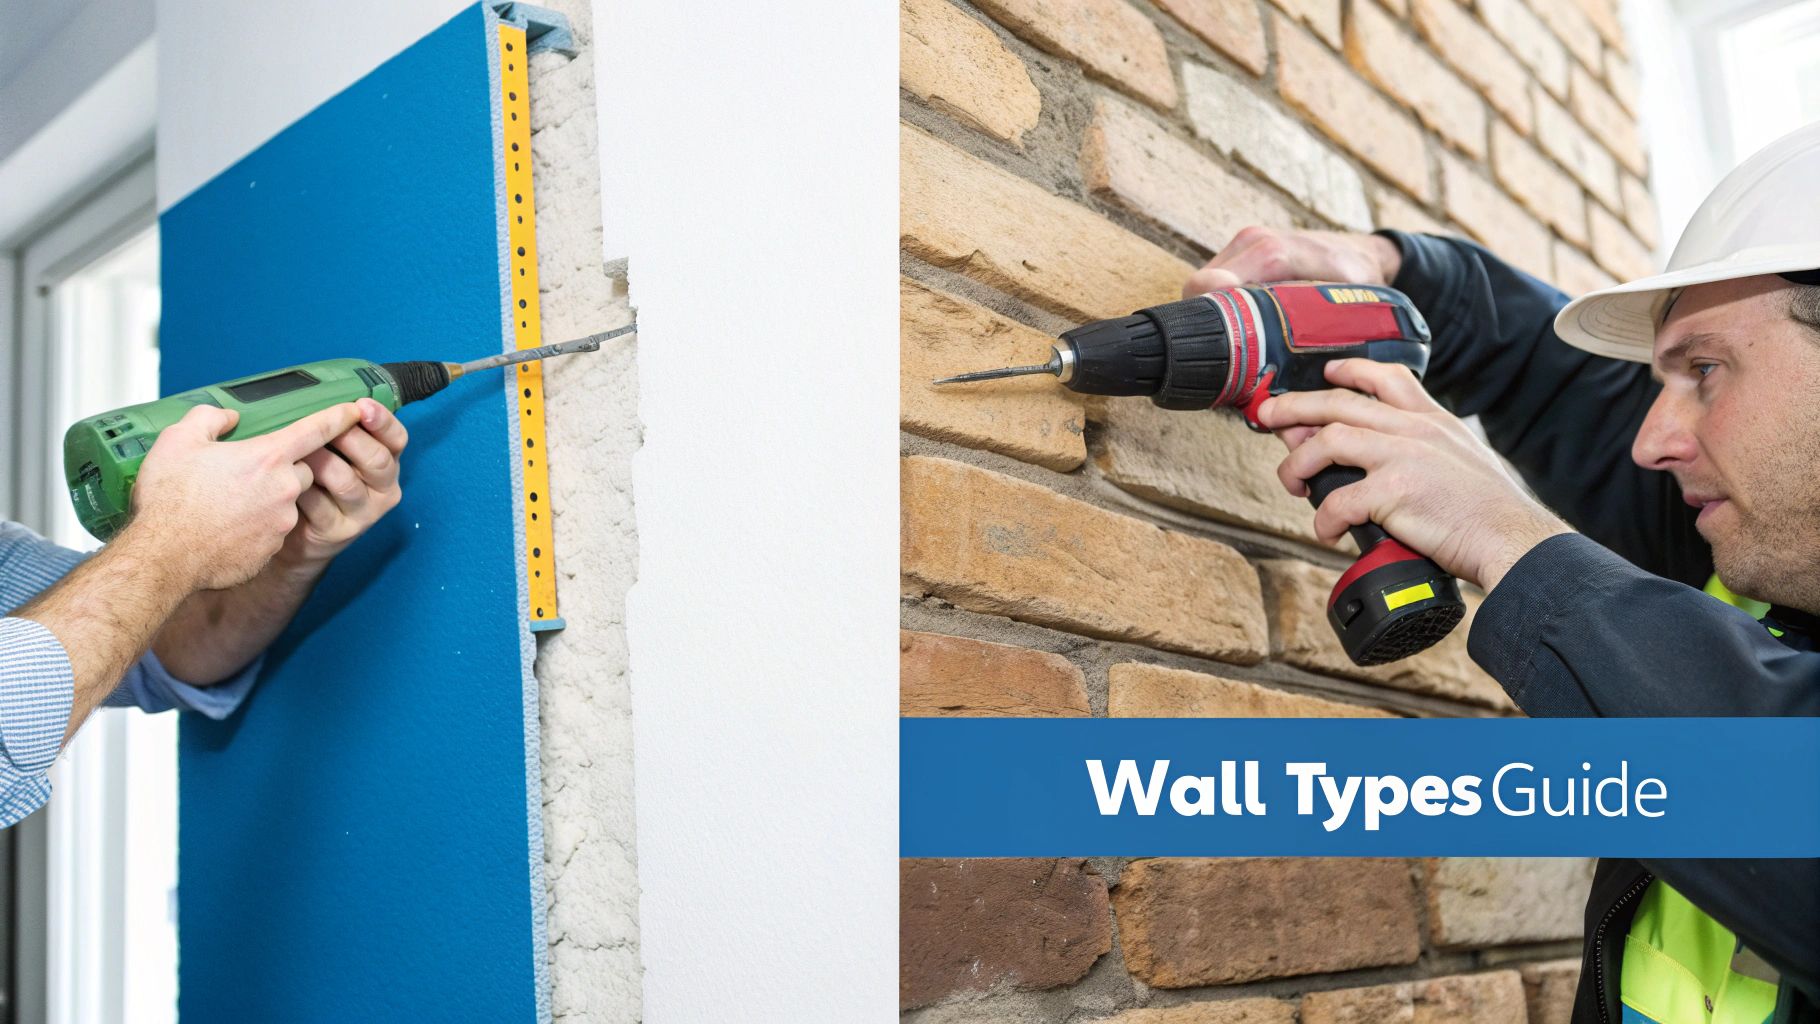
Hanging a picture securely isn’t just about picking the right fixing—it’s about matching your method to the wall you’re working with. Tackling hollow plasterboard calls for a completely different approach than drilling into solid brick. Get this wrong and you could be staring at a fallen frame; get it right and your artwork will stay put for years.
This guide covers the two most common wall types in UK homes. Master these techniques and you’ll be able to hang everything from light prints to heavy mirrors with absolute confidence.
Plasterboard (often called drywall) hides a hollow cavity behind a thin gypsum panel. That’s why a simple nail will pull right through under weight. Your best bet is to aim for a stud or, if that’s not possible, use a hollow-wall anchor.
First, grab a stud finder and mark out any vertical studs. Screwing directly into timber gives you the strongest hold. When you can’t line up your picture with a stud, reach for one of these anchors:
Self-Drive Anchors
Perfect for medium-weight frames. You don’t need to drill—just press the point into the board, twist with a screwdriver until it’s flush, and you’re ready for a screw.
Toggle Bolts
Ideal for heavier items such as large mirrors. You drill a hole slightly bigger than the folded toggle, push it into the cavity and let it spring open. Tightening the screw then pulls the toggle flat against the reverse side, spreading the load over a wider area.
| Anchor Type | Weight Capacity | Pilot Hole Needed | Best For |
|---|---|---|---|
| Self-Drive Anchors | Up to 10 kg | No | Photo frames, small shelves |
| Toggle Bolts | Up to 25 kg | Yes | Large mirrors, heavy artwork |
For more on the material you’re working with, check out these standard plasterboard sheets and appreciate why these specialised fixings matter so much.
Solid brick or blockwork walls may look daunting, but they’re actually the most reliable once you know the drill—literally. Hammering a nail straight in is a recipe for a bent nail and chipped brick. Instead, arm yourself with a drill, a masonry bit, a wall plug and a screw.
Begin by choosing the correct drill bit. A masonry bit is designed for dense materials like brick and concrete—using a wood or metal bit will simply blunt it.
Pro Tip: Stick a small strip of masking tape over your drill mark. It stops the bit from skidding and helps protect surrounding plaster from flaking.
Once you’ve marked your spot, drill a hole that’s the same diameter and slightly deeper than your plug. Tap the plug in gently until it sits flush with the surface. From there, driving in your screw expands the plug inside the brick, creating an unshakeable anchor.
Industry forecasters expect the picture hanging market to grow strongly through 2033, driven by a rising interest in home personalisation. You can explore the full picture hanging system market growth report for more insight.
“Adapting your technique to each wall type is the difference between a secure hang and a loosening disaster.”
By tailoring your fixings and approach to plasterboard or brick, you’ll enjoy professional, worry-free results every time.
We’ve all seen it: artwork hung so high you have to crane your neck to see it, a gallery wall that feels more chaotic than curated, or a beautiful picture that’s just frustratingly crooked. Knowing how to hang pictures is as much about sidestepping these common pitfalls as it is about mastering the techniques. Think of this as your final checklist, a collection of hard-won advice to help you get a polished result on the first try.
One of the most frequent errors is a simple mismatch between the frame's weight and the fixing's strength. It’s easy to grab any old hook, but a heavy, glass-fronted frame puts a lot more stress on the wall than a lightweight canvas. Underestimating this can lead to a disastrous fall, damaging both your wall and your cherished art.
Another classic oversight is forgetting about the drop. Many frames have a hanging wire or D-rings set below the top edge. If you measure from the ceiling down to where you want the top of the frame to be and put your nail there, the picture will inevitably hang several inches too low. Always measure to where the hook will actually sit, not to the top of the frame.
Perfect placement is what separates an amateur display from one that looks intentional and professional. It’s all about creating a sense of balance.
Avoid Direct Sunlight: A sunny spot might seem like a great place to show off your art, but UV rays are a print's worst enemy. Over time, direct sunlight will cause colours to fade and paper to yellow. Choose a wall that gets indirect light to preserve your art for years to come.
Mind the Gap: When creating a gallery wall, inconsistent spacing can make the whole arrangement look messy. Aim for a uniform gap—usually between 5cm and 8cm—between each frame to create a cohesive, organised feel.
Don't Hang Too High: As we've mentioned, art should connect with the room's furniture and inhabitants. Hanging pictures way up near the ceiling disconnects them from the living space below. Always default to eye level and adjust from there.
The desire to create beautiful, personalised spaces is a major driver behind home decor trends. In the UK, the picture frame market is set to grow steadily, with an expected expansion of around 3.6% annually until 2030, as more people seek to personalise their homes. You can learn more about the growth of the UK picture frame market and its impact.
Even with perfect placement, using the wrong hardware can ruin all your hard work. A secure hang is a safe hang.
A common slip-up is assuming one type of fixing works for all walls. A screw that holds firm in solid brick will pull right out of hollow plasterboard. Taking a moment to identify your wall type and select a specialised fixing, as we discussed earlier, is the single most important step for security.
By learning from these frequent missteps—from measuring the wire drop to selecting the right fixing—you can avoid the frustration of having to re-hang your art and achieve a flawless finish that looks both intentional and professionally styled.
Keep these points in mind, and you'll not only know how to hang pictures but how to do it correctly, avoiding the rookie mistakes that can detract from a beautiful display.
Even with a solid plan, a few questions always seem to pop up right when you’re about to hang your art. Let's run through some of the most common ones I hear, with clear answers to solve those final hurdles, from keeping your walls pristine to making sure that extra-heavy mirror stays put.
This is a big one, especially for renters or anyone who just can't bear the thought of making holes. Thankfully, there are some brilliant damage-free solutions out there.
Adhesive strips are probably the most popular choice. The key is to buy the right size for your frame's weight and, crucially, to always clean the wall with a bit of rubbing alcohol first. This gets rid of any dust or grease and helps the strips get a really firm grip.
Another fantastic option, and one that looks very professional, is a picture rail system. You install a single rail up near the ceiling, and from there, you can hang pictures on adjustable cords and hooks. It’s a one-time job that gives you complete freedom to chop and change your display later on without ever drilling another hole.
One of the most frequent mistakes I see is art hung way too high above furniture. It ends up looking disconnected, just floating on the wall. A great rule of thumb is to hang the frame so the bottom edge is about 15-20cm (6-8 inches) above the back of the sofa.
This creates a nice, cohesive visual link, making the art and the sofa feel like a single, intentional group. Before you commit, get someone to hold the frame in place while you step back and have a proper look. This gap is just enough to stop people from bumping their heads but close enough to feel professionally styled.
Always trust your eye for the final decision. A good tip is to take a photo on your phone; looking at the composition on a screen can help you judge the balance more objectively.
Of course, the final presentation goes beyond just hanging. Knowing how to properly prepare different types of artwork, like learning the specific techniques for framing counted cross stitch pictures, is what really creates a polished, gallery-worthy display.
When you're dealing with anything heavy—and by that, I mean over 10kg—standard picture hooks are completely out of the question. Safety is everything here, and your approach will depend entirely on what your wall is made of.
Always, always check the weight rating on the fixing's packaging. If you're ever in doubt, go for a fixing rated for more weight than your item. It’s just not worth the risk.
For every DIY project, from hanging a single picture to a full-scale renovation, having the right tools and fixings is key. At Neasden Hardware, we provide everything tradespeople and home improvers need to get the job done right. Explore our extensive range of high-quality hardware and get fast, reliable delivery at https://neasdenhardware.co.uk.