Order Online
- Straight to your door!
Straight to your door


Changing a lock is usually a pretty straightforward job. It's mostly about taking out the fixing screws, sliding out the old cylinder or the main lock body, and popping a new one in its place. For common UK locks like Euro cylinders or Mortice locks, you'll only need a few basic tools you probably already have in your toolbox.
Whether you've just got the keys to a new place, had a key go missing, or just want to beef up your home security, knowing how to change a lock is a seriously useful skill. It's one of the quickest and most effective ways to take control of who has access to your home, giving you that crucial peace of mind.
This guide will walk you through the whole process, from picking the right lock for your door to doing those final checks that ensure everything is working perfectly. You don't need to be a pro to get this done; with a bit of guidance, it's a job well within your reach.
Upgrading your locks isn't just about swapping out old hardware for new. It's a fundamental step in securing your home. In fact, it can even be a condition of your home insurance policy, as many insurers require locks that meet specific British Standards.
There are a few key moments when changing a lock is a no-brainer:
Deciding whether to tackle this yourself or call in a professional often comes down to cost, time, and confidence. While hiring a locksmith guarantees the job is done right, understanding the basics can help you figure out if it's a task you can handle.
Here's a quick look at how the two approaches stack up.
| Factor | DIY Approach | Professional Locksmith |
|---|---|---|
| Estimated Cost | £20 - £70 (cost of the new lock) | £80 - £150+ (includes lock, labour, and call-out fee) |
| Time Commitment | 30 - 60 minutes per lock (plus time for research/shopping) | 20 - 45 minutes per lock |
| Key Considerations | Lower cost, but requires confidence with basic tools and careful measurement to get the right replacement. | Higher cost, but offers expertise, speed, and the assurance of a professional installation. Great for complex or high-security locks. |
In the UK, the average cost to have a professional change a lock is around £100, but this can climb to between £200 and £350 if you're doing several doors. While the cost is higher, the peace of mind can be well worth it.
A correctly installed lock is your first line of defence. Taking the time to do it properly not only protects your property but also provides invaluable peace of mind for you and your family.
By following our instructions, you can make sure your home is secure. If you're ready to get started, you can explore our detailed guide on how to install door locks for a step-by-step walkthrough.
Picking the correct lock is probably the most important decision you'll make in this whole process. Get it right, and your home is secure and your insurance is valid. Get it wrong, and you could create a weak spot or just end up making another trip to the hardware shop. The UK market has a few common types, and knowing the difference is key.
This isn't just you, either. More and more homeowners are looking for better security. The UK's mechanical locks market is growing steadily, with a projected compound annual growth rate of around 6.6%. This shows a real demand for more secure locking systems, driven by people who want better protection. You can see more insights on this trend over at futuremarketinsights.com.
For most UK homes, the choice really boils down to two main players: Mortice locks and Euro cylinder locks. Each one is designed for specific door types and offers different levels of security.
While these are the most common for your front and back doors, you might run into other types inside the house. For instance, if you're looking for a bit of privacy, it's worth exploring the different bathroom door lock types to find the right fit.
When you're shopping for a new lock, you'll see the term "BS 3621" pop up a lot. This isn't just jargon; it's a crucial mark of quality.
BS 3621 is a British Standard that certifies a lock has been tested against common burglary techniques like drilling, picking, and "fishing" the lock open. Many home insurance policies actually mandate that external door locks meet this standard.
Look for the British Kitemark symbol on the lock's faceplate. This is your guarantee that it's passed these tough tests and will be recognised by your insurer. For Euro cylinders, you want to see a TS007 3-star rating. Alternatively, a 1-star cylinder paired with 2-star rated handles will give you equivalent protection against lock-snapping.
A classic DIY mistake is buying the wrong size lock. An ill-fitting lock isn't just a pain to install; it can be a major security risk.
For a Euro cylinder, getting the measurement right is critical. If it sticks out more than 3-5mm from the door handle, it becomes an easy target for burglars. To measure correctly, take the old cylinder out and measure from the centre of the fixing screw hole to the outside edge on both sides. These two numbers (e.g., 40mm/50mm) give you the exact size you need. It's a simple step that makes all the difference.
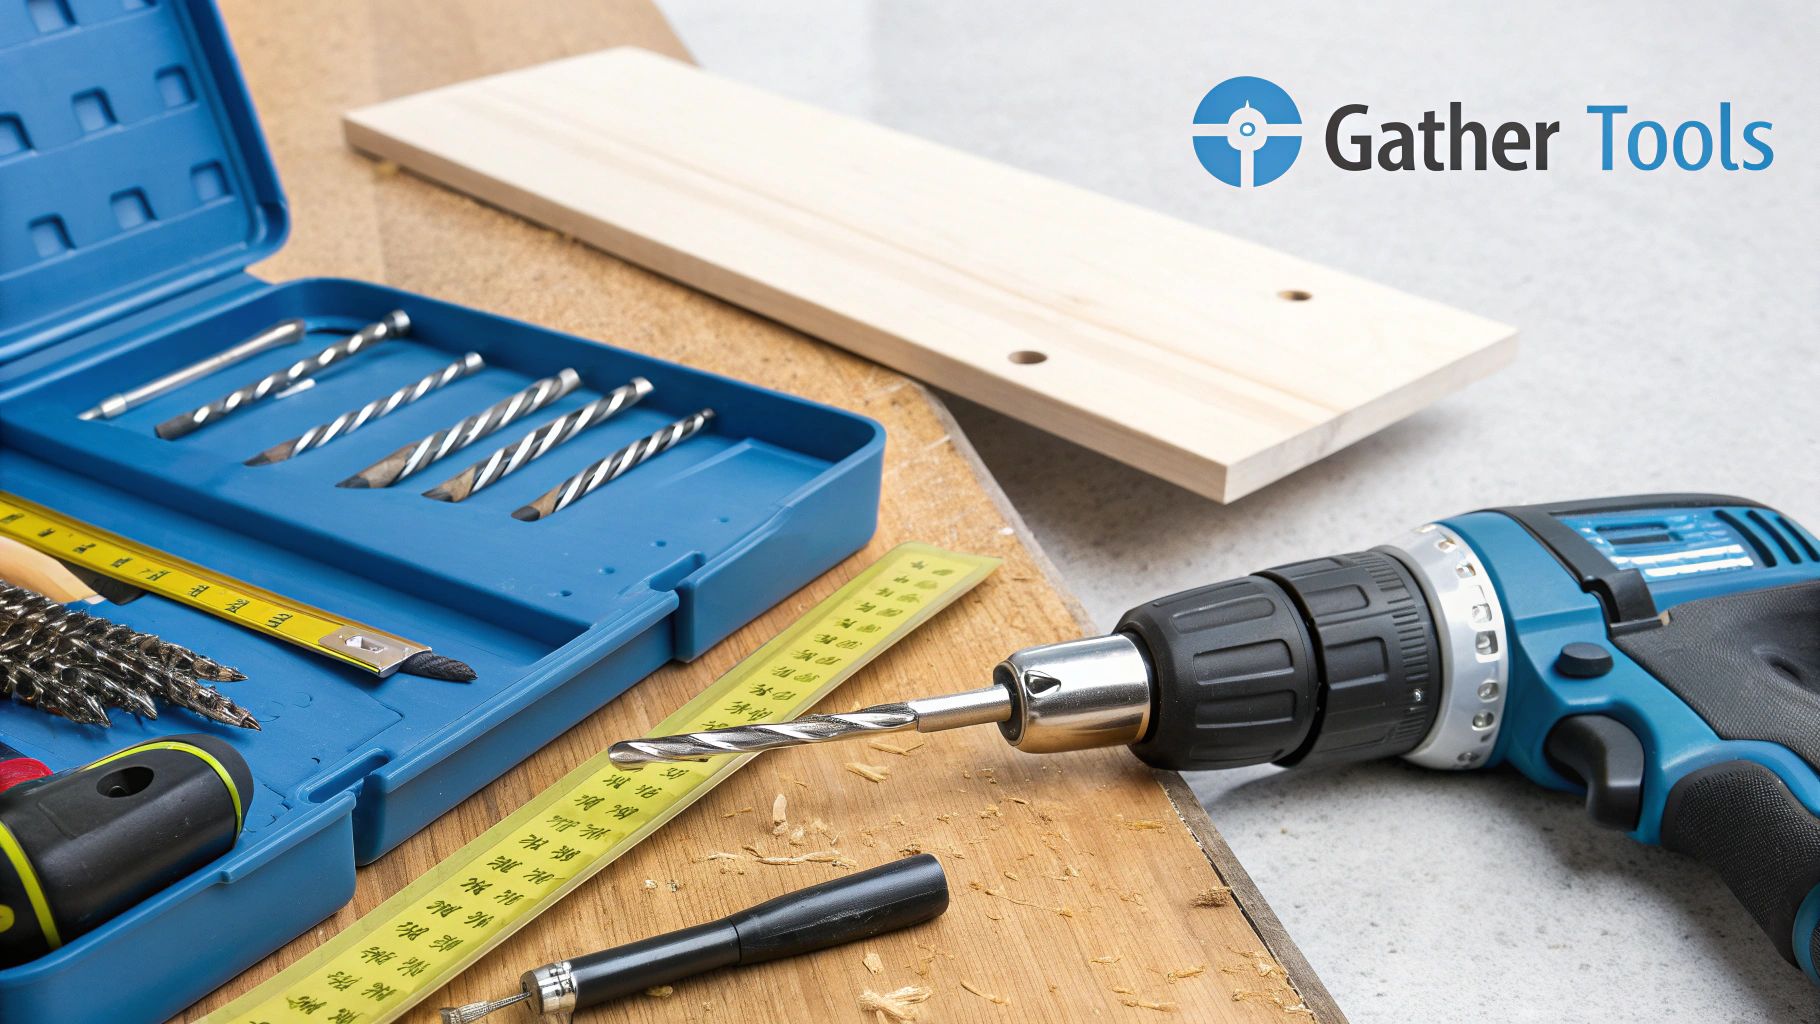
Before you even think about touching a screw, a little preparation goes a long way. Getting organised first means the actual job of changing the lock will be quicker, smoother, and far less stressful. You’ll be surprised at how few tools you actually need for most standard lock changes.
For most jobs, you can get by with a very basic toolkit. This simple setup will see you through the majority of lock replacements on uPVC, composite, and wooden doors across the UK.
Having the right tools ready prevents those frustrating trips back to the shed halfway through the job. Here's your simple checklist:
Now, for more complex installations, like fitting a mortice lock into a brand-new door, you might need more specialised equipment. In these cases, a lock jig ensures the recess is cut with perfect precision. You can learn more about how a professional Trend lock jig works to achieve a flawless finish.
Pro Tip: Before you start, take a quick photo of your current lock from both sides of the door. This simple step creates an invaluable reference point if you forget how the components fit back together during reassembly.
Finally, prepare your workspace. Lay down a dust sheet or an old towel beneath the door to catch any wood shavings or debris and protect your flooring. Make sure you have good lighting so you can clearly see what you’re doing, especially when lining up small screws.
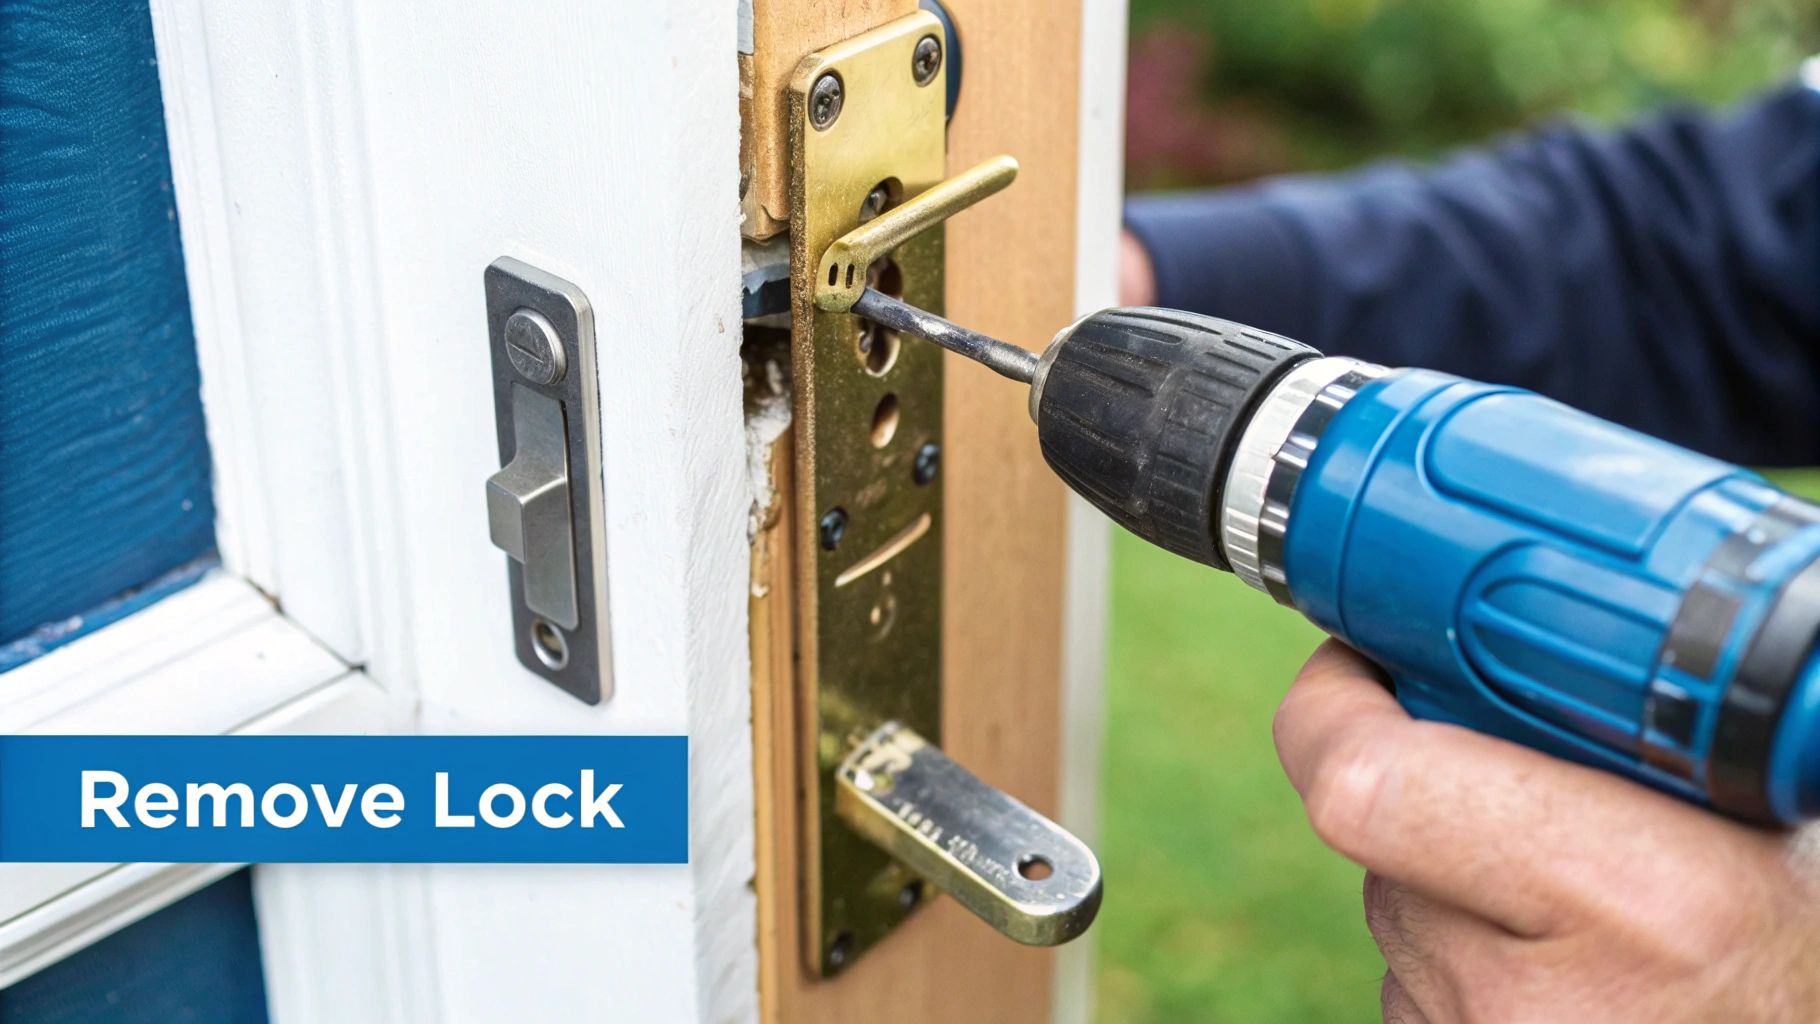
With your tools laid out, it's time to get hands-on and remove the old lock. This is where a bit of patience pays off, as a methodical approach will save you from scratching your door or stripping a screw. The process varies slightly depending on what you’re working with – a Euro cylinder or a Mortice lock, which are the two most common types you'll find in the UK.
Rushing this part is a classic mistake that can turn a simple job into a proper headache. So, take your time. We'll walk through how to tackle each type, one step at a time.
You’ll find Euro cylinders on most uPVC and composite doors, and thankfully, they're usually the simplest to replace. The entire locking mechanism is neatly contained within the cylinder, which is held in place by just one screw.
First things first, you need to find this retaining screw. Open your door and look at the thin metal plate running down the edge. There will be a screw that lines up with the bottom of the keyhole – that's the one you're after.
Once you've taken the screw out, don't expect the cylinder to just drop out. It’s held in position by a small metal piece inside called a cam, which is deliberately offset from the lock body.
Pro Tip: To get it out, pop the key in the lock and give it a slight turn, maybe 10 to 15 degrees, while gently pulling or pushing the cylinder. You'll feel a little 'sweet spot' where the cam aligns perfectly, allowing the cylinder to slide right out. A gentle wiggle of the key usually helps find this position.
Mortice locks, typically found on wooden doors, are a bit more involved because the lock body is tucked away inside the door itself. The process is still perfectly doable, but it has a few extra steps.
Start by unscrewing the door handles or the escutcheons (that’s the proper name for the keyhole covers) from both sides of the door. They’re usually held on by two visible screws.
Next, you'll need to remove the two screws that hold the lock's faceplate to the edge of the door. With those gone, the main lock body should now be loose inside its cavity. You can then gently wiggle and pull it straight out.
Of course, sometimes the screws have other ideas. If you come across one that’s old, rusted, or has a stripped head, don't force it. A good quality screw extractor kit is an absolute lifesaver in these situations, letting you grip and remove even the most stubborn screws without damaging the door. This Faithfull 4-piece screw extractor kit will make short work of this very common problem.
The image below gives you a good idea of the key steps you'll be taking when you fit the new lock, which is basically the reverse of what you've just done.
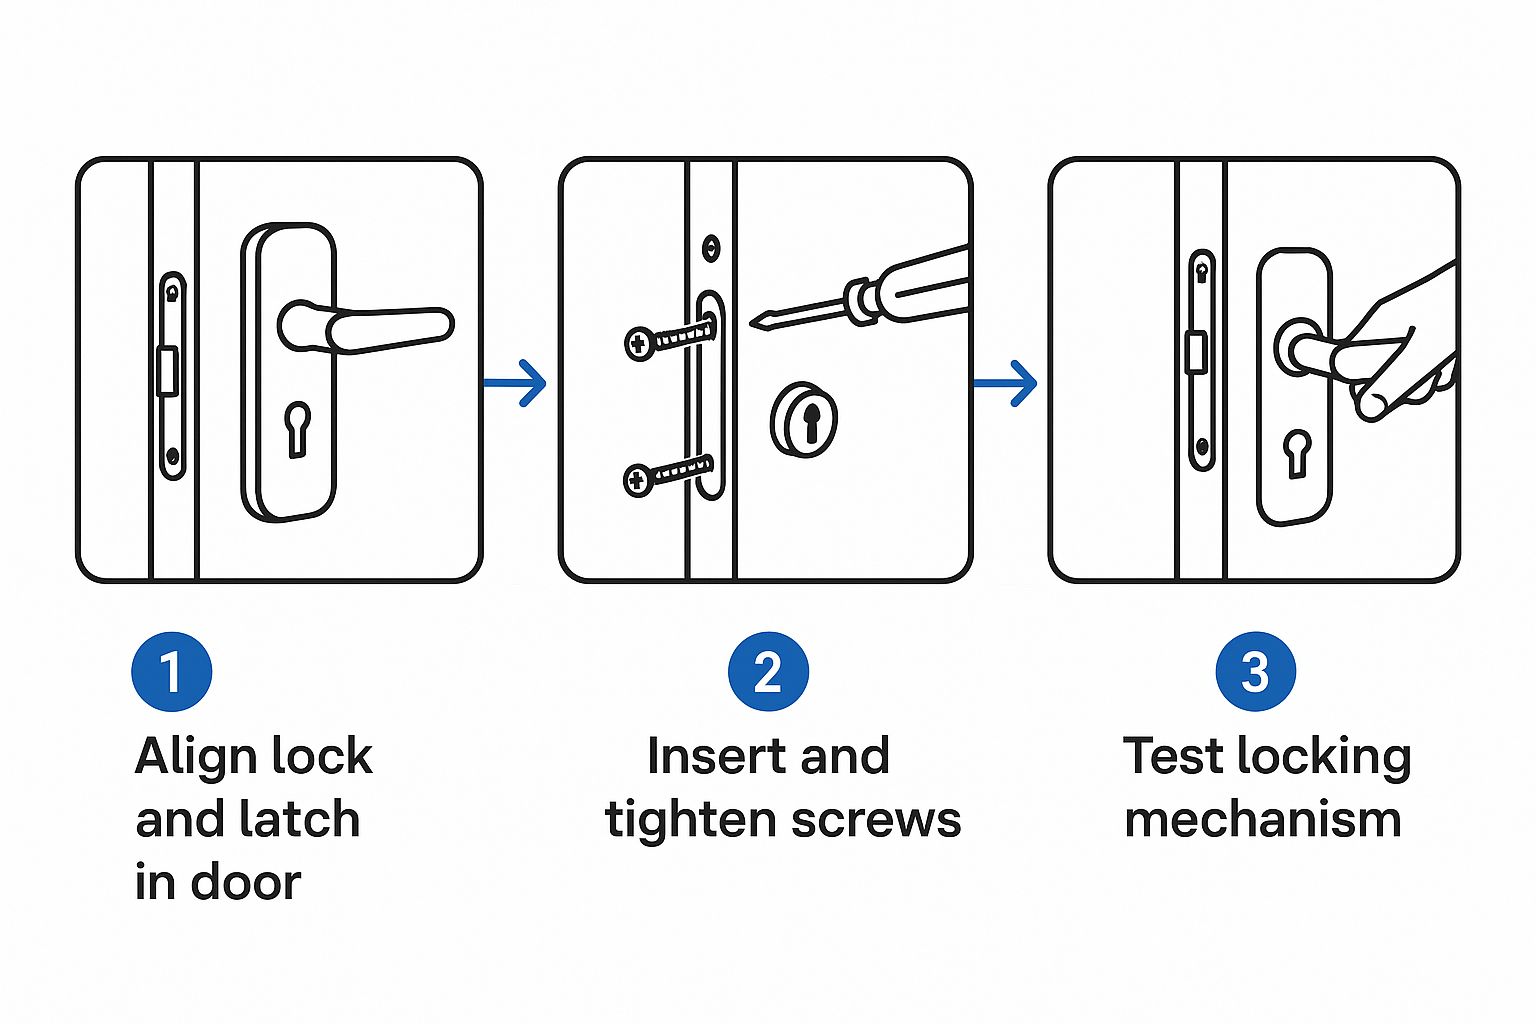
This visual guide is a great reminder of how important careful alignment, secure fastening, and proper testing are to making sure your new lock works perfectly.
With the old lock out of the way, you’re ready for the satisfying part: fitting the new one. This stage is all about precision and testing as you go. A securely fitted lock doesn’t just protect your home; it also operates smoothly for years to come.
The process is pretty much the reverse of removal, but this is where careful alignment is absolutely crucial. Whether you're working with a Euro cylinder or a Mortice lock, the goal is to get every component to fit snugly without being forced.
Installing a Euro cylinder is usually a quick job. First up, pop the key into the new cylinder and give it a slight turn. You just want to retract the cam so it sits flush with the lock's body, exactly like you did during removal.
With the cam aligned, gently slide the new cylinder into the hole in your door. You might need to give it a little wiggle to get it past the internal workings of the handle. Once it’s in place and sitting flush with the escutcheons, it’s time to secure it.
Grab the long retaining screw that came with your new lock. From the edge of the door, thread it through the hole in the faceplate until you feel it catch the screw hole on the cylinder. Tighten it until it's snug, but avoid over-tightening. Cranking it too hard can cause the lock mechanism to bind up and feel stiff.
For a Mortice lock, you’ll start by sliding the main lock body into the cavity, or 'mortice', in the door's edge. Double-check it’s the right way up—the deadbolt should be positioned to lock towards the door frame.
Next, line up the screw holes on the lock's faceplate with the holes in the door. Insert and tighten the two faceplate screws to hold the lock body firmly in place.
With the main body secure, you can re-attach the door handles and escutcheons. Just pass the spindle through the square hole in the lock body, attach the handles on either side, and secure them with their screws.
The UK's lock and hinge manufacturing industry, valued at around £1.0 billion, is a testament to the importance of quality hardware. This sector has seen steady growth, reflecting a continuous demand for reliable security products in both new builds and home upgrades. This sustained demand ensures that high-quality, British-standard locks are readily available for your projects. You can discover more insights about the UK locks market and its economic impact on futuremarketinsights.com.
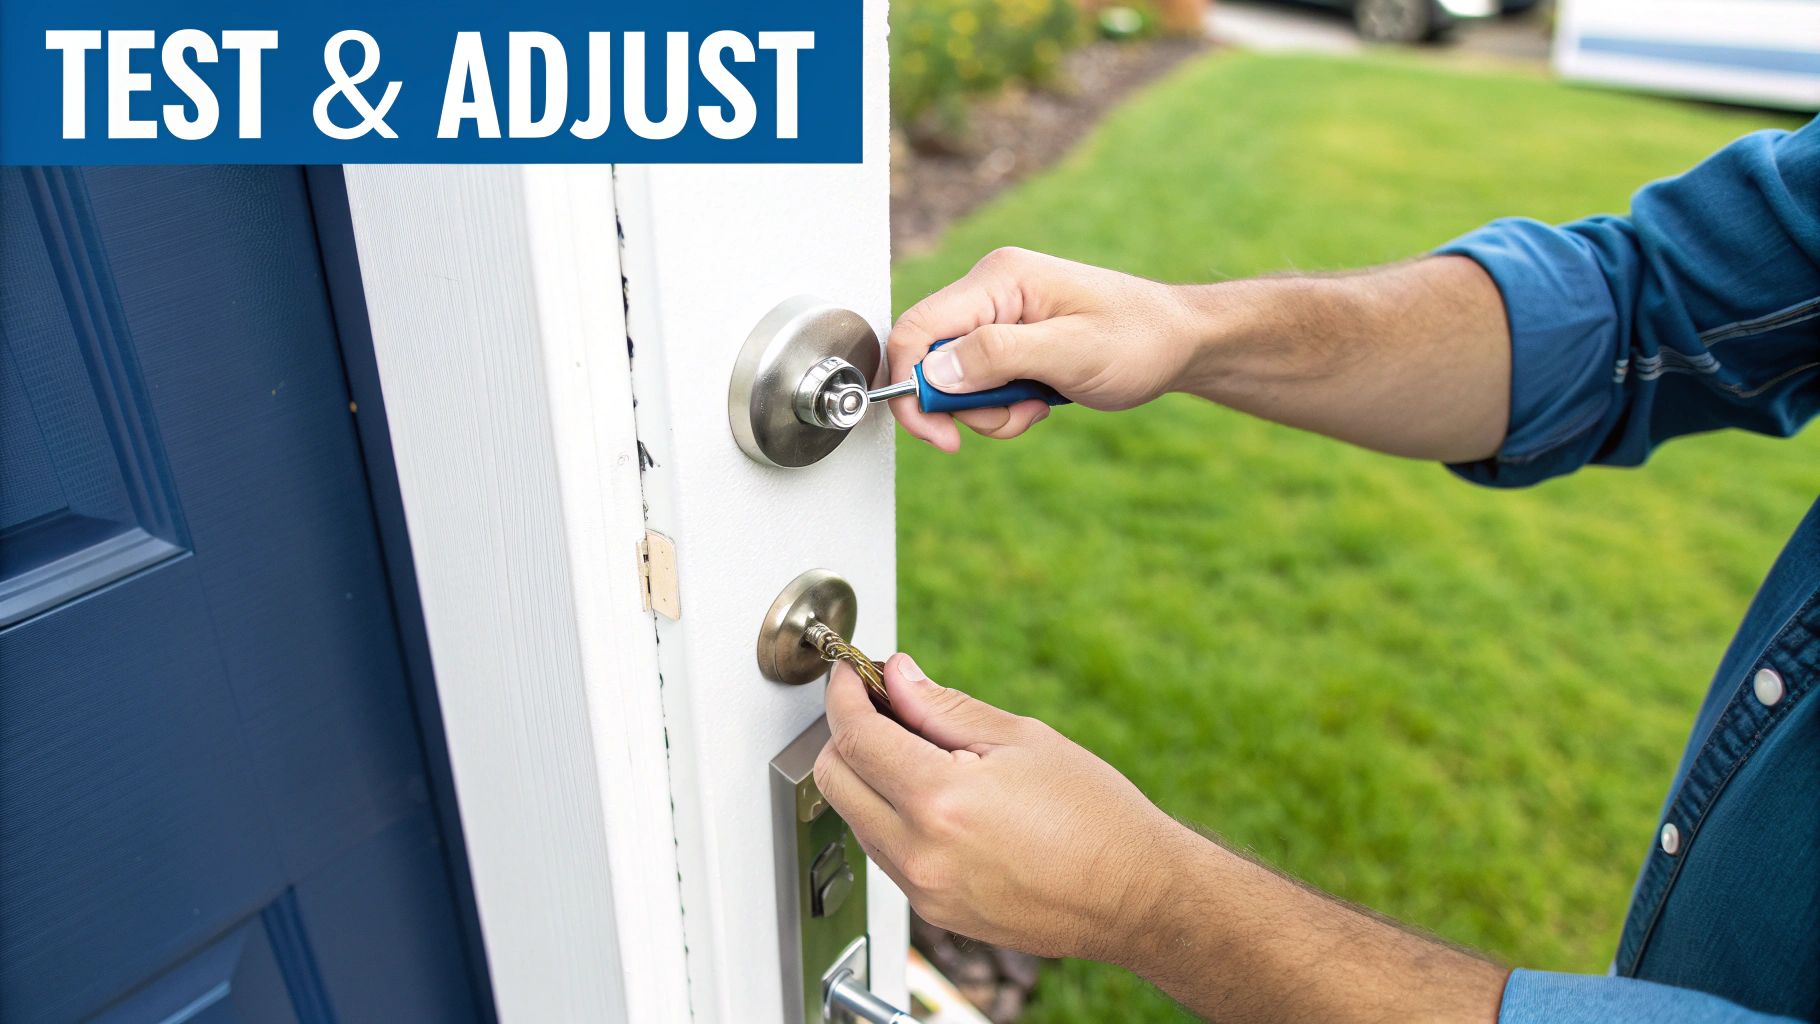
Never, ever consider the job finished until you’ve thoroughly tested the lock's operation. This simple checking process saves you from the nightmare of discovering a problem only after you've shut the door.
A lock that works perfectly with the door open may jam when it's closed due to misalignment. Always test in both states to confirm a successful installation.
Follow this simple testing sequence:
If you feel any stiffness, try slightly loosening the handle or retaining screws. Often, a tiny quarter-turn is all that's needed to relieve the pressure and let the mechanism move freely again.
Even after you’ve successfully fitted your new lock, a few questions might pop into your head. It’s completely normal. Getting to grips with the finer points of lock changing is what keeps your home secure and your hardware in great shape for years to come.
So, let's run through some of the most common queries we hear from homeowners.
There's no hard-and-fast expiry date on a lock, but there are definitely times when changing them is non-negotiable. The moment you move into a new place, changing the locks should be top of your list. You just never know who might still have a key from the previous owners.
The same goes if your keys are lost or stolen, or after a break-in. Don't hesitate – change them immediately.
As for general wear and tear, a good rule of thumb is to think about an upgrade every 7 to 10 years. If your lock is getting stiff, tricky to turn, or just feels a bit worn out, it's time. This is also the perfect chance to upgrade to a newer model that meets current British Standards, like BS 3621, for some serious peace of mind.
Absolutely. Rekeying is a smart little trick where a locksmith changes the internal pins of the lock cylinder to work with a new key. The best part? All the original hardware—the handle, the bolt, everything—stays right where it is. If your lock is already a high-quality one and is in good nick, this can be a much cheaper option.
It’s an ideal solution if you've lost a key but don't want the hassle or expense of replacing the whole unit.
Just bear in mind, rekeying is a fiddly job that’s best left to a professional. And if your current lock is old, showing its age, or doesn't meet modern security standards, a full replacement is always the smarter, safer bet.
When you’re browsing for locks in the UK, you’ll see the BS 3621 kitemark everywhere. Think of it as a badge of honour. It certifies that the lock has been put through its paces by independent testers, standing up to common burglary techniques like drilling and picking.
A lot of home insurance providers in the UK actually insist that external door locks meet this standard. Having a BS 3621-compliant lock can sometimes even knock a bit off your insurance premiums because it shows you’re serious about security.
So, when you’re buying a new mortice deadlock or a nightlatch, always look for that British Kitemark on the box and on the faceplate of the lock itself. It’s your guarantee that you’re fitting a top-quality, insurance-approved lock that offers real protection.
Hands down, the biggest DIY blunder we see is buying the wrong size lock, especially when it comes to Euro cylinders. If the cylinder sticks out more than 3-5mm from the handle, it’s basically an open invitation for burglars to use a technique called "lock snapping." It’s a huge security risk.
It is absolutely vital to measure your old cylinder properly—from the central screw hole to each end—before you even think about buying a replacement.
Another classic slip-up is over-tightening the screws. It’s tempting to really crank them down, but too much force can bend the lock mechanism or even damage the door itself. The result? A lock that’s stiff and a nightmare to use. Just tighten the screws until they’re snug, but never force them.
For all your hardware needs, from high-security locks to the perfect finishing touches for your home, Neasden Hardware has you covered. With over thirty years of experience and a vast range of products available for next-day delivery, we provide the tools and expertise to help you get the job done right. Explore our full collection at https://neasdenhardware.co.uk.