Order Online
- Straight to your door!
Straight to your door


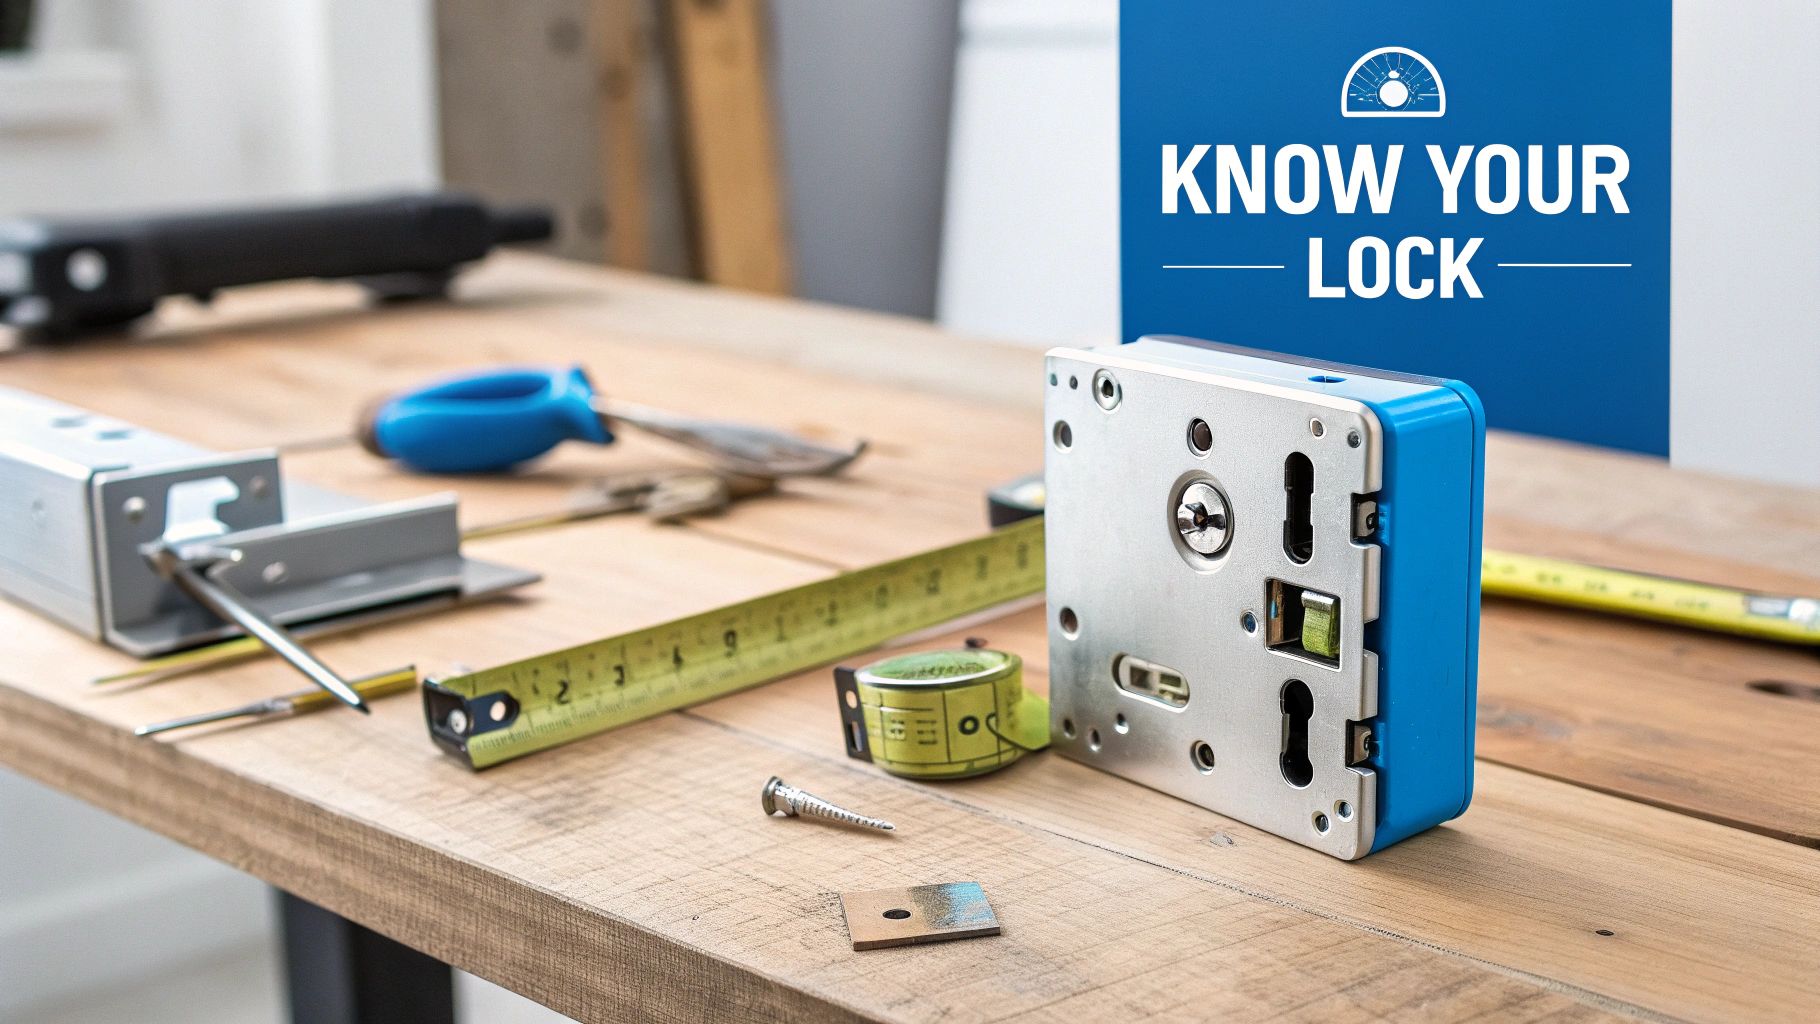
Fitting a mortice lock is all about precision. You'll be marking up the door, cutting out a pocket (the mortice) in the edge, setting the lock body inside, and then fitting the matching strike plate to the door frame. The real secret to getting it right is accurate measuring and careful chiselling – that’s what ensures the lock sits perfectly flush and works without a hitch.
Before you pick up a single tool, it’s worth getting your head around the basics of how to install door hardware. A mortice lock is a classic for timber doors, and for good reason. It’s known for its strength because the main body is sunk deep inside the wood, not just screwed to the surface. This simple fact makes it worlds tougher to force open than a standard rim lock.
The world of mortice locks might seem a bit daunting at first, but it really just boils down to a few key types. Knowing the difference will save you a frustrating trip back to the hardware shop with the wrong bit of kit.
Getting familiar with the lingo makes the whole job a lot less intimidating. When you unbox your new lock, you'll find three main parts you need to know:
Not all mortice locks do the same job. The two you’ll come across most often are sash locks and deadlocks. A sash lock has both a key-operated bolt for security and a spring-loaded latch that works with a set of door handles. It’s the perfect choice for a back door or an internal office door where you want the convenience of just closing it behind you.
A deadlock, on the other hand, is purely about security. It only has a key-operated bolt, with no latch or handle mechanism. This makes it a popular choice for front doors, often paired with a separate night latch for everyday comings and goings. For a deeper dive into different lock mechanisms, our guide on how to install door locks has some great insights.
Here’s a quick comparison to help you choose the right mortice lock based on your security needs and door type.
| Lock Type | Typical Use | Security Level | Insurance Approved (BS3621) |
|---|---|---|---|
| 5-Lever Sashlock | External doors (back, side) | High | Yes |
| 5-Lever Deadlock | External doors (front) | High | Yes |
| 3-Lever Sashlock | Internal doors (bedrooms, offices) | Medium | No |
| 3-Lever Deadlock | Internal doors (sheds, studies) | Medium | No |
| Bathroom Lock | Bathroom/WC doors | Low (privacy only) | No |
Choosing the right lock isn't just about function; for external doors, it's often a requirement.
When it comes to your external doors, insurance compliance is the single most important factor. Most UK home insurance policies insist that final exit doors are fitted with locks that meet the BS3621 standard. This stamp of approval means the lock has been put through its paces and tested against common break-in methods. You can spot one by the British Standard Kitemark stamped right on the faceplate.
A BS3621 lock will almost always have at least five levers, a hardened steel plate to stop drills, and a bolt that throws further into the frame. A 3-lever lock is absolutely fine for an internal door, but putting one on an external door could void your home insurance policy.
The numbers really back this up. In 2022, a huge 60% of all residential lock installations in the UK involved mortice locks. And as of 2023, an overwhelming 85% of these are BS3621 certified, which just goes to show how focused the industry is on meeting those crucial insurance standards. You can find more data on lock fitting trends from industry sources like Keytek™.
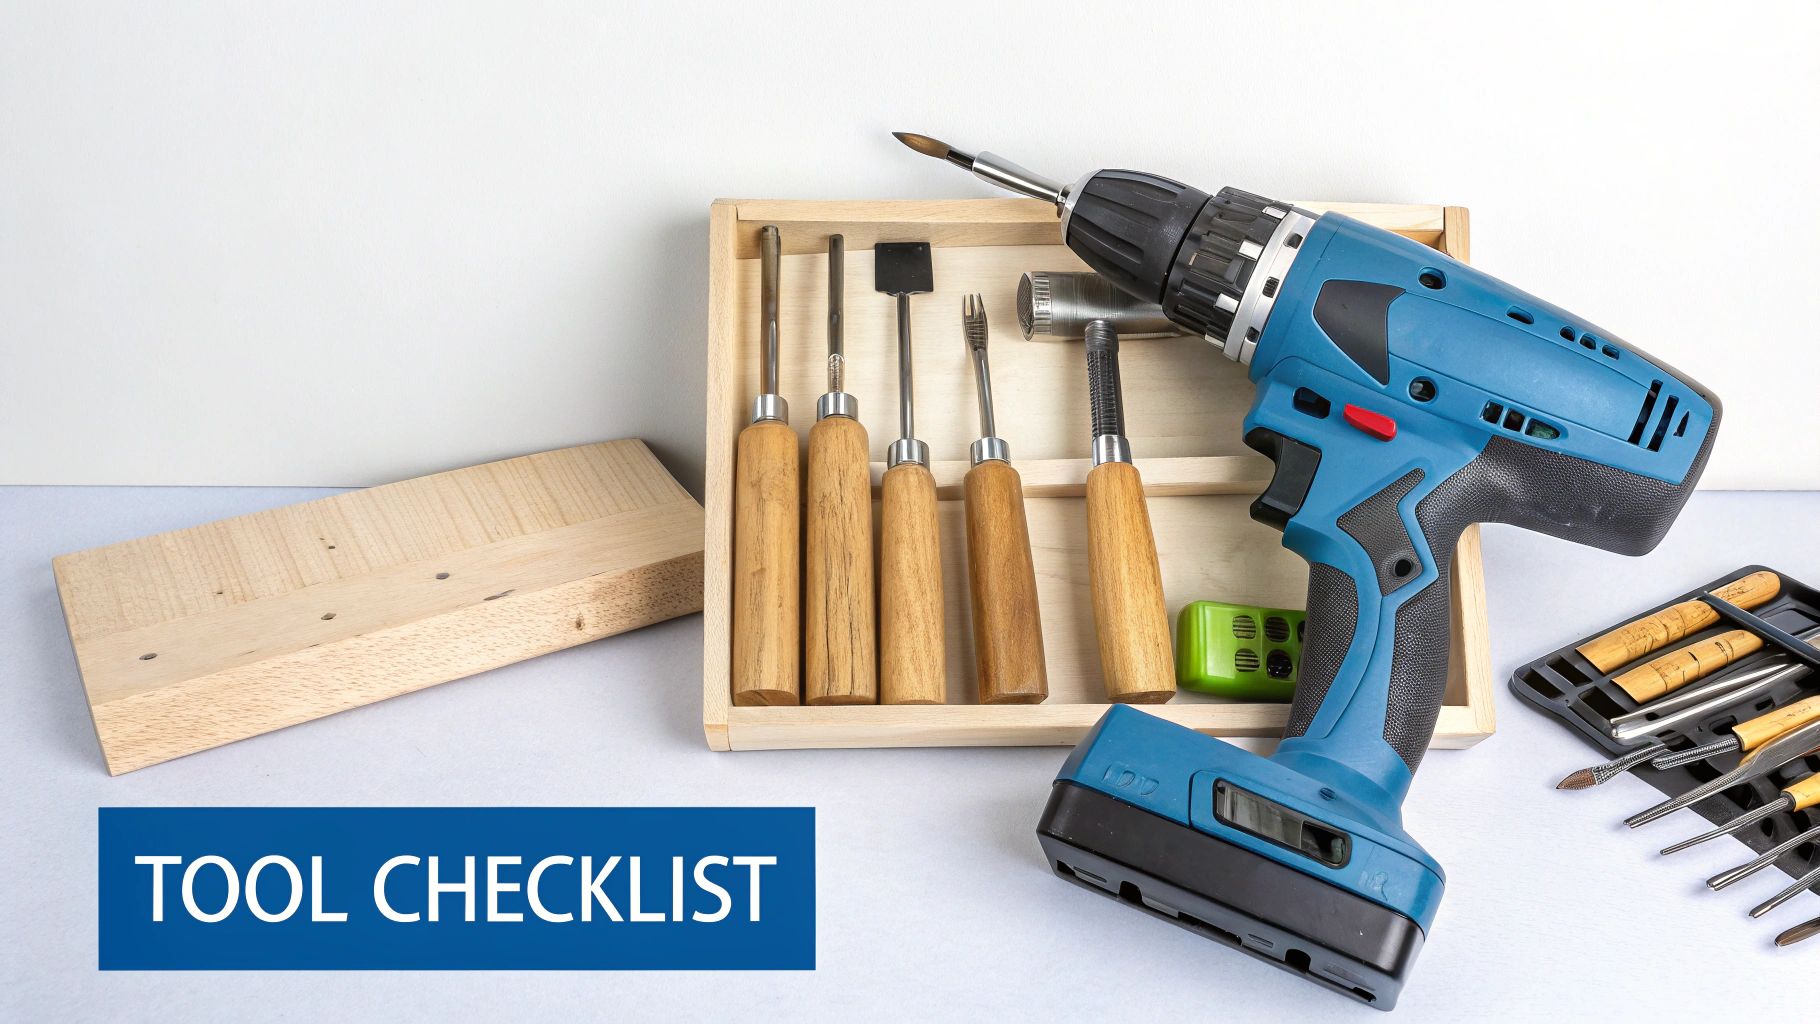
A clean, professional mortice lock installation is built on a foundation of good prep work. Before you make a single mark or cut, taking the time to gather the right equipment and set up your workspace properly will make the entire process smoother and help you sidestep common pitfalls. The right tools don't just make the job easier; they make it safer and more accurate.
Think of it like cooking a meal – having all your ingredients ready means you can focus on the technique. Rushing to find a specific chisel midway through is a recipe for mistakes. As you get set up, always keep in mind the importance of prioritising safety during any door installation to prevent any accidents.
Having the correct tools to hand is non-negotiable. While you can get by with the absolute basics, a few specialist items can elevate your work from acceptable to flawless. Here’s a practical checklist of what you'll need.
For those fitting a standard internal lock, a good quality 3 Lever Mortice Sashlock is often a perfect choice, balancing security with everyday convenience.
With your tools organised, it’s time to prepare the door itself. A stable work area is vital for precision. If you can, it’s much easier to take the door off its hinges and lay it on its side across a pair of trestles or a workbench.
This gives you a solid, horizontal surface to work on, allowing you to apply pressure evenly when drilling and chiselling. If you do this, pop a blanket or dust sheet underneath to protect the door's finish from any accidental scratches.
Pro Tip: If you can't remove the door, make sure it's securely chocked open with wedges. This stops it from swinging back and forth while you're trying to make precise cuts into its edge.
For anyone planning to fit more than one mortice lock, or for those who simply want a guaranteed perfect result, investing in a morticing jig is a seriously wise move. This clever device clamps onto the door and guides your drill or router, ensuring the mortice cavity is cut perfectly straight and to the exact depth required.
While it's an extra expense, a jig virtually eliminates the risk of the mortice being cut crooked or too wide – two of the most common DIY mistakes. It transforms a challenging task into a much simpler, repeatable process.
When you're fitting a mortice lock, precision isn't just a nice-to-have; it's everything. This isn't like other DIY jobs where being a few millimetres out is no big deal. Get your measurements wrong here, and you're looking at a wobbly lock, a key that grinds every time you turn it, or worse, a permanently damaged door.
The old carpenter's saying, "measure twice, cut once," has never been more true. This first stage of marking out is where the success of your entire project is decided. Spending an extra five minutes now to double-check every line will save you hours of headaches later on.
First things first, you need to decide where the lock is going to live. The standard height for a door handle or keyhole is usually around one metre (1000mm) from the floor. This just feels right and lines up with most other door furniture you'll come across.
Once you’ve got your height, mark it clearly on the edge of the door with a sharp pencil. This is your main reference point. Now, you can hold the lock body against the door's edge, line up its centre with your mark, and trace the top and bottom of the lock case. These two horizontal lines now define the vertical space for the mortice you’re about to cut.
Pro Tip: For the cleanest, sharpest lines, ditch the pencil and use a marking knife instead. A knife actually scores the wood fibres, creating a perfect, razor-thin channel for your chisel to sit in. This stops it from slipping and dramatically reduces the chances of the wood splitting.
With the height sorted, it's time to mark the thickness of the mortice. The goal here is a perfectly centred cavity, leaving an equal amount of timber on both sides of the lock. This is what gives the fitting its strength.
A marking gauge is the best tool for this job. Set the gauge to exactly half the thickness of your door, and then scribe a line right down the centre of the door's edge, running between your top and bottom height marks. This gives you a dead-centre guideline for all your drilling and chiselling.
Next, you need to mark out the actual width of the mortice.
Those two outer lines now give you the perfect outline of the wood you need to remove. This careful prep work is what ensures the lock body will have a snug, secure fit when you're done.
Once the edge is marked up, you need to get those measurements onto the face of the door. These marks are for drilling the holes for the keyhole and, if it's a sash lock, the handle spindle. This is where a try square becomes indispensable, making sure every line you draw is perfectly square to the door's edge.
Hold your try square firmly against the door edge and extend the top and bottom mortice lines a little way across the face. Now, you need to mark the centre point for the keyhole and spindle. This measurement is called the backset – it's the distance from the edge of the door to the centre of the keyhole.
Place the lock body flat against the face of the door, lining it up with your height marks. Carefully mark the exact centre points for the keyhole and the handle spindle. These are your drilling targets. Getting these spots absolutely right is critical for a smooth-turning key and a handle that sits perfectly level.
With your door perfectly marked up, it’s time to get hands-on and cut the mortice. This is where patience and a steady hand really pay off. You’re essentially carving out a snug, secure home for the lock body by carefully removing just the right amount of timber.
Getting the positioning, marking, and transferring of your measurements spot-on is the foundation for a successful fit, as this workflow shows.
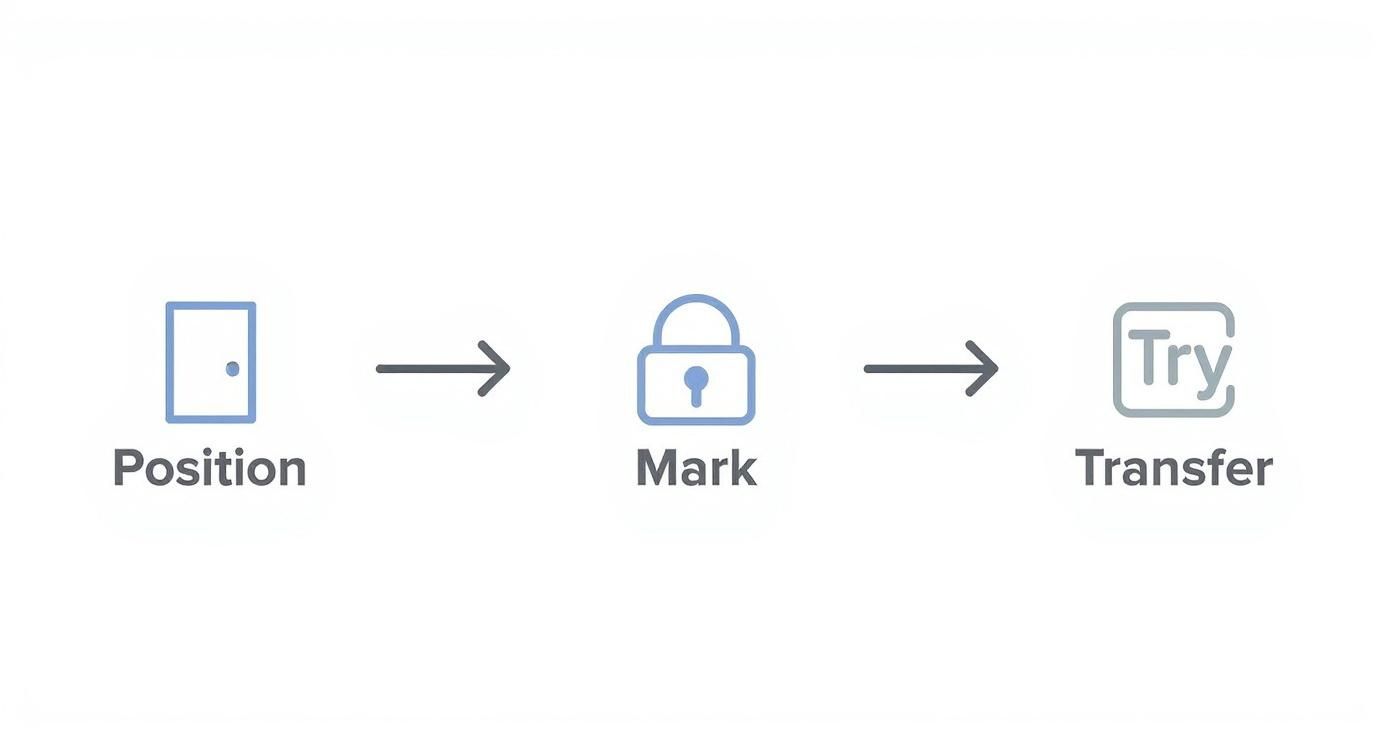
This visual is a great reminder that a clean cut always starts with flawless prep work.
The quickest way to get started is to remove most of the wood with a power drill. Grab a flat wood bit that's just a fraction wider than the thickness of your lock body. For instance, if your lock is 16mm thick, a 17mm bit is perfect. That tiny bit of extra width gives you a little wiggle room and stops the lock from binding later on.
Wrap a piece of masking tape around your drill bit to act as a depth gauge—a simple but effective trick to stop you from drilling too deep. Now, working between your top and bottom height marks and within the lines you scribed earlier, drill a series of overlapping holes. Just take your time and keep the drill perfectly straight, at a right angle to the door's edge.
If you’re fitting several locks or just want absolute precision, a specialised tool can make all the difference. Investing in a professional Trend Lock Jig turns a tricky job into a straightforward, repeatable process, guaranteeing a perfectly straight and clean mortice every single time.
With the bulk of the timber gone, you'll be left with a rough cavity. Now it’s time to switch to the more traditional craft of using a chisel and mallet to clean it up. The goal is to create a clean rectangular hole with smooth, flat sides and square corners.
Start by paring away the remaining wood between the drill holes. Use a sharp wood chisel—ideally one that’s slightly narrower than the mortice itself—and trim the sides. Keep the bevelled edge of the chisel facing into the mortice to avoid accidentally making the hole too wide.
To square off the corners, make a series of gentle cuts, starting from the inside and working your way out. Let the tool do the work; there’s no need for brute force here. A few well-placed taps with the mallet should be enough to slice through the wood fibres cleanly.
Top Tip: When chiselling, always keep your non-dominant hand behind the cutting edge of the tool. This is a non-negotiable safety rule that prevents serious injury if the chisel happens to slip.
Once you think the mortice is ready, it's time for a test fit. Gently slide the lock body into the cavity. It should be a snug fit—not so tight you have to force it, but not so loose that it rattles.
If it feels too tight in certain spots, take note of where it’s binding, pull it out, and carefully shave off a tiny sliver of wood from that area with your chisel. Repeat this until the lock slides in and out smoothly and sits perfectly centred in the door’s edge. A perfect fit here is crucial for the lock's long-term security and function.
With the lock body fitting perfectly, the final step in this stage is to cut a shallow recess for the faceplate. The aim here is to get the faceplate to sit completely flush with the edge of the door for a clean, professional finish.
Slide the lock into its mortice one last time. Hold it firmly in place and, using a very sharp marking knife or a Stanley knife, carefully score a line around the entire perimeter of the faceplate. This gives you a precise outline to work from.
Now, remove the lock. Using your sharp chisel (this time with the bevel facing down), carefully tap along the scored lines to define the edges of the recess. Then, slowly and methodically, chisel out the wood within this outline to a depth that matches the thickness of the faceplate. Work in thin layers to avoid going too deep.
Once you’re done, the lock body should slide in, and its faceplate should sit beautifully flush with the surrounding timber. It’s this attention to detail that really separates a good DIY job from a professional one.
With the lock body sitting snugly in the door, it’s time to shift your focus to the door frame. This is where you’ll fit the strike plate—the metal plate that catches the bolt and holds the door securely shut. A perfectly aligned strike plate is the secret to a lock that turns smoothly. If it’s even slightly off, you’ll find the key is stiff to turn or the door just won’t close properly.
Luckily, there’s a simple trick to nail the alignment first time, without any complicated measurements or guesswork.
First, close the door so it’s nearly shut, leaving just a small gap. Now, turn the key to fully throw the bolt out, letting it press against the door frame.
Grab a sharp pencil and carefully mark the top and bottom of the bolt right onto the frame. These two little lines are your bullseye—they show the exact height for your strike plate.
Next, open the door and use a try square to extend those lines across the face of the door jamb. You’ve now got a foolproof guide. Hold the strike plate against the frame, line it up with your marks, and trace around its outer edge. Don’t forget to mark the inner rectangles where the bolt and latch will pass through.
Just like you did with the faceplate, you want the strike plate to sit completely flush with the frame. This means you need to create two recesses: a shallow one for the plate itself, and a much deeper one for the lock bolt to slide into.
Start with the shallow recess for the plate. Take a sharp chisel and a mallet and carefully tap along the outline you drew. This scores the wood, giving you a clean edge to work from and stops the timber from splitting. From there, it's a case of methodically removing the wood inside the outline until the recess matches the thickness of your strike plate. Go slowly and keep checking the depth as you work.
Expert Tip: To make the deeper housing for the bolt, grab a drill with a flat wood bit that's a touch wider than the bolt. Drill out most of the timber inside the marked area, then just tidy up the edges with your chisel. It’s far quicker and neater than trying to chisel out the whole chunk of wood by hand.
Once you’re done, the strike plate should drop neatly into its recess and sit perfectly flush. Don't screw it in just yet, though. First, we need to get the handles on.
This is the final stretch where it all comes together. It’s time to fit the handles and the keyhole covers, which are known as escutcheons.
With everything fitted, it’s time for a quick test. Turn the handles to check the latch pulls back and springs out smoothly. Use the key to throw the bolt back and forth, making sure there's no grinding or resistance.
Finally, close the door and test the lock against the strike plate. If it all lines up beautifully, go ahead and secure the strike plate to the frame with screws. You should hear a satisfying, solid "click" as the door locks—the sound of a job well done.
Even with the most careful prep, it's not unusual to hit a snag when you first test your newly fitted mortice lock. Don't worry, it happens to the best of us. The most common issues are almost always down to tiny misalignments or a fit that’s just a fraction too tight. Thankfully, they're often easy to fix with a bit of patience.
Fitting a mortice lock is a classic DIY job in the UK, but it’s worth knowing how you stack up against the pros. A skilled locksmith can usually get it done in 1 to 2 hours, while a first-timer will naturally take longer and might run into a few more bumps. Given that these locks are fitted in 9 out of 10 new build homes in England and Wales, it’s a skill worth mastering. If you're curious about professional timings and costs, you can discover more insights about lock fitting services.
Let’s run through some of the usual suspects and how to sort them out.
This is probably the most common frustration. You've done all the hard work, but turning the key feels like a real battle instead of a smooth, satisfying click.
Nine times out of ten, the culprit is a mortice that’s just a little too snug. If the lock body is being squeezed by the timber, it puts pressure on the internal gubbins and causes the levers to bind.
The fix is simple. Take the lock out and use a sharp chisel to carefully shave a tiny sliver of wood from the inside walls of the mortice. You’re just trying to relieve the pressure, not create a loose, rattly fit. Pop the lock back in, test it, and repeat if needed until the key turns without any trouble.
If you've fitted a sash lock, you might find the handle feels stiff or the latch doesn't pull all the way back when you turn it. This problem nearly always points to the spindle connecting the handles.
A correctly fitted lock should operate with minimal effort. If you have to force the key or handle, something isn't right. Pushing through a stiff lock will only cause premature wear and could lead to a complete failure down the line.
You close the door, turn the key, and... thud. The bolt hits the metal strike plate instead of sliding cleanly into its keep. This is usually a tiny misalignment, but it’s incredibly annoying.
To figure out what’s wrong, close the door and throw the bolt so it just touches the frame. Get down at eye level and see exactly where it’s hitting—is it too high, too low, or off to one side?
Once you know, you’ll need to slightly enlarge the hole in the strike plate using a small metal file. File away a small amount from the edge where the bolt is making contact. Test it often as you go, and stop as soon as the bolt slides home without any friction.
For a huge range of mortice locks, tools, and all the ironmongery you need for your next project, look no further than Neasden Hardware. With over 30 years of family-run experience, we provide expert advice and quality products for both trade professionals and DIY enthusiasts. Explore our selection online and get everything you need delivered straight to your door at https://neasdenhardware.co.uk.