Order Online
- Straight to your door!
Straight to your door


Installing your own sliding wardrobe doors is one of those incredibly satisfying DIY jobs. It all comes down to fitting the top and bottom tracks, then hanging and adjusting the doors themselves. The two things that will make or break this project are accurate measurements and making sure the wardrobe opening is properly prepped, level, and plumb.
Before you even think about picking up a drill, getting the setup right is what separates a frustrating weekend from a job well done. This initial groundwork is all about choosing the right doors for your room, taking measurements that are spot on, and getting all your gear together. It's so tempting to rush this part, but believe me, a little patience here guarantees a smooth, professional-looking finish.
The style of door you pick genuinely changes the feel of a room. Here in the UK, sliding doors have become hugely popular, especially as new builds get smaller and we all look for clever, space-saving designs. Mirrored doors, for instance, are a classic for a reason—they double up as a full-length mirror and make small rooms feel bigger and brighter by bouncing light around.
But it’s not just about mirrors. Other popular materials include:
Pro Tip: Think about where the wardrobe is going. If it’s for a dark hallway, mirrored doors can be a game-changer. For a clean, minimalist bedroom, a simple, unadorned melamine finish might be the perfect fit.
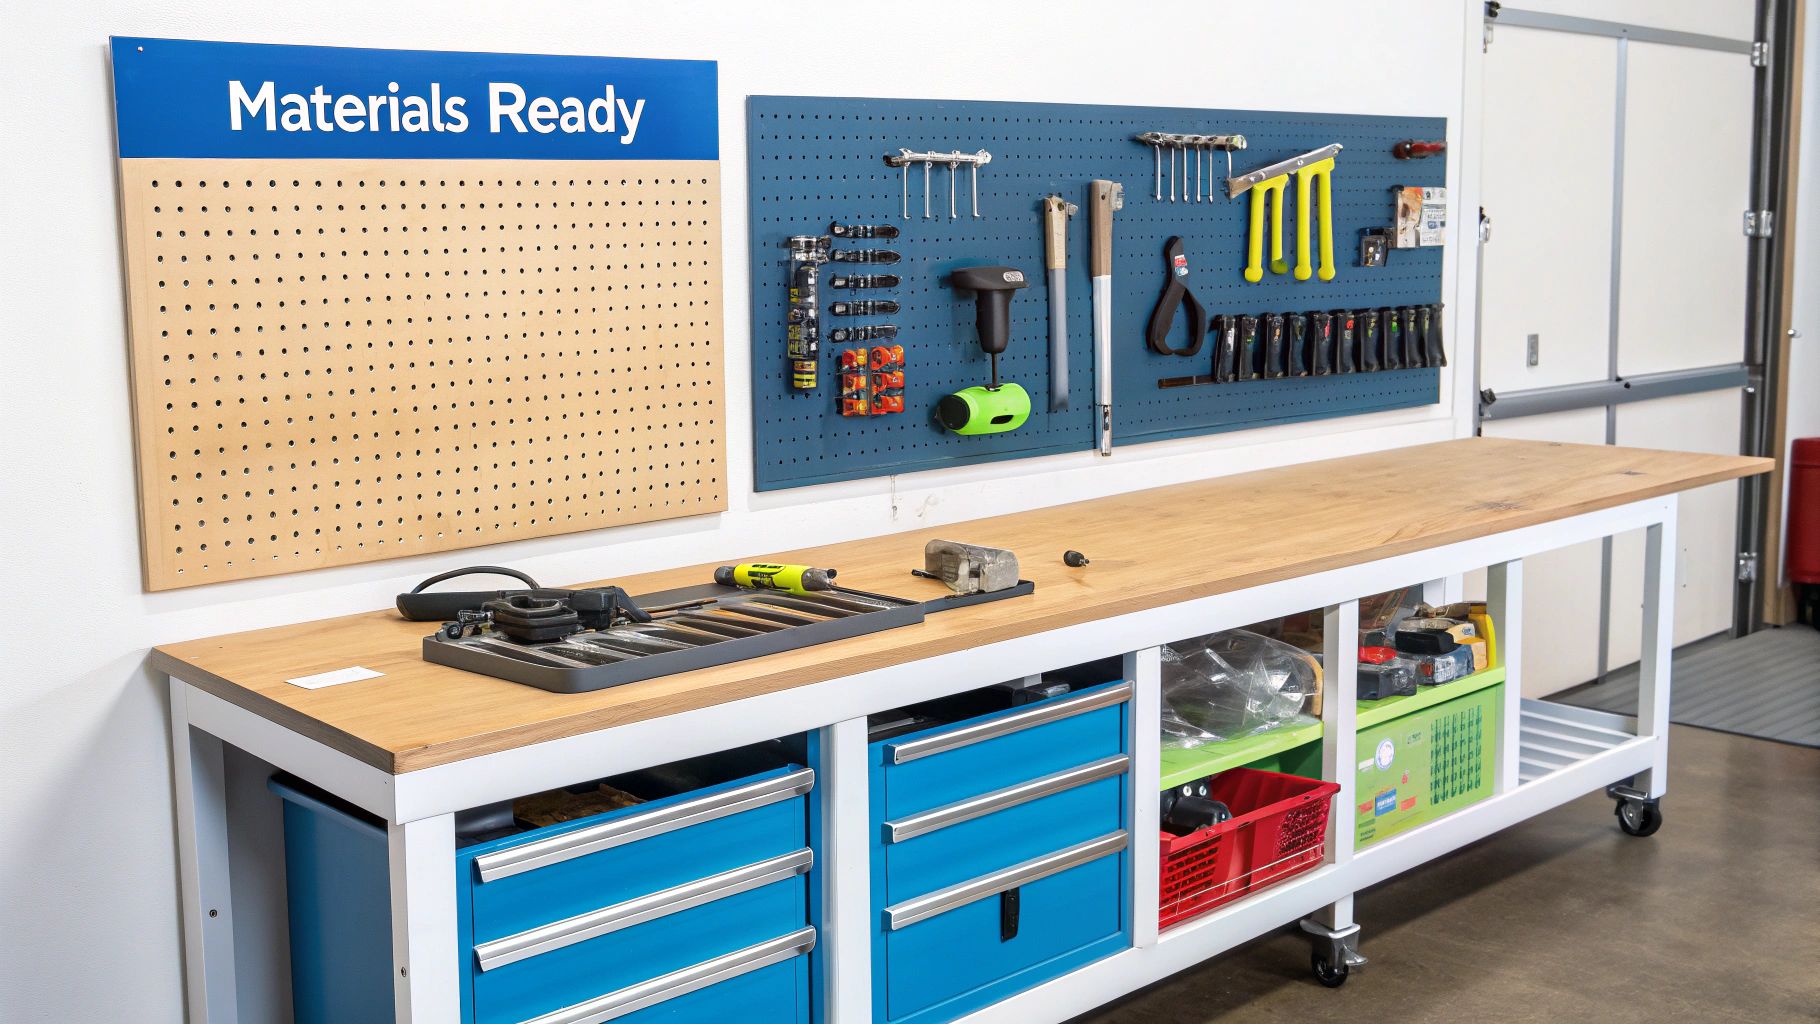
To avoid those annoying mid-project trips to the DIY shop, it’s always a good idea to lay everything out before you start. The table below covers the essential tools and prep work you'll need to get everything lined up for a smooth installation.
| Category | Item/Task | Why It's Important |
|---|---|---|
| Measuring & Marking | Quality Tape Measure | Ensures all measurements for tracks and doors are exact. |
| Pencil | For clearly marking cutting lines and drill points. | |
| Spirit Level | Crucial for checking that floors, walls, and tracks are perfectly level. | |
| Plumb Line / Laser Level | Guarantees vertical alignment is spot on, preventing wonky doors. | |
| Tools | Cordless Drill | For drilling pilot holes and driving screws to secure the tracks. |
| Drill & Screwdriver Bits | The correct sizes are needed for the screws and wall plugs you're using. | |
| Preparation | Clear the Area | A tidy workspace reduces trip hazards and makes the job easier. |
| Check the Opening | Ensure the floor is level and walls are plumb before you begin. | |
| Read Instructions | Familiarise yourself with the manufacturer's specific guide for your doors. |
Having these items ready and understanding each step is the foundation of any successful wardrobe build.
You don’t need a workshop full of expensive gear to get this done, just a few key items that will make the job a hundred times easier.
Your basic toolkit should definitely include:
Getting prepared like this is a core part of any flat-pack or wardrobe project. If you're building the entire wardrobe frame from scratch before fitting the doors, you might find this general wardrobe assembly guide useful for the bigger picture. Taking a moment to organise your tools and understand the whole job just gives you confidence and ensures a much better result.
The secret to doors that glide effortlessly isn't just in the doors themselves—it’s in the opening you’re fitting them into. This is where a little bit of prep work really pays off. Even a few millimetres out of alignment can cause doors to stick, scrape, or hang awkwardly down the line. Getting this stage right is the foundation for the entire project.
Before you even think about installing the tracks, you need to make sure your wardrobe opening is plumb, level, and square. Many UK homes, especially older properties, come with their own charming quirks, like bowed walls and sloping floors. Trust me, ignoring these is a recipe for frustration later on.
Grab your spirit level to get started. First, place it on the floor of the opening to see if it’s perfectly level. Next, hold it vertically against both side walls (the jambs) to check if they are plumb—meaning perfectly vertical.
To check if the opening is square, measure the diagonals from corner to corner. The two measurements should be identical. If they’re not, your opening isn't a perfect square. Don't panic if it's slightly off; most aren't.
Many DIYers rush this stage, but making small adjustments now delivers a huge impact later. A solid, true foundation is non-negotiable for a professional finish that lasts.
If your walls or floor are slightly out of kilter, you have a few good options for creating a true surface. The main goal here is to build a reliable frame for the tracks to attach to.
Taking the time to build this framework guarantees your tracks will be perfectly aligned, leading to doors that operate as smoothly as they should. And while you’re focused on wardrobe doors, it can be interesting to see how others approach similar large openings. For instance, looking into the best blinds for sliding glass doors might offer some useful ideas on space management and aesthetics. Ultimately, this preparation ensures your installation is built on a solid base from the ground up.
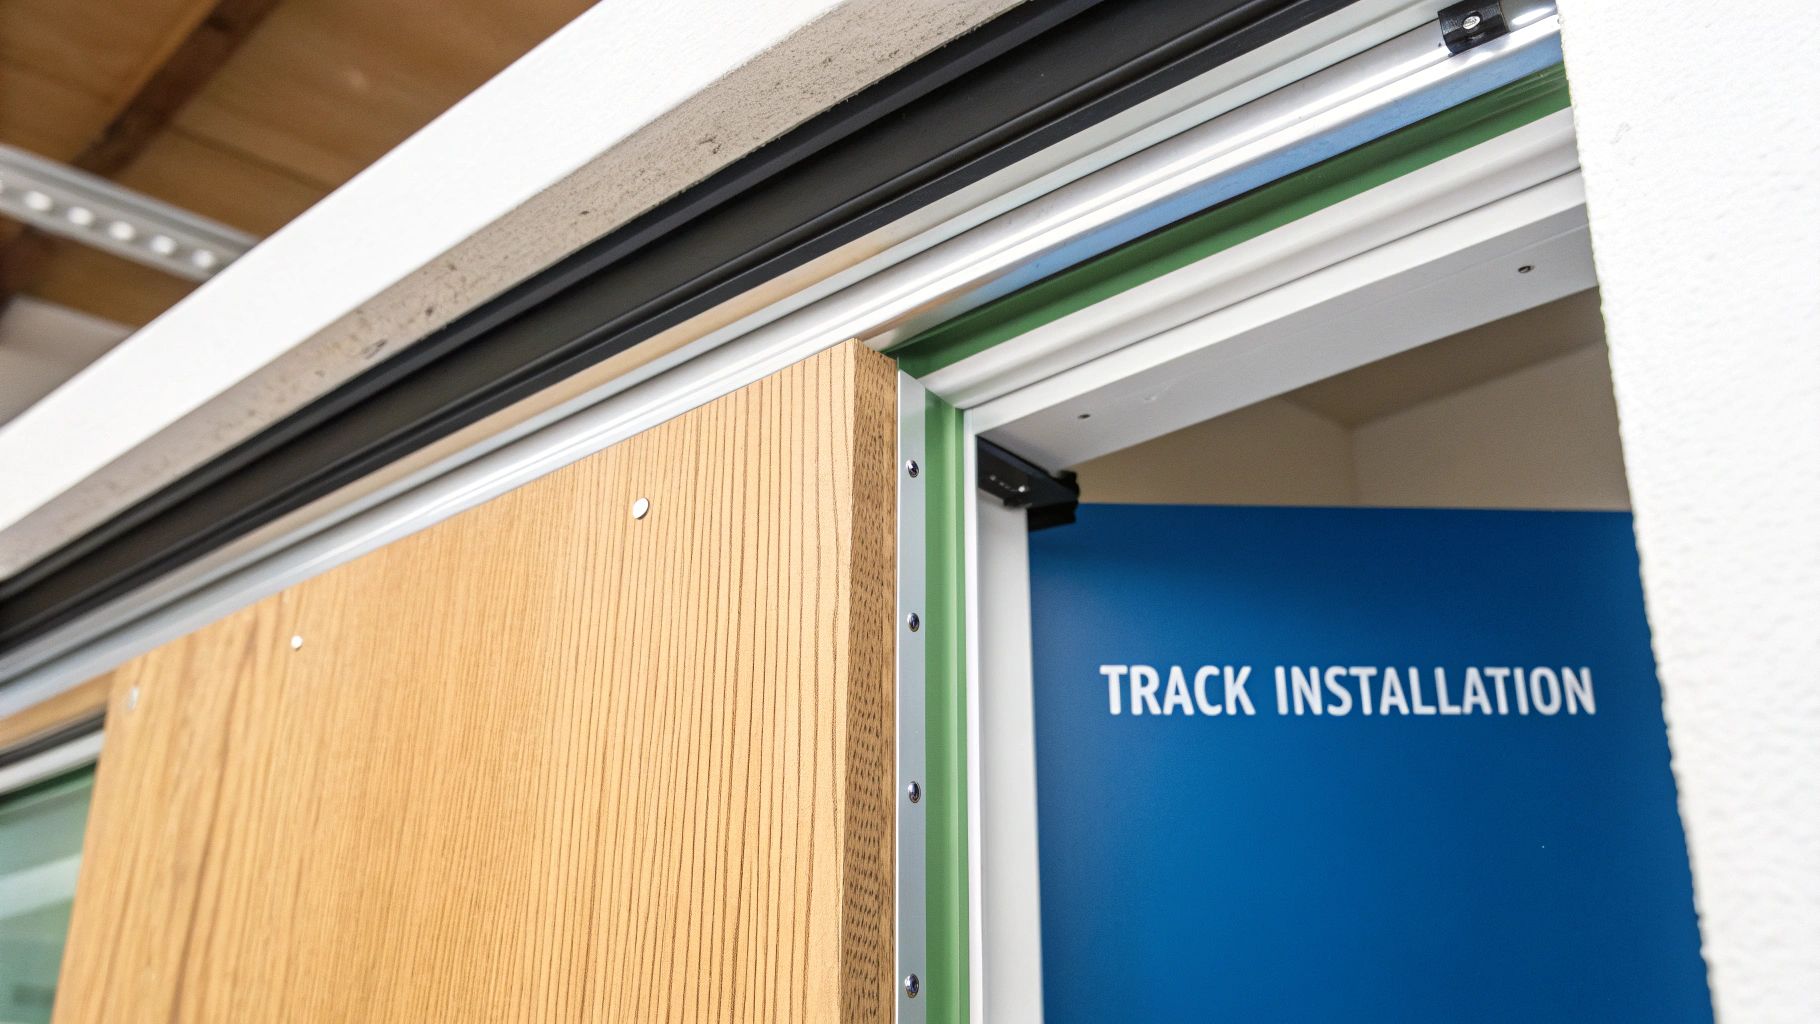
Now that your wardrobe opening is prepped and ready, it's time to fit the hardware that makes everything glide. Getting the top and bottom tracks installed with precision is arguably the most crucial part of the whole job. This framework is what holds the doors, so a little extra care here will pay off for years to come.
First up is the top track. Position it snugly against the top of the opening, making sure it’s pushed right back against the wall or frame. Grab a pencil and mark your screw positions through the pre-drilled holes in the track. If you’re lucky enough to be fixing into a timber lintel, a small pilot hole is all you need before screwing it directly in.
This process highlights the core steps, but a visual guide can help clarify the sequence for preparing and fitting.
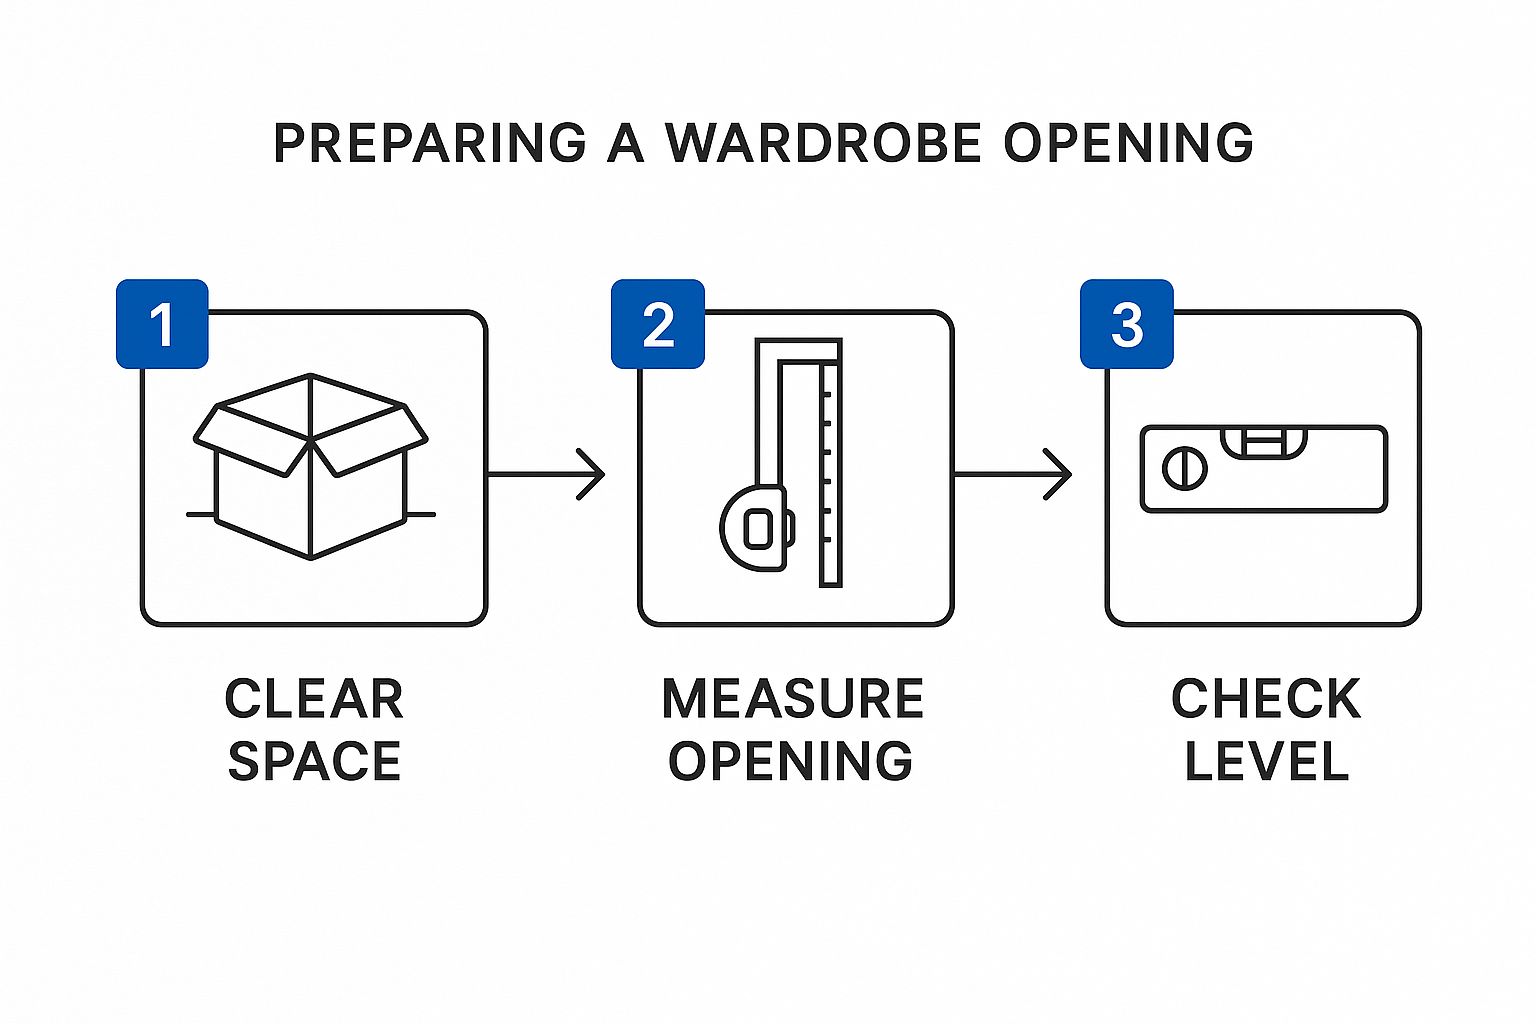
This simple flow—clearing your space, measuring accurately, and checking for level—forms the non-negotiable groundwork for a successful installation.
This next part is critical: the bottom track must be perfectly aligned with the top one. To nail this, you’ll need a plumb line or a long spirit level held vertically against the top track. Starting from one end, drop the plumb line to the floor and make a mark. Do the same thing at the other end.
Those two little marks now give you the exact line where the front edge of your bottom track needs to sit. Lay the track down along this line and, once again, mark your drilling points.
The alignment between the top and bottom tracks is everything. If they are even slightly out of sync, your doors won't hang straight, leading to scraping, sticking, or ugly, uneven gaps. Take your time with the plumb line—it’s a simple tool that guarantees professional results.
The type of wall or floor you're drilling into will dictate the fixings you need. This is a detail that many people overlook, but it's vital for a secure fit.
The installation of sliding wardrobe doors in the UK often involves these detailed steps, which affect both the time and cost of the project. A professional fitter typically takes between 2 to 4 hours to install a single unit, with the complexity varying based on the door materials.
With your tracks securely in place, you have a robust, perfectly aligned framework. For extra insight into the structural side of things, particularly for doors that use tracks, this sliding glass door installation guidance offers some very relevant information. If you're ready to choose your hardware, our SlideLite 50 Sliding Wardrobe Kit contains all the essential components for a smooth installation.
Right, this is the moment you’ve been waiting for – getting the doors on the tracks and seeing your vision finally come together. Lifting these doors into place can feel a bit awkward, but it's much simpler than it looks. I’d always recommend grabbing an extra pair of hands for this part; it just makes things safer and a whole lot easier.
The trick is to angle the door and carefully slot the top rollers into the upper track first. Once they’re sitting nicely, you can gently lift and guide the bottom wheels until they drop into the bottom track. You'll usually feel and hear a satisfying click as they settle into place.
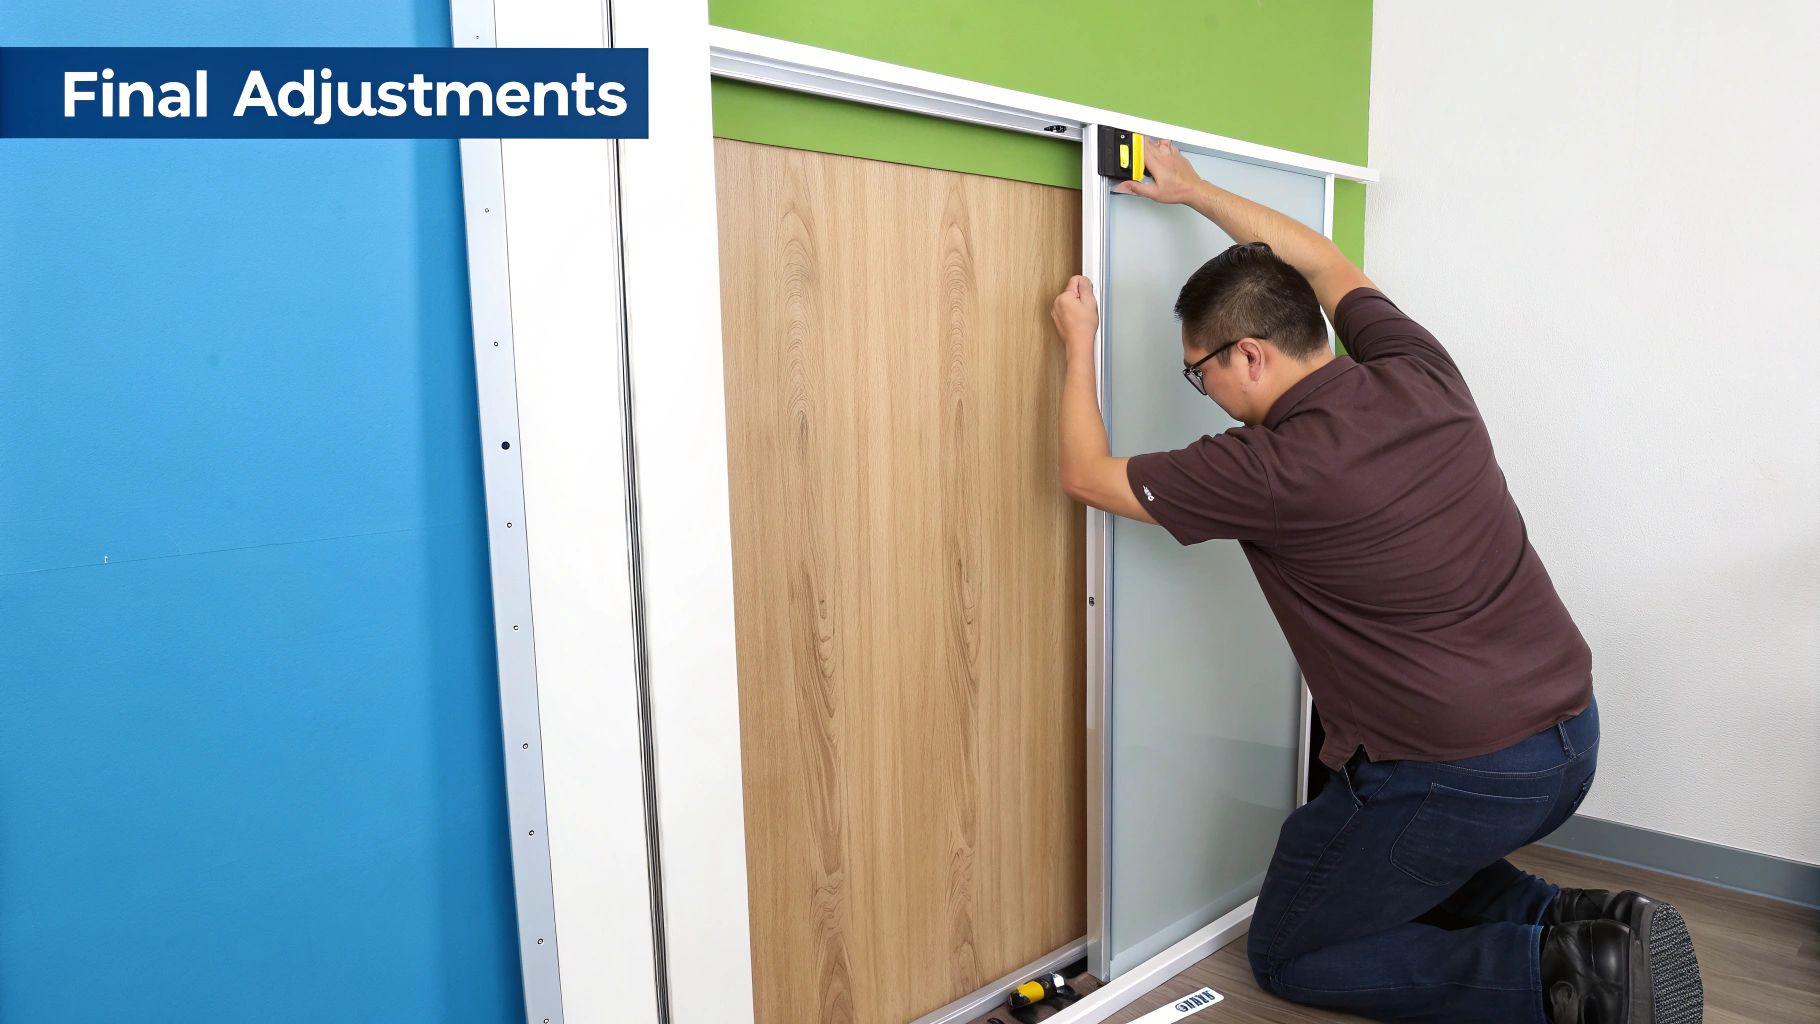
Getting the doors hung is one thing, but the real secret to a professional-looking job is in the final adjustments. Most sliding door systems have small adjustment screws on the wheels or rollers. These are your best friends for tweaking the height and angle, making sure each door hangs perfectly straight and closes flush with the frame.
Your main goal here is to get even, consistent gaps all around. If a door is even slightly lower on one side, you'll end up with a noticeable tapered gap at the top or bottom. Grab a spirit level and hold it against the side of the door to check if it's plumb. From there, make tiny, incremental turns to the roller screws, checking with the level after each adjustment until it’s spot on.
Key Takeaway: Patience is everything during this stage. Small, half-turn adjustments are usually all it takes. It's easy to overdo it, so the best approach is to tweak a little, check your work, and then tweak again.
With the doors hanging perfectly, it’s time for the finishing touches that make a massive difference. Door stoppers, sometimes called positioners, are small but essential bits of kit that fit inside the tracks. They stop the doors from sliding too far and banging into your walls. Just slide them into the track and lock them in place where you want the doors to stop.
If you're looking for an upgrade, a soft-close mechanism is a fantastic addition. This is becoming a really popular feature in modern UK homes. It catches the door in the last few centimetres of travel and pulls it gently shut, adding a touch of quiet luxury. Most are easy to retrofit and well worth it for that high-end feel.
The demand for these features is definitely growing. We're seeing homeowners look for more advanced options, with soft-close tracks now making up about 10-15% of the market. There's also a big shift towards sustainable materials, with eco-friendly boards representing around 20% of new purchases, which can influence installation choices.
Now is a good time to take a look at a quick guide for troubleshooting any common issues you might run into during these final adjustments.
| Problem | Likely Cause | Solution |
|---|---|---|
| Door scrapes the bottom track | The door is hanging too low. | Use the adjustment screws on the bottom rollers to raise the door slightly. Check with a spirit level to ensure it remains plumb. |
| A gap appears at the top or bottom when closed | The door isn't hanging vertically (it's not plumb). | One side is higher than the other. Use the roller adjustment screws to level the door, using a spirit level against the side stile for guidance. |
| Door feels stiff or judders when sliding | Debris in the track or misaligned rollers. | First, check the tracks are completely clean. If the issue persists, ensure both top and bottom rollers are properly seated in their respective tracks. |
| Doors overlap unevenly | Stoppers are not correctly positioned. | Adjust the position of the door stoppers inside the tracks to ensure the doors align perfectly when in their open or closed positions. |
A little patience here goes a long way in achieving that perfect, smooth glide you're after.
Before you down tools, give the doors a final test. Slide them back and forth along the entire length of the tracks. They should move smoothly and quietly, with no scraping, bumping, or catching. This last check makes sure all your hard work pays off with a flawless installation that will last for years.
If you ever need to upgrade or replace parts down the line, browsing a full range of sliding door hardware can give you plenty of options, from new rollers to soft-close dampers.
With your doors gliding smoothly along their tracks, it’s time to tackle the finishing touches. These are the details that take your project from a functional installation to a truly professional-looking piece of fitted furniture.
Most sliding door kits include decorative cover strips or pelmets designed to hide the top track. This simple addition gives the wardrobe a much cleaner, more integrated look. They usually just clip on or fix in place with a few small screws.
If you need to cut these trims to size for a perfect fit, be careful. Using the wrong tool can easily lead to a splintered, messy edge. I’ve found that a specialised trim cutter with a sharp blade gives a much neater finish than a standard saw.
Long-term care is what keeps your doors gliding like new, and thankfully, it’s incredibly straightforward. The number one enemy of smooth sliding doors is debris in the bottom track. Over time, it’s amazing how much dust, hair, and grit can accumulate down there, blocking the wheels.
The most effective thing you can do is give the bottom track a quick vacuum every few weeks. It only takes a minute. For a more thorough clean, grab a stiff brush to dislodge any stubborn dirt before you hoover it up. This simple habit prevents unnecessary wear and tear on the rollers and keeps everything running silently.
Keeping the tracks clean is the single most important maintenance task you can do. A two-minute clean every month prevents 90% of common sliding door problems, protecting your investment and saving you from future headaches.
Different door materials need slightly different care to keep them looking their best. Following these simple guidelines will help maintain their appearance for years after installation day.
By adding these small jobs to your regular cleaning routine, you’ll ensure your sliding wardrobe doors continue to function perfectly and look fantastic.
Here are the answers to some of the most common questions we hear from customers tackling a sliding door project. We've pulled together our experience on everything from dealing with tricky floors to deciding when to call in a pro, hopefully helping you solve problems before they even start.
Yes, you absolutely can, but there's a right way to do it. The last thing you want is to fix the bottom track directly onto the carpet pile. It'll feel unstable and will eventually sink as the carpet compresses, causing the doors to jam.
The proper method is to first install a solid, level plinth or baseboard. You'll need to cut the carpet and underlay away, fixing this board securely to the floorboards underneath. Your bottom track then gets screwed onto this solid foundation, giving you a stable base that won't budge.
A good rule of thumb is to aim for an overlap somewhere between 25mm and 50mm. This is just enough to make sure you don't see any annoying gaps between the doors when they're closed, keeping your wardrobe's contents neatly hidden away.
That said, the exact amount can vary depending on the system you've bought and the width of the door stiles (the vertical frames). Always have a look at the manufacturer’s instructions first; they'll give you the perfect overlap measurement for their specific design.
This really boils down to your own DIY confidence and how straightforward the job is. If you're working with a nice, square, and level opening, then it's a very achievable project for a competent handyperson.
However, you might want to consider hiring a professional if:
While DIY installation is definitely possible, we often recommend professional fitting for a truly precise finish. An expert can quickly troubleshoot common issues like uneven floors, ensuring your tracks are perfectly aligned for smooth, long-lasting operation from day one.
An uneven floor is probably the most common headache we see, especially in older British homes. The solution isn't to force the track to follow the slope of the floor. Instead, you need to create a perfectly level base for it to sit on.
The best way to do this is by fitting a timber plinth along the bottom of the opening. Get your spirit level out and use packers or shims to get this plinth dead-on level before you secure it to the floor. This gives your bottom track the flat, stable surface it needs for the doors to glide without sticking or scraping.
It's vital to know if your walls are perfectly vertical, or "plumb," as we say in the trade. The simplest way to check is with a good old spirit level. Just hold it vertically against the side walls inside your wardrobe opening.
If the bubble sits right in the centre, your wall is plumb. If it’s off to one side, you'll need to fit liners or a frame. You can then pack behind them with shims to create a true vertical surface for the doors to close neatly against. For more answers to specific queries, you can always explore our own frequently asked questions page for some extra guidance.