Order Online
- Straight to your door!
Straight to your door


Getting a professional-looking paint job has little to do with the final coat and everything to do with the groundwork you lay beforehand. The prep stage is where you solve problems before they even happen, guaranteeing the paint adheres properly and stands the test of time.
Properly prepping wood for painting boils down to three key stages: cleaning the surface to remove grime, sanding it to create grip, and applying a suitable primer to seal the wood. Skipping these foundational steps is the number one reason I see paint jobs fail with chipping, peeling, and a blotchy appearance down the line.

Think of this guide as your roadmap for transforming any wooden item, from tired old furniture to fresh skirting boards. We'll break down the essential stages, explaining exactly why cleaning, sanding, and priming are completely non-negotiable for a finish that lasts.
Before you even think about picking up a brush, a little organisation goes a long way. The goal here is to create a workspace that’s both efficient and safe, preventing mishaps and ensuring a much better result. As you get started, it's worth considering the overall impact on your home, including understanding indoor air quality, as dust and fumes can be significant factors.
Your setup should include:
Not all wood is created equal, and your preparation strategy has to adapt accordingly. The steps you’d take for a piece of raw, untreated pine are worlds away from what’s needed for a chest of drawers that’s been varnished and painted multiple times over the decades.
A flawless finish is born from meticulous preparation, not expensive paint. The time you invest in cleaning, sanding, and priming will pay dividends in the durability and appearance of your final product.
We'll dive into these distinctions in more detail, but the key is to first assess what you're working with. A previously painted surface needs stripping or some intensive sanding to get rid of the old layer, while raw wood needs sealing to stop it from soaking up paint like a sponge. Understanding this difference is the first step toward a successful project. For more practical advice, you can find plenty of great paint and decorating tips to help you get started.
Before you even think about picking up a piece of sandpaper, the wood surface has to be spotlessly clean. Trying to paint over dirt, grease, or grime is a recipe for disaster. It’s like building on a shaky foundation—your paint simply won’t stick properly, and you'll be looking at a peeling, failed finish in no time.
Your first job is to figure out what you’re dealing with. For the general dust and light dirt you’d find on an old piece of furniture or some skirting boards, a simple mix of warm water and a bit of mild detergent is usually all it takes. Just give the surface a good wipe-down with a clean cloth, rinse it with fresh water, and let it dry completely.
Kitchen cabinets, old window frames, or any wood in a high-traffic spot is a different story. These surfaces often have a stubborn, greasy film that normal soap and water just can't shift. This is where sugar soap really earns its keep. It's a mild but incredibly effective alkaline cleaner made specifically to cut through grease and leave you with a chemically clean surface that’s ready for paint.
Mix up the sugar soap following the packet instructions, get it on with a sponge, and give it a gentle scrub. You’ll want to pay extra attention to areas around handles or near the cooker where the grime really builds up. Afterwards, it’s absolutely crucial to rinse the wood thoroughly with clean water. Any leftover cleaner can cause just as many adhesion problems as the grease you just removed.
Any pro will tell you that a proper clean is non-negotiable before sanding or priming. A survey of UK decorators found that over 78% stick to warm water and mild soap for the initial clean, but they'll pull out the stronger stuff for serious grime. Once clean, the wood needs to be bone dry, which can take anywhere from 24 to 48 hours, depending on the humidity. You can get more professional insights on how to prepare surfaces for painting.
If you’re working with a surface that’s buried under layers of old paint or varnish, a quick clean isn't going to cut it. For a truly professional finish, you’ve got to get that old coating off and get back to a solid, stable base. You’ve got three main ways to go about it: chemical strippers, a heat gun, or good old-fashioned mechanical scraping.
The right choice really depends on the job in front of you. Are you tackling one thin layer of varnish on a flat door, or are you up against decades of thick, lumpy gloss paint on an intricate fireplace mantel? Each method has its own pros and cons.
Chemical paint strippers are seriously effective, especially on surfaces with detailed carvings or mouldings where sanding would be a nightmare. They work by using a solvent to dissolve the bond between the paint and the wood, turning the old finish into a soft sludge you can just scrape away.
When to Reach for Chemical Strippers:
But be warned, this stuff is potent and needs to be handled with care. Always work in a well-ventilated space, wear the right PPE (personal protective equipment) like chemical-resistant gloves and safety goggles, and follow the manufacturer’s instructions to the letter.
A heat gun is another go-to for stripping thick layers of paint, particularly from larger, flatter surfaces. The tool heats the paint until it softens and blisters, which allows you to lift it away easily with a scraper.
On the right surface—think a door or a large tabletop—this method can be much quicker than using chemicals. The trick is to keep the gun moving constantly to avoid scorching the wood underneath. Just be aware that this method is useless for varnish; it just turns it into a sticky, gooey mess instead of blistering.
Safety First: A heat gun is a serious fire hazard. The intense heat can ignite dust lurking in cracks or even smoulder away for hours before a fire breaks out. Never use one near flammable materials, and always have a fire extinguisher or a bucket of water within arm's reach.
Sometimes, if you're only dealing with a single, flaky layer of paint, you can get away with just a sharp scraper and a bit of elbow grease. It’s the most labour-intensive method, for sure, but it’s also the least messy in terms of chemicals or fumes.
Once the loose paint is off, a thorough sanding is usually enough to get the surface ready. This approach works best when the existing paint is already in poor condition and practically falling off on its own.
Once you've cleaned and stripped the surface, you’re ready for the most transformative stage: sanding. This isn’t just about making the wood feel smooth. It’s about creating a microscopic texture—what we in the trade call a 'key'—that gives primer and paint something to really grab onto. If you skip this, even the best paint will struggle to adhere, leading to chipping and peeling down the line.
Think of it like trying to write on glossy photo paper with a pencil; the graphite just slides right off. Sanding roughs up that glossy surface just enough, creating the perfect foundation for a strong, lasting bond. It’s the secret to a finish that’s not only beautiful but incredibly durable.
This visual guide breaks down the essential prep work that comes before you even think about sanding.
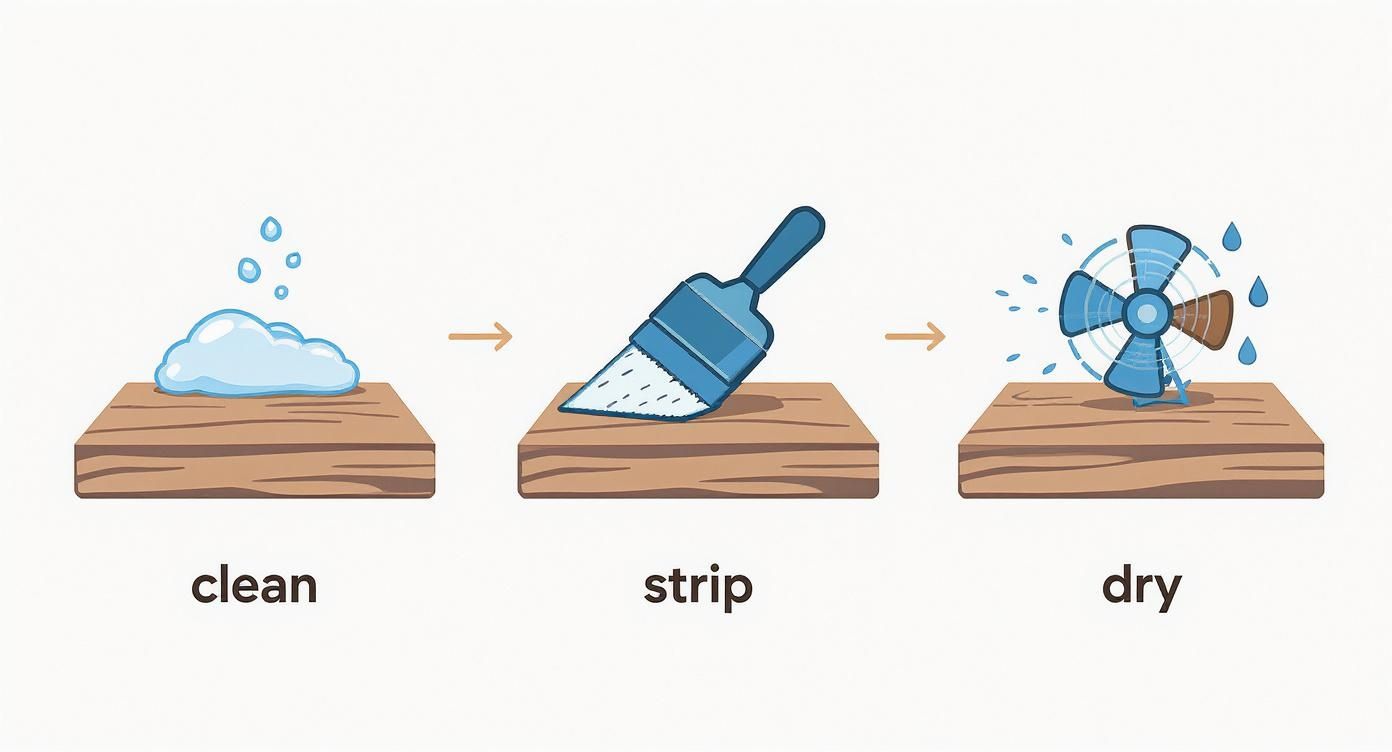
As you can see, a proper clean, strip, and dry cycle is non-negotiable. Only then is the wood truly ready for sanding.
Walking into a hardware shop and facing a wall of sandpaper can be a bit much, but it’s simpler than it looks. Sandpaper is graded by number: a low number means a coarse grit for aggressive removal, while a high number means a fine grit for smoothing.
Getting this choice wrong can create a lot of extra work. Start too fine on a rough surface, and you’ll be sanding for ages. Start too coarse on a decent surface, and you’ll leave deep scratches that are a nightmare to get out.
To help you pick the right tool for the job, here’s a quick guide to sandpaper grits and their best uses.
| Grit Range | Primary Use | Example Application |
|---|---|---|
| 60-80 | Heavy-duty stripping & levelling | Taking off thick, old layers of paint or flattening a very rough, uneven piece of timber. |
| 100-150 | General purpose smoothing | The real workhorse grit. Perfect for the first sanding pass on bare wood or after stripping. |
| 180-220 | Final pre-primer smoothing | Creates that silky-smooth surface that’s ready for primer. Also great for a light scuff between coats. |
| 320+ | Ultra-fine finishing | Used between topcoats of paint or varnish to achieve a flawless, glass-like feel. |
For most projects, you’ll work your way up through the grits. For example, you might start with a 120-grit to smooth the bare wood, then switch to a 220-grit for the final pass before priming. This methodical approach ensures you remove imperfections without creating new ones.
The choice between sanding by hand or grabbing a power tool really comes down to the size and shape of your project. Honestly, most professional jobs use a bit of both.
Manual sanding, with a good old-fashioned sanding block or even just a folded sheet of paper, gives you ultimate control. It's perfect for delicate bits, curved profiles, and sharp furniture edges where a power sander would just chew them up and round them off. For any intricate work, this is your best bet.
But for large, flat surfaces like doors, tabletops, or floorboards, an electric orbital sander is an absolute game-changer. It strips material quickly and evenly, saving you hours of elbow grease and a sore forearm. A quality orbital sander will leave a smooth, swirl-free finish that’s almost impossible to replicate by hand over a big area. For those larger jobs, having a reliable tool and the right accessories, like these excellent Klingspor self-fastening sanding discs, makes all the difference.
How you sand is just as important as what you sand with. The golden rule is simple: always sand in the direction of the wood grain. Go against the grain, and you’ll tear the wood fibres, leaving fine scratches that will stick out like a sore thumb once the paint goes on.
Use light, even pressure. Let the sandpaper do the work—pushing too hard will just tire you out and can gouge the surface.
Sanding is a cornerstone of professional decorating. A recent UK survey found that 94% of decorators sand wood surfaces before painting. Their typical process involves starting with a 100-150 grit and finishing with a 220-320 grit for an impeccably smooth finish. This attention to detail is why professional results look so good.
Once you’re done sanding, you'll have a fine layer of dust over everything. This has to go. Completely. Any dust left behind will mix with your primer and create a gritty, awful texture.
Start by vacuuming the surface with a brush attachment. Then, follow up with a tack cloth—a sticky, resin-coated cloth that picks up every last speck of dust. This final, thorough clean is the secret to getting a truly blemish-free finish.
Even after the most diligent sanding, your wood surface is likely to have a few battle scars. Small cracks, dents, screw holes, or stubborn gaps in the joinery are common, but they’ll stand out glaringly under a fresh, smooth coat of paint. This is where wood filler becomes your secret weapon, turning an imperfect surface into a flawless one.
Taking the time to fill these imperfections is a non-negotiable step if you want a truly professional finish. When sanded correctly, a perfectly filled repair becomes completely invisible, ensuring the only thing people notice is the beautiful, even colour.
Not all fillers are created equal, and picking the right one is crucial for a repair that lasts. The choice really boils down to the type of damage you're fixing.
If you’re dealing with soft or slightly rotted wood, always apply a wood hardener first. This liquid soaks into the porous fibres, solidifying them and creating a stable base for the filler to bond to. Trying to fill soft wood without hardening it first is a waste of time—the repair will inevitably fail. An excellent option for these demanding jobs is Ronseal’s Two-Part High Performance Wood Filler, which is designed for exactly this kind of robust repair.
Applying filler correctly is more than just slapping it on. The goal is to create a seamless patch that blends perfectly with the surrounding wood.
Start by pressing the filler firmly into the hole or crack using a flexible putty knife. You want to force it deep into the imperfection to eliminate any air pockets. It’s absolutely essential to slightly overfill the area, leaving the filler sitting just proud of the surface.
Wood fillers, particularly water-based ones, shrink slightly as they dry. By overfilling, you ensure that once it has shrunk and been sanded, the repair will be perfectly flush with the wood, rather than creating a noticeable dip.
Allow the filler to dry completely, following the manufacturer’s instructions. Drying time can vary significantly based on the filler type, depth of the repair, and humidity, so be patient. Rushing this step and sanding before it’s fully cured will just result in a gummy mess and a failed repair.
Once the filler is rock-hard, it’s time to sand it flush. This is the final and most critical part of the repair process. The aim here is to smooth the filler without accidentally sanding away the softer wood around it.
Wrap a sheet of 120-grit sandpaper around a sanding block. The block is vital—it distributes pressure evenly and stops you from creating a dip around the repair, which is a common mistake when sanding with just your fingers.
Sand with light, even strokes until the filler is perfectly level with the surrounding wood. Run your fingertips over the area; you shouldn't be able to feel any transition between the wood and the filler. This tactile check is often more reliable than just looking at it. Once it's completely smooth, you’re ready for the final step in your prep: priming.
After all that meticulous cleaning, stripping, and sanding, it’s tempting to crack open the topcoat and get straight to the fun part. But hold on. Skipping the primer is like building a house without a foundation—a critical mistake that will undermine all your hard work.
Think of priming as the essential bridge between the wood and the paint. It’s the final prep step that guarantees a professional, durable, and vibrant finish.
This undercoat isn’t just an extra layer. It does a few crucial jobs your final paint isn’t designed for. First, it seals the porous wood surface, stopping the topcoat from soaking in unevenly. This prevents a blotchy, inconsistent look and actually saves you money, as you'll need fewer coats of your more expensive paint to get full coverage.
Primer also creates a superior adhesive layer. It’s formulated to grip tenaciously to the wood, providing the perfect "keyed" surface for your paint to bond to. This strong bond is what prevents chipping, peeling, and flaking down the line, ensuring your finish stands up to everyday life.
Choosing the right primer is just as important as deciding to use one in the first place. Each type is formulated to solve specific problems, and matching the primer to your wood and paint choice is the key to a flawless result.
The success of your paint job often hinges on getting the primer right for the specific wood you're working with. A primer that’s perfect for MDF might be completely useless on knotty pine. This guide will help you pick the right one every time.
Choosing the right primer can feel a bit daunting, but it's really about identifying the problem you need to solve. Are you dealing with stubborn knots, a super-thirsty surface, or just need a solid base for your new colour? Our table below breaks it down to help you find the perfect match.
| Wood Type | Common Issue | Recommended Primer Type | Why It Works |
|---|---|---|---|
| Knotty Pine | Resin bleed from knots causes yellow stains. | Shellac-Based Primer | Creates an impermeable barrier, permanently sealing the resinous knots so they can't discolour the topcoat. |
| MDF | Highly porous surface, especially on edges. | Water-Based Wood Primer | Seals the absorbent fibres to prevent the paint from soaking in unevenly, ensuring a smooth, uniform finish. |
| Bare Hardwoods | Tannin bleed can cause brown staining. | Oil-Based Primer | Effectively blocks the water-soluble tannins found in woods like oak and mahogany from leaching into the paint. |
| Previously Painted Wood | Adhesion problems over glossy surfaces. | Oil-Based or Adhesion Primer | Provides exceptional grip on slick or glossy old paint, creating a strong foundation for the new topcoat to stick to. |
Ultimately, taking a moment to select the correct primer will save you headaches later and ensure your finish looks fantastic for years to come. For specific recommendations, check out the primers we stock at Neasden Hardware.
Applying primer is straightforward, but a little care goes a long way. The goal here is a thin, even coat that covers the entire surface without any drips or heavy patches.
First things first, stir the primer thoroughly. For application, use a high-quality brush or a mini foam roller. A brush gives you more control for cutting in around edges and tackling detailed areas, while a roller is perfect for achieving a beautifully smooth finish on flat surfaces like doors or panels.
Pro Tip: Always apply primer in thin, even coats. One consistent coat is usually enough, but for very porous woods like MDF or if you're covering a dark colour, a second coat might be necessary to get a uniform base. Let the first coat dry completely before you decide if another is needed.
Once the primer is fully dry (always check the tin for specific times), it's best practice to give it a very light sand with fine-grit sandpaper—something around 220-grit is perfect. This quick scuff removes any minor imperfections or dust nibs, creating an ultra-smooth canvas for your paint.
Wipe away the dust with a tack cloth before you start painting. This final touch is what separates a good finish from a great one.
Even with the best instructions, a few questions always seem to pop up once you get started. Knowing how to prep wood for painting is one thing, but understanding the why behind each step is what really makes a difference. Let's tackle some of the most common queries we hear, so you can solve problems before they even start.
Getting these details right is what separates a decent DIY job from a finish that looks genuinely professional. A little extra knowledge helps you move beyond just following steps and start making smart decisions for your specific project.
In almost every case, yes. Even if a surface feels perfectly smooth to your hand, sanding—or 'keying' as it’s often called in the trade—creates thousands of microscopic scratches. These tiny grooves give the primer and paint something to physically grab onto, creating a much stronger mechanical bond.
For anything with a glossy, varnished, or previously painted finish, this step is completely non-negotiable. If you skip it, your new paint has no way to properly adhere and will almost certainly start peeling or chipping in no time. The only rare exception might be if you're using a specialised 'no-prep' paint, but for a durable, professional finish with standard paints, sanding is absolutely essential for long-term results.
This is a classic point of confusion, but the two products are designed for very different jobs and stages of a project.
Wood filler is used before you paint to fix imperfections on bare or prepped wood. It's made to dry hard, be sanded down completely smooth, and then painted over. It's your go-to for filling cracks, nail holes, and dents to create a flawless surface.
On the other hand, wood putty is a finishing product used after you've stained or varnished a piece. It’s usually oil-based, stays flexible, and comes in different colours to match common wood tones. Its job is to fill tiny nail holes on an already finished piece, but it never fully hardens and isn't designed to be painted.
Ah, the dreaded bleed-through. This is a common headache, especially with pine and other resinous woods. Knots contain natural oils and resins that will eventually leach through layer after layer of paint, leaving behind ugly yellow or brown stains.
To stop this from happening, you absolutely must use a dedicated stain-blocking or knotting primer, which is typically shellac-based. This isn't a step you can afford to skip. After sanding, apply two thin coats of this specialist primer directly over every knot before you apply your main, all-over primer. This creates a permanent seal that locks in the resins and stops any future bleed-through in its tracks.
Trying to paint directly onto Medium-Density Fibreboard (MDF) is a recipe for a patchy, uneven finish. MDF is incredibly porous—think of it like a dense sponge—and it will soak up paint inconsistently. The result is a blotchy mess that will take you countless extra coats of expensive topcoat paint to even try and fix.
The cut edges of MDF are particularly thirsty and will just drink up the paint, leaving a rough, fuzzy texture. To get a smooth, professional result, you must seal the entire surface with a specific MDF primer or a high-quality wood primer before your colour goes on. This crucial step is the only way to get an even, durable, and professional-looking job.
For all your painting and decorating projects, from specialist primers to high-quality abrasives, Neasden Hardware has the tools and supplies you need. Explore our extensive collection online and get everything delivered right to your door. Visit us at https://neasdenhardware.co.uk to get started.