Order Online
- Straight to your door!
Straight to your door


Let's get one thing straight: there’s no single "best fixing for plasterboard." The best one is always the one that’s perfect for your specific job. Getting it right comes down to three things: how heavy the item is, how thick your plasterboard is, and what’s hiding behind it—a hollow cavity or a solid wall. This guide will walk you through how to choose with confidence every single time.
Picking the right fixing is the most important step for a secure, lasting result. Plasterboard is a brilliant building material, but it has one big weakness: it’s brittle. If you just drive a normal screw into it, the gypsum core will crumble, and it’ll fail under the slightest weight. That's where specialised fixings come in; they’re cleverly designed to get a solid grip on the back of the board.
Before we get into the specifics, it helps to have a general feel for the world of hardware. A bit of background knowledge provides a solid foundation for any project, and you can get a good overview from this practical guide to fasteners and fittings.
To find the best fixings for plasterboard, you need to answer a few simple questions about what you’re doing:
This simple flowchart is a great way to visualise how to match the weight of your item to the right type of fixing.
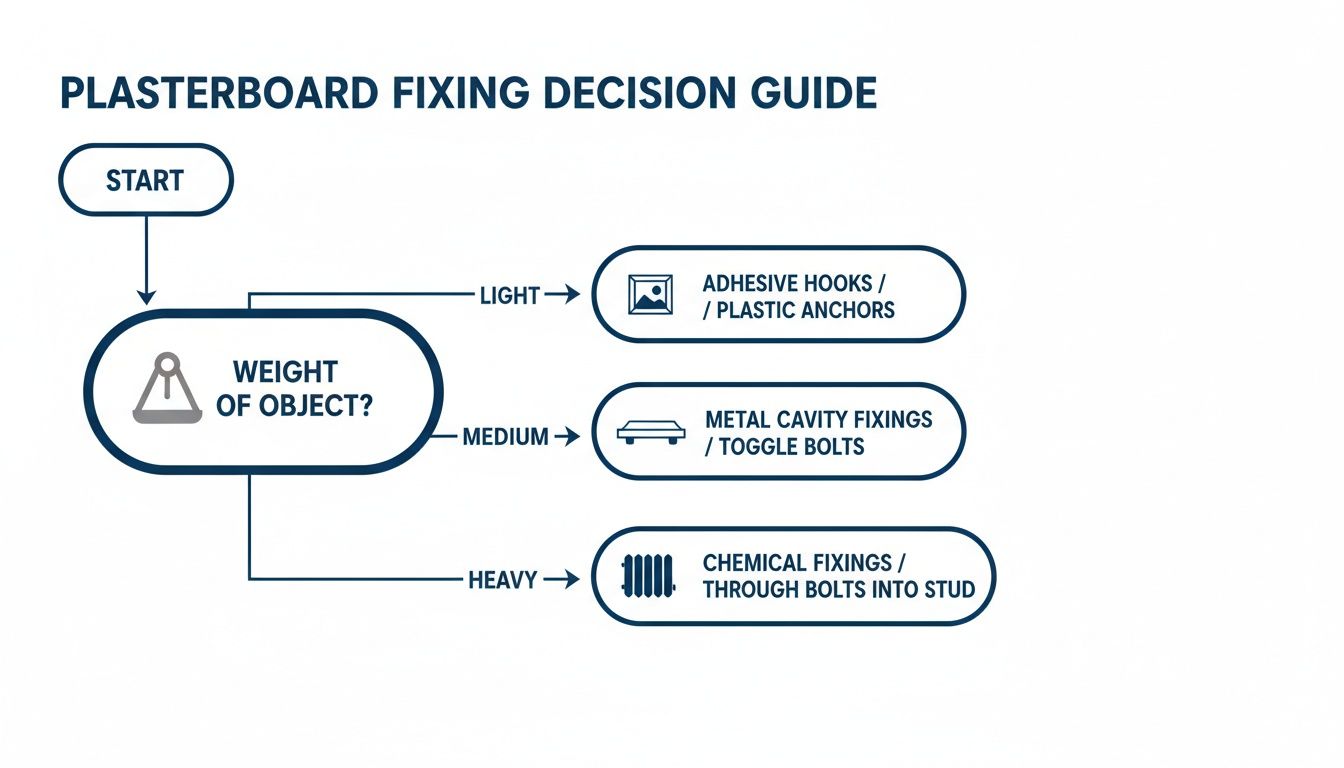
As you can see, the first thing you always need to figure out is the weight.
It’s no surprise that the UK's plastering and plasterboard market is booming, with the industry projected to hit £3.3 billion in revenue by 2025. It just shows how much we rely on these materials. Tradespeople trust high-quality fixings from brands like Rawlplug and Fischer, which are proven to hold loads of 30kg or more per fixing in standard 12.5mm plasterboard.
To help you get started, the table below gives a quick overview of which fixings work best for different load weights.
| Load Category (Weight) | Example Items | Recommended Fixing Type |
|---|---|---|
| Light (Up to 5kg) | Picture frames, smoke alarms, small clocks | Self-drive plasterboard plugs, plastic toggle fixings |
| Medium (5kg to 20kg) | Curtain poles, mirrors, small shelves, towel rails | Hollow wall anchors (metal), spring toggles |
| Heavy (Over 20kg) | Radiators, kitchen cupboards, large TVs, boilers | Heavy-duty toggle bolts, GripIt fixings, resin anchors |
This table is a great starting point, but always remember to check the manufacturer's specifications for the exact fixing you choose, as load ratings can vary between brands.
To get a grip on why you need special fixings for plasterboard, you first have to understand what you’re drilling into. Plasterboard is a brilliant but slightly deceptive material – it’s just a core of gypsum plaster squashed between two thick sheets of paper. This simple construction gives it some rigidity, but it has a major weakness.
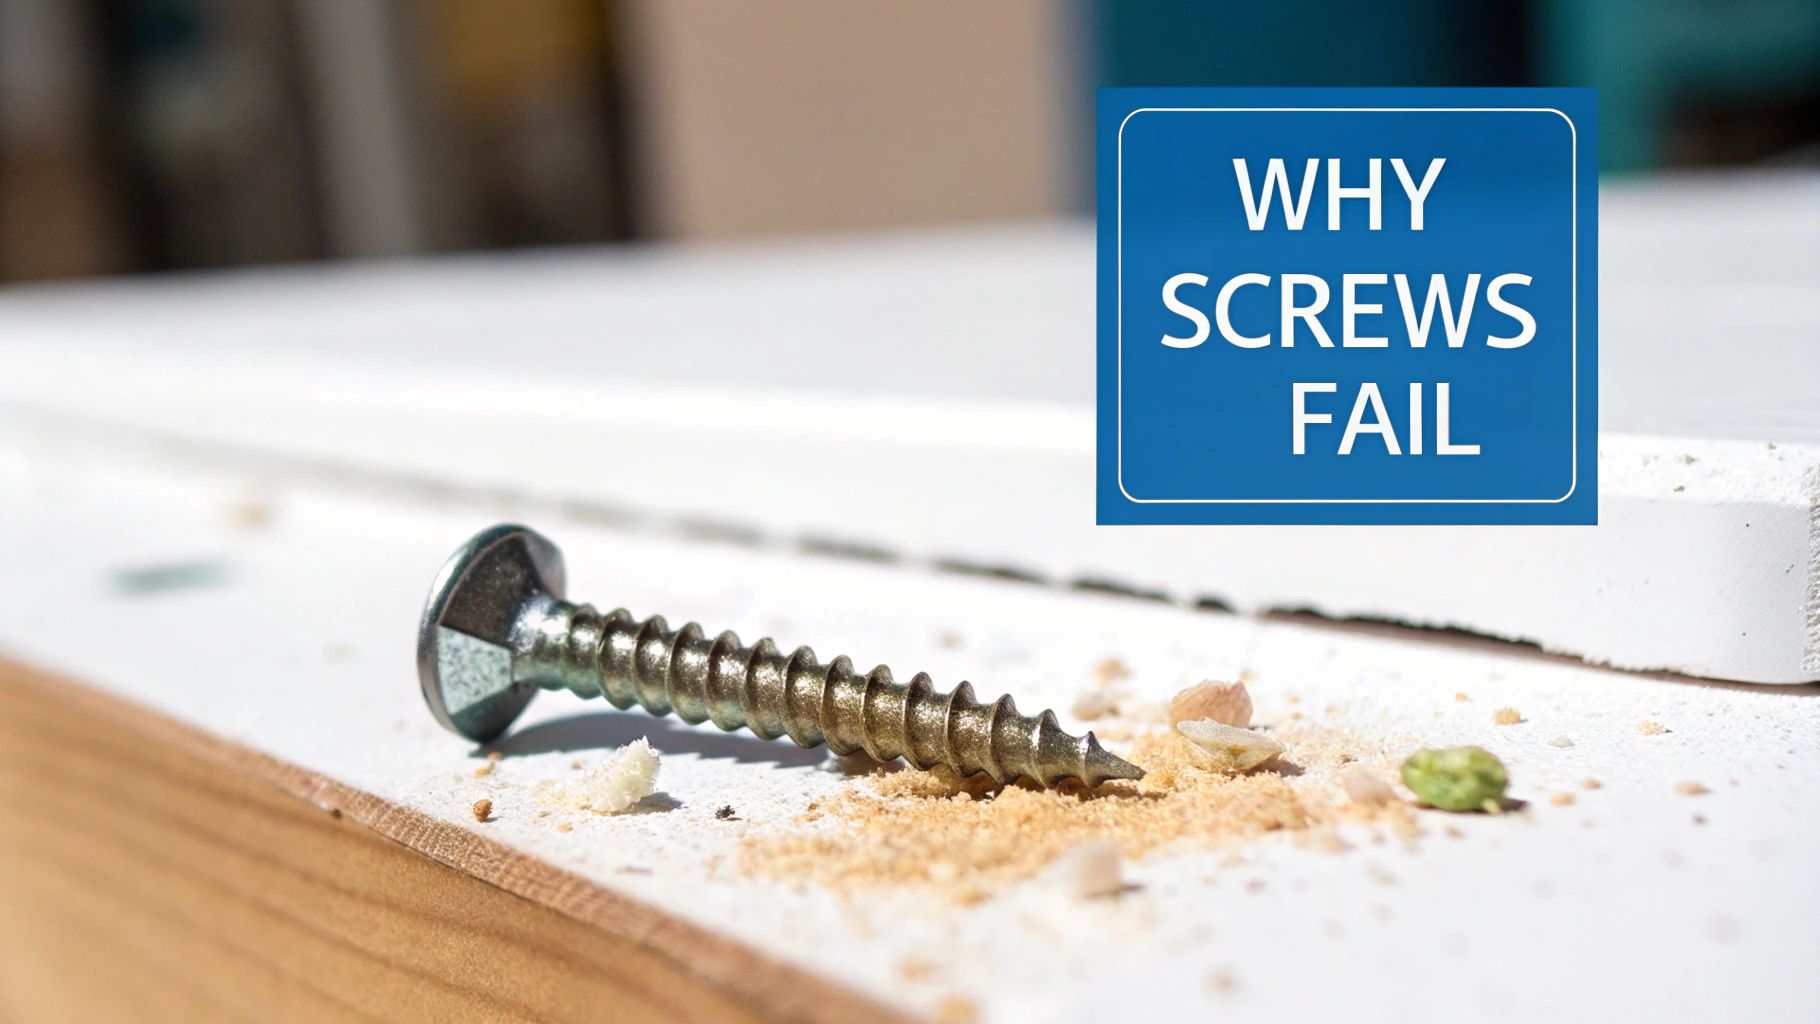
Think of plasterboard like a digestive biscuit. It’s surprisingly tough if you press on it evenly, but the moment you focus all that pressure on one tiny spot, it just crumbles. That’s exactly what happens when you try to use a standard screw.
A normal screw has nothing substantial to bite into. Its threads just tear through the soft gypsum, leaving a powdery, useless hole that won’t hold any real weight. Even if you add a standard plastic wall plug, you're still just trying to expand outwards in a material that prefers to break apart under pressure. The result? The screw pulls out with hardly any effort, usually taking a big chunk of your wall with it.
Knowing the common types of plasterboard in UK homes is the first step to choosing the right fixing. The board’s thickness makes a huge difference to how an anchor performs, as it dictates how much material the fixing has to grab onto from behind.
No matter the thickness, the rule is the same. The strength of your fixing doesn't come from the gypsum itself, but from how well it distributes the weight across a large area on the other side of the board.
A standard screw fails because it creates a point load—all the force is focused on one tiny, crumbly spot. Specialised fixings solve this by expanding, toggling, or gripping behind the plasterboard. This clever mechanism turns a fragile point load into a secure, distributed load.
The secret to a solid plasterboard fixing is to create a much bigger footprint behind the board. By spreading the weight out, you dramatically reduce the stress on any single point of the delicate gypsum core, stopping it from crumbling under the strain.
This is why a hollow wall anchor that opens like a little umbrella or a toggle bolt that flips into a T-shape can hold some serious weight. They aren't relying on the crumbly plaster; they're using the entire surface of the board as a brace. You can learn more about how different screws work by checking out this guide on the self-tapping screw, which is often a key part of many plasterboard fixings. It all comes back to this one principle, which explains why simply grabbing a bigger, longer screw is never the right answer for plasterboard walls.
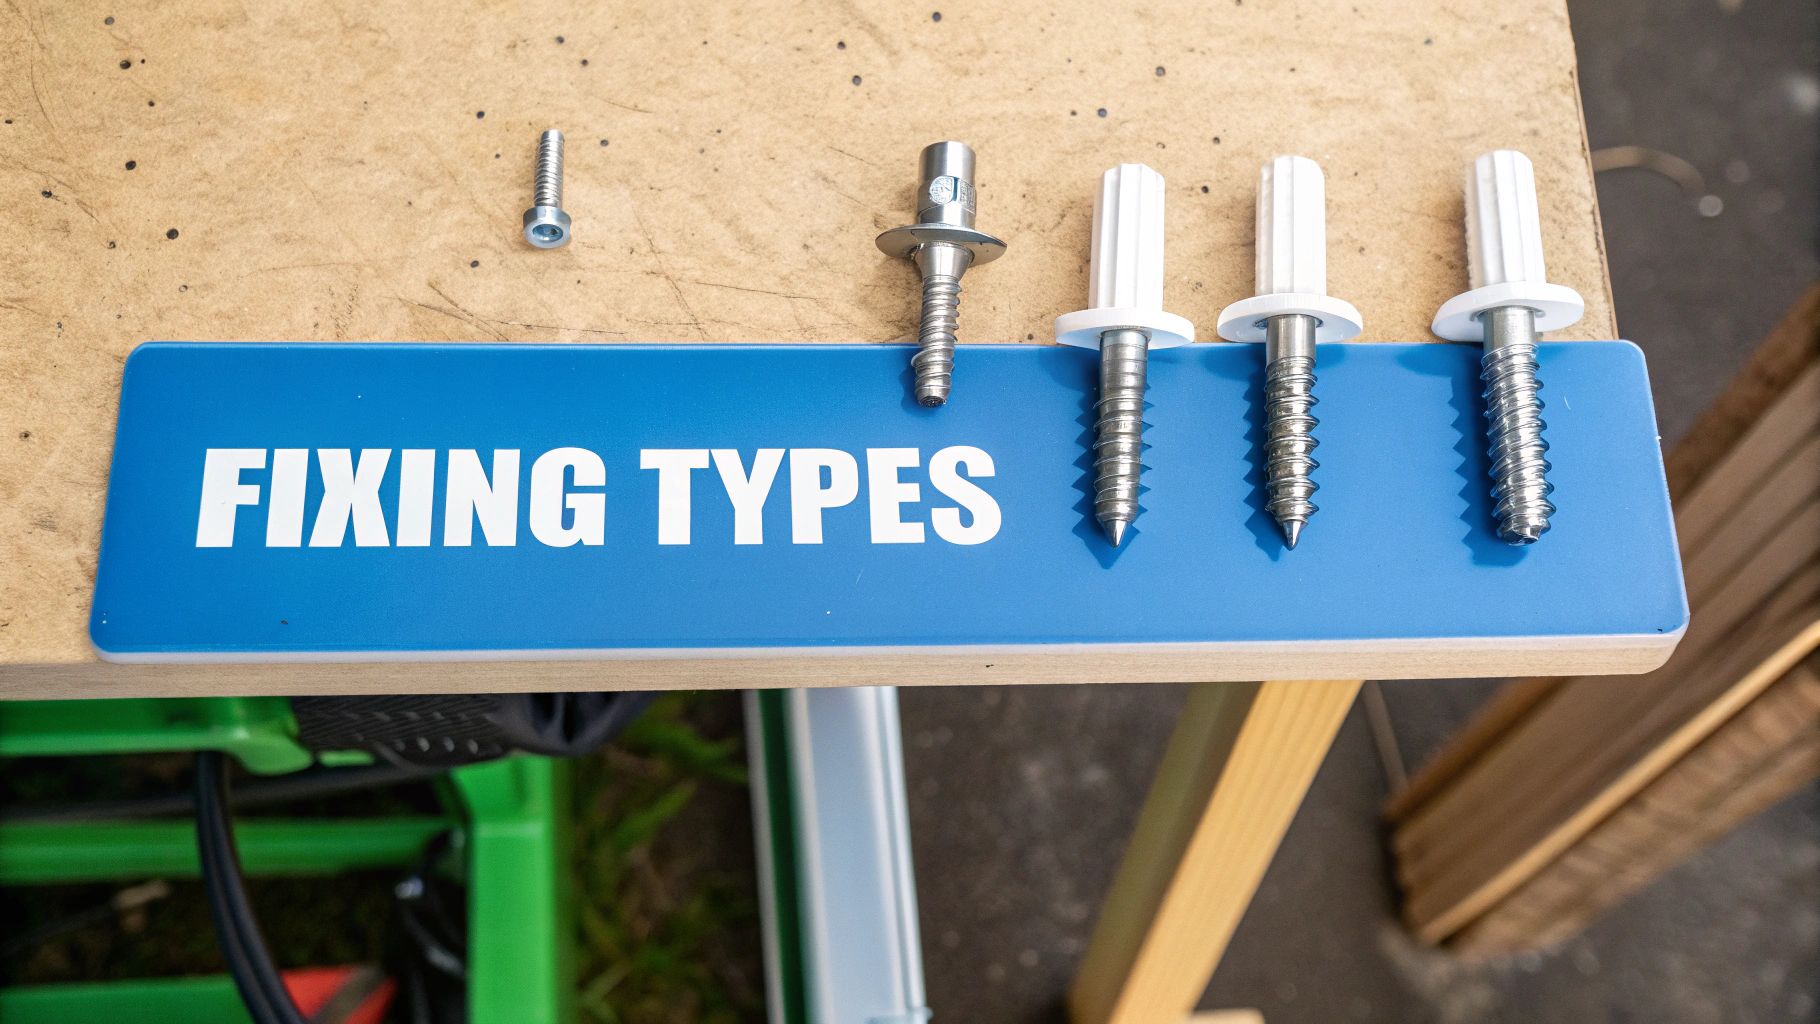
Staring down the fixings aisle at a DIY store can feel a bit much. You’re met with a wall of oddly shaped metal and plastic bits, all promising to be the perfect solution. The truth is, there’s no single "best" fixing—just the right one for the job at hand.
Think of it like choosing shoes. You wouldn’t wear wellies to a wedding, and you definitely wouldn't use a flimsy plastic plug to hang a heavy radiator. Matching the fixing to the load and the wall is the secret to getting a secure fit that you’ll never have to worry about again. Let’s break down the most common types you’ll come across.
Often called "worm" or "pig tail" fixings, these are your go-to for really light-duty jobs. Their design is beautifully simple: a coarse, wide thread bites directly into the plasterboard, carving its own path and creating a snug anchor point for a screw.
They are ridiculously easy to install, usually needing nothing more than a screwdriver. The plastic ones are ideal for things like small picture frames, smoke alarms, or other lightweight bits and pieces. Metal versions give you a bit more bite, making them a solid choice for slightly heavier items like canvases or wall clocks.
Pros & Cons of Self-Drive Plugs:
When you’re hanging medium-weight items like curtain rails, mirrors, or small shelves, you need to step up your game. Hollow wall anchors, often known by the brand name "Molly bolts," are a brilliant all-rounder for these kinds of tasks.
These clever metal fixings work by expanding in the cavity behind the plasterboard. As you tighten the screw, the anchor’s metal sleeve crumples and flares out, creating four legs that clamp firmly against the back of the board. This action spreads the load over a much wider area, stopping the fixing from just ripping through the plaster.
The real genius of a hollow wall anchor is that it creates a permanent threaded insert in your wall. You can take the screw out and put it back in as many times as you like—perfect for when you need to take things down to decorate.
Once you get into heavier territory—think floating shelves loaded with books, large mirrors, or small radiators—toggle fixings are one of your strongest bets. They use a simple but highly effective mechanical trick to distribute some serious weight.
A spring toggle is made of a long bolt with a pair of spring-loaded "wings" on the end. You drill a hole, fold the wings back, and push them through. As soon as they clear the board, the wings snap open inside the cavity. Tightening the bolt pulls them hard against the back of the plasterboard, creating an incredibly secure brace. Gravity toggles are similar but use a metal bar that flips down with gravity instead of springs.
Given that most UK homes built after 1945 have cavity walls, fixings like these are indispensable. In fact, the UK's gypsum board market hit a revenue of £733.1 million in 2023. For any loads tipping the scales over 20kg, most tradespeople would recommend spring toggles or metal hollow wall anchors for their superior grip. You can find more insights into the growing demand for specialised construction materials at Grand View Research.
For the really demanding jobs—we’re talking kitchen cupboards, big-screen TVs on swing-arm brackets, or chunky radiators—you need to bring out the big guns. These fixings are engineered for maximum strength.
A great example is the GripIt fixing. This British invention has a unique design with large plastic wings that rotate and expand behind the plasterboard, spreading the load over a massive surface area. They often boast load capacities that leave other cavity fixings in the dust.
To make sense of it all, here's a quick comparison of the most common options you'll find.
This table breaks down the key players, showing you what they do, how much they can hold, and where they really shine.
| Fixing Type | How It Works | Typical Max Load (12.5mm Board) | Best For | Ease of Installation |
|---|---|---|---|---|
| Self-Drive Plug | Screws directly into plasterboard, creating its own thread. | Up to 5kg | Picture frames, smoke alarms | Very Easy |
| Hollow Wall Anchor | Sleeve expands behind the board to form clamping legs. | Up to 20kg | Mirrors, shelves, curtain rails | Moderate |
| Spring Toggle | Spring-loaded wings open inside the cavity for a wide brace. | 20kg to 50kg+ | Radiators, heavy shelves | Moderate |
| GripIt Fixing | Large plastic wings rotate and expand for maximum grip. | Up to 70kg+ | Kitchen cupboards, TVs | Easy |
Ultimately, choosing the right fixing isn't about finding the strongest one, but the smartest one for your specific project. By understanding how each of these work, you can walk into any DIY store and pick the perfect fixing with confidence, whether you're hanging a family photo or an entire kitchen cabinet.
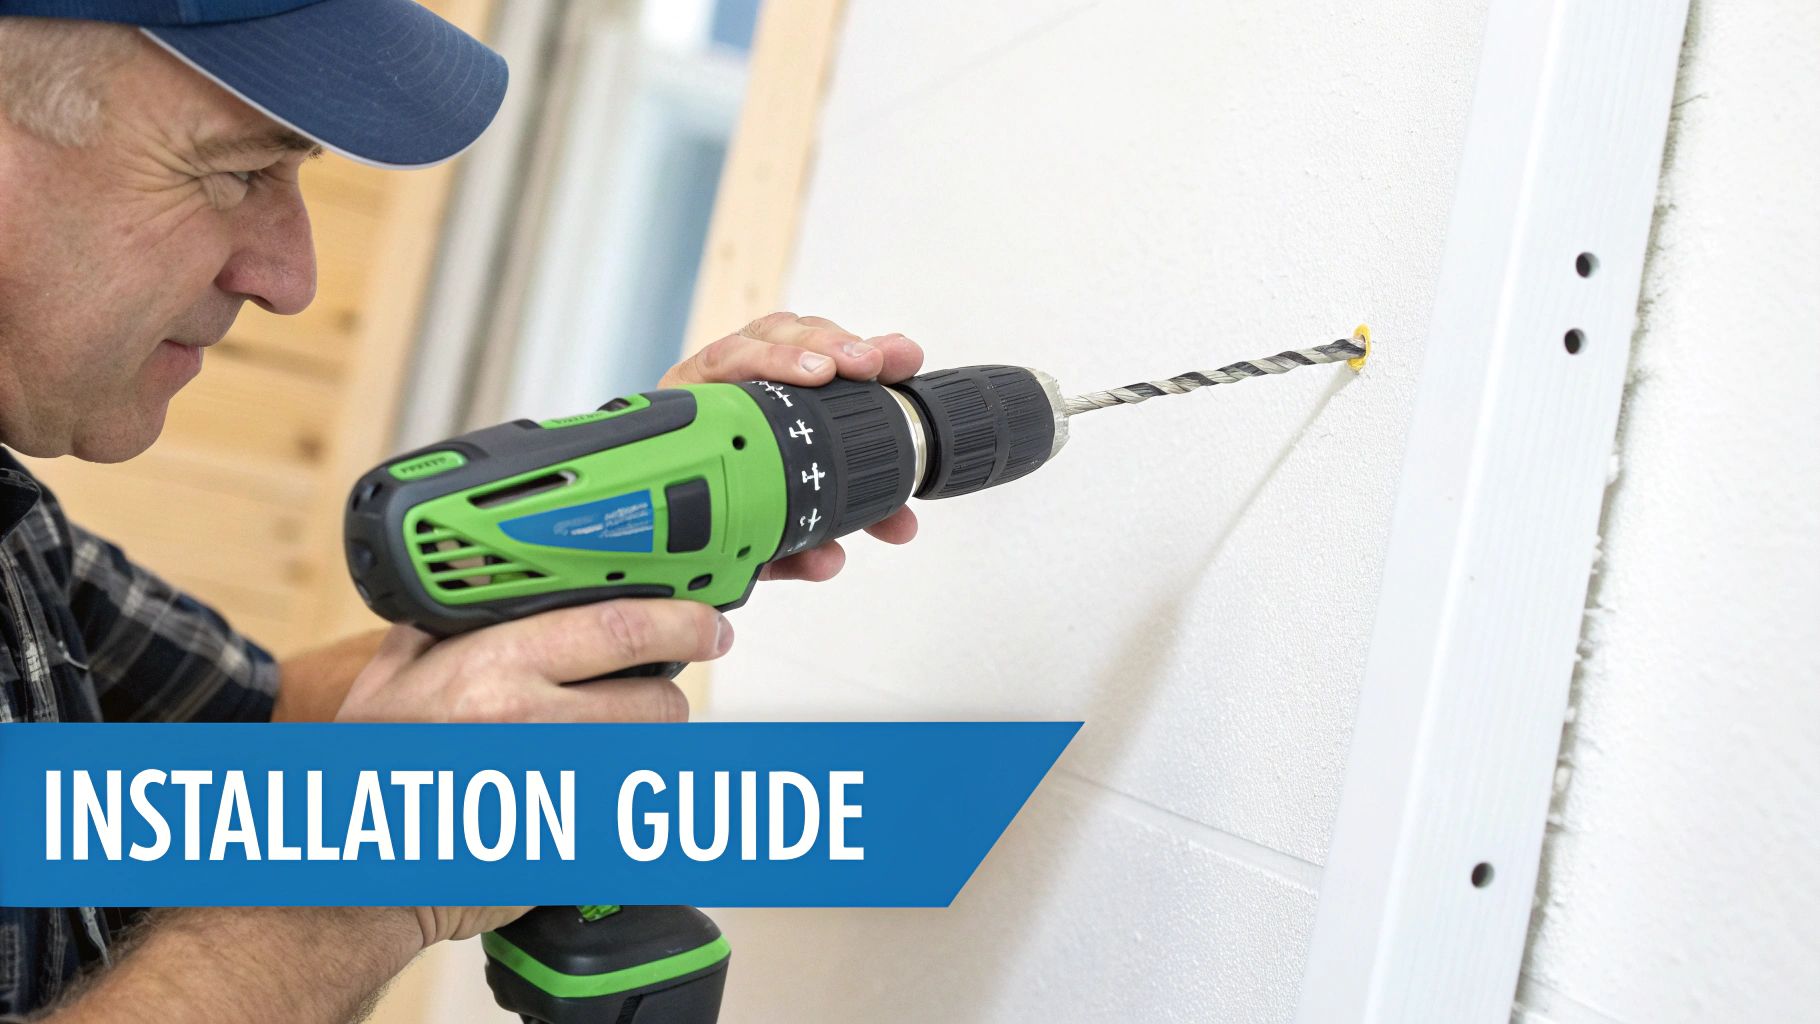
Choosing the right fixing is half the battle, but even the best anchor on the market will let you down if it’s not installed properly. A solid installation is the difference between a securely hung shelf and a hole in the wall. It’s all about the process and a bit of precision.
We'll break down the installation into simple, manageable steps. Let's focus on those small details that make a huge difference, so you can get it right the first time, every time.
Don't even think about picking up the drill just yet. A few minutes of prep work now can save you a world of pain later. Rushing this stage is where most DIY mistakes happen, leading to everything from wonky shelves to hitting a hidden pipe.
First, mark your exact fixing point with a pencil. Grab a spirit level to make sure your markings are spot on, especially if you're hanging something that needs multiple fixings like a cabinet or radiator. Double-check your measurements—the old saying "measure twice, cut once" has never been more true.
Next, find out what’s lurking behind the wall. A stud detector is your best friend here. It’ll help you locate wooden studs, metal noggins, pipes, and electrical cables. Trust me, drilling into a live wire or a water pipe is a dangerous and expensive mistake you don't want to make.
One of the most common DIY slip-ups is using the wrong size drill bit. If the hole is too big, the fixing will just spin and never grip. Too small, and you’ll end up mangling the plasterboard trying to force it in. Always check the fixing’s packaging and match the drill bit to the manufacturer's spec.
Hollow wall anchors, often called Molly bolts, are a fantastic choice for medium-weight items. Their design cleverly expands behind the board to create a super-secure grip.
When you’re hanging something heavy, a spring toggle is your go-to. It works by spreading the load over a much wider area inside the cavity, giving it incredible strength.
Getting these installation steps right is just as important as choosing the fixing in the first place. For a bit of inspiration on what you can do with your new skills, check out our guide on how to hang pictures securely for a professional-looking gallery wall. With these techniques under your belt, you’ll be ready to tackle any plasterboard project with confidence.
Hanging a light picture frame is one thing. But what about the jobs that make you stare at the wall and question everything? I’m talking about the serious installations: that massive new television, floating shelves destined for a heavy book collection, kitchen cabinets, or a weighty radiator. These aren't just decorative bits and pieces; they're heavy, functional, and under constant stress.
Successfully mounting these big-ticket items requires a completely different level of planning. You need to understand the forces at play—not just the dead weight pulling straight down, but also the dynamic forces, like when an articulating TV bracket is pulled away from the wall. This is where choosing the best fixings for plasterboard becomes a matter of safety, not just looks.
Mounting a large, modern TV, especially on an extending arm bracket, is one of the most demanding jobs you can ask of plasterboard. That bracket acts like a lever, multiplying the force on the fixings every single time you move the screen. A single, flimsy fixing here is a recipe for disaster.
For a job like this, spreading the load isn't just a good idea—it's non-negotiable. Your first move should always be to find the timber or metal studs behind the plasterboard. Securing the bracket directly into at least two of them with long, heavy-gauge screws is the gold standard for structural support.
But what if the studs aren't where you need them? Then you have to rely on multiple heavy-duty cavity fixings.
This same thinking applies directly to kitchen wall cabinets. They have to support their own weight plus the considerable, ever-changing weight of plates, glasses, and tins of beans.
Radiators throw a unique one-two punch at your walls: they're incredibly heavy, and they're constantly heating up and cooling down. This combination of sheer weight and thermal cycles can cause lesser fixings, particularly plastic ones, to weaken and fail over time. For this reason, metal fixings are the only reliable option.
When hanging a radiator, always, always go for heavy-duty metal hollow wall anchors or large toggle bolts. Their all-metal construction means they won't degrade with the heat, giving you a safe and secure installation that will last for years.
Floating shelves can be deceptive, too. The shelf itself might feel light as a feather, but once it’s loaded with books, the leverage force pulling away from the wall can be immense. For particularly heavy items like mirrors or TVs, some of the best fixings on the market boast holding capacities of 25kg per fixing in standard 9.5mm boards. That number jumps to 35kg in thicker 12.5mm boards, outperforming standard plastic plugs by a whopping 50% in independent pull-out tests. It's worth a moment to explore more data on plasterboard fixing performance to really see the difference.
Before you drill a single hole for any heavy-duty project, run through this quick checklist. It’ll help ensure a safe, secure result you can trust.
By taking a moment to understand the forces involved and choosing the right heavy-duty fixing for the job, you can confidently tackle even the most demanding installation projects. You'll know for sure that your prized possessions are securely and safely attached to the wall.
Even with the best preparation, things can sometimes go sideways. We've all been there: a fixing that just won't grip, a drill hole that disintegrates into a crumbly mess, or the dreaded discovery of a hidden stud right where you need to hang something. It’s incredibly frustrating, but don’t worry—these common hiccups are nearly always fixable with a bit of know-how.
Knowing how to troubleshoot these problems is what turns a DIY headache into a successful installation. Let's walk through the most frequent mistakes and cover some simple, practical solutions to get your project back on track.
This is a classic. You drill your pilot hole, pop the fixing in, and it just spins uselessly without tightening. It usually means one of two things: the pilot hole is slightly too big, or the plasterboard around it has crumbled away. Either way, the fixing has nothing solid to bite into.
Don’t panic; you have a couple of options. The simplest fix is often to just use a slightly larger fixing. If your original anchor was a 6mm, try stepping up to a 7mm or 8mm version. That extra width is usually all it takes to get a firm grip.
Alternatively, you can repair the hole itself. A great method is to fill the oversized hole with a fast-setting wall filler. Once it's completely dry, you can drill a new, correctly sized pilot hole right in the same spot and start fresh.
Plasterboard is surprisingly brittle, and it's easy to end up with a messy, crumbly hole if you're not careful. This often happens if you apply too much pressure while drilling or if your drill bit is blunt.
The key to preventing this is to let the drill do the work. Use a sharp, fresh drill bit and apply steady, gentle pressure. A sharp bit will cut a clean hole rather than tearing its way through the paper and gypsum core.
If the damage is already done and the area is too weak to support a fixing, you'll probably need to patch it. A small plasterboard repair patch can cover the damage, giving you a solid new surface to fill, sand, and drill into. For more insights on avoiding common pitfalls, it's worth reviewing the Top 5 Mistakes to Avoid When Fixing Drywall Damage to ensure a durable repair.
Hitting something hard and unyielding behind the plasterboard can stop your drill dead in its tracks. If it's a timber stud, you’re in luck—you can just use a wood screw and fix directly into it. But if it’s a metal stud or the old-school wooden lath found in lath-and-plaster walls, your standard fixing won't cut it.
By correctly diagnosing the issue, you can quickly pivot to a solution and make sure you're using the best fixings for plasterboard in any situation.
Even with a detailed guide, a few specific questions always seem to pop up. We get asked these all the time by both seasoned tradespeople and weekend DIYers, so here are some quick, clear answers to the most common queries.
It really depends on the type you’ve used. Simple plastic self-drive plugs are almost always a one-shot deal. Their threads get chewed up during removal, and you’ll never get the same solid grip a second time.
More robust fixings, like metal hollow wall anchors, are a different story. When you unscrew the bolt, the expanded anchor body stays put inside the wall, ready for you to use it again. Spring toggles, however, can't be reused; the toggle itself will simply drop down inside the wall cavity once the bolt is out.
To guarantee reliability and safety, especially when hanging anything heavy, our advice is to always use a new fixing. It’s a small price to pay for complete peace of mind.
There’s no single magic number for this, as it depends on the shelf’s length, the total weight it needs to hold, and the specific fixings you're using.
A good rule of thumb for heavy-duty shelving is to place a fixing every 400-600mm. This spacing often lines up with the wall studs, giving you the option for maximum support. Always check the load capacity of your chosen fixings and divide the total expected weight by the number of fixings to ensure each one is well within its safe working limit.
For exceptionally heavy items, some of the strongest options are heavy-duty toggle bolts, specialised anchors like the GripIt fixing, or even chemical resin anchors if you can get them into a masonry block behind the plasterboard.
But the ultimate strength is always achieved by finding the wooden or metal studs behind the plasterboard and fixing directly into them with long screws. When that isn't possible in a cavity wall, a high-quality, large-diameter metal toggle bolt or a specific heavy-duty anchor system will give you the highest load capacity you can get from the plasterboard alone.
For all your project needs, from light-duty plugs to the very best fixings for plasterboard available for heavy loads, explore the extensive range at Neasden Hardware. Find everything you need for a secure, professional finish at https://neasdenhardware.co.uk.