Order Online
- Straight to your door!
Straight to your door


When you're trying to soundproof a room, it's all about tackling two key problems: sealing air gaps and adding mass to the door itself. Most of the unwanted noise you hear is sneaking through those tiny cracks around the frame and under the door. So, your first and most effective move is always to get those sealed up with proper acoustic seals and a door sweep.
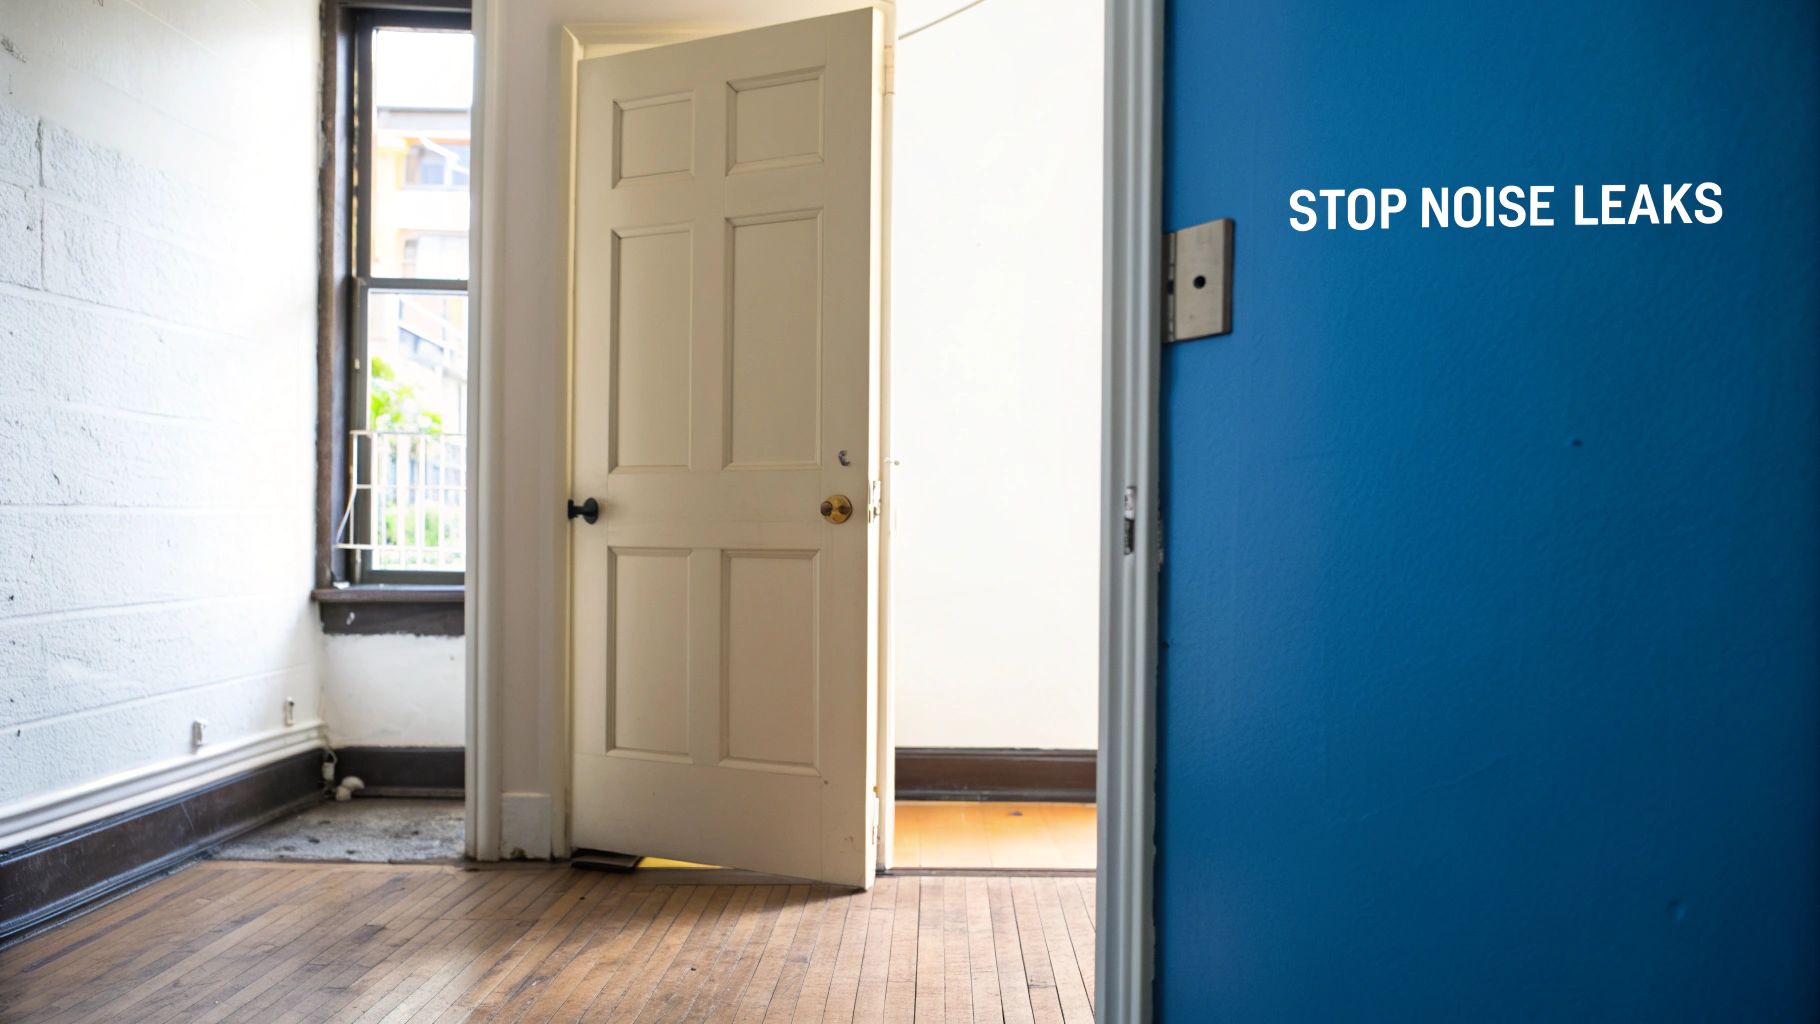
Ever shut a door hoping for a bit of peace and quiet, only to find you can still hear every word from the hallway? It’s a common frustration, and nine times out of ten, the door is the culprit. In almost any room, a standard door is the weakest link in your sound defence, acting more like a sieve for noise than a solid barrier.
The science behind this is pretty straightforward. Sound travels in two main ways: through the air (airborne noise) and through solid things (structure-borne noise). Your door is failing on both fronts.
Take a look at most standard internal doors in UK homes. They're usually hollow-core, which means they’re just a thin layer of wood or MDF stretched over a cardboard honeycomb frame. This flimsy, lightweight design offers next to no mass to block sound waves, letting vibrations from chatter, music, or footsteps pass straight through. Think of it like a drum skin—it's practically designed to vibrate.
Worse still are the gaps. A door needs a gap around it to swing open and shut, but those very gaps become perfect highways for sound. It’s shocking, but even a tiny 1% gap around the edge of a door can let in over 50% of the sound from the other side.
For anyone living in a London flat or trying to work from home, this story is all too familiar. The poorly fitting frame of a bedroom-turned-office or the hollow door to the living room can turn what should be a private space into a shared one, making focused work feel impossible.
This isn't just a minor annoyance; it’s a massive issue across the country. In the UK, noise complaints have skyrocketed to nearly 1,200 per day, with neighbour disputes being a huge driver. The weak point in these situations is often the door separating flats or rooms. A standard internal door typically has a Sound Reduction Index (Rw) of only 20-25 dB. That means a shout at 70 dB on one side is still clearly audible at around 45-50 dB on the other. You can dig into the data on these trends over at soundproofing specialists Resonics.
The good news is that sorting these issues is completely achievable. This guide is packed with practical advice for both tradespeople and determined DIYers. By focusing on the two core principles—sealing gaps and adding mass—you can finally reclaim your quiet space.
Before you start, it’s vital to make sure your door is hanging and closing properly. Our guide on how to fix a sticking door will help you get the basics right first.
Before you start buying materials or pulling out tools, the first step is to play noise detective. Figuring out exactly how and where sound is getting through your door is the secret to choosing the right solution. A few simple tests can give you a clear, actionable plan and save you both time and money.
Don't skip this part. A few minutes of diagnosis is what separates a successful soundproofing project from a frustrating one that doesn't deliver the quiet you're after. The goal is to pinpoint every weak point, from obvious gaps to the very material of the door itself.
One of the most effective ways to find air gaps is also the simplest. Wait until it’s dark outside or in the adjoining room, then turn on the lights in the room you're inspecting. Get down on the floor and look for any light bleeding through the cracks.
Anywhere you see light, sound is getting through just as easily. Make a mental note of these areas.
Next, give your door a firm rap with your knuckles in a few different spots. Does it make a hollow, booming sound, almost like a drum? If so, you've got a hollow-core door. A dull, solid thud means you're dealing with a solid-core door, which is much better at blocking sound but might still need help with gaps. This simple test tells you whether you need to focus on sealing gaps or adding mass to the door itself.
Pro Tip: If your door is making other unwelcome noises, like squeaks or groans, it might be a sign of poor alignment. Addressing these issues first can improve the door's fit and make sealing more effective. Check out our guide on how to fix squeaky door hinges for a quick solution.
With the major culprits identified, it's time for some specifics. Grab a tape measure and check the size of the gap at the bottom of the door. This measurement is crucial for choosing the right size of door sweep or automatic drop-down seal. A gap of 5-10 mm is pretty typical for UK internal doors.
While you're down there, inspect any existing weatherstripping or seals. Are they compressed, cracked, or peeling away? Old, worn-out seals offer almost no acoustic benefit and will need replacing. Run your hand along the frame to feel for draughts—another sure sign of an air and sound leak.
Now that you've done your detective work, you can confidently choose the right products. The table below will help you match the symptoms you’ve found with the most effective soundproofing strategies.
| Symptom | Likely Cause | Primary Solution | Neasden Hardware Category |
|---|---|---|---|
| Light visible around the frame | Air gaps between door and frame | Acoustic Perimeter Seals | Door & Window Seals |
| Hollow sound from the 'knock test' | Lightweight hollow-core door | Add mass with acoustic panels or MLV | Door Furniture & Accessories |
| Significant light/draught under the door | Large bottom gap | Automatic Drop-Down Seal or Door Sweep | Door & Window Seals |
| Old seals are brittle or peeling | Worn-out weatherstripping | Replacement Adhesive Seals (e.g., D-seals) | Door & Window Seals |
By matching your diagnosis to the right solution, you're setting yourself up for a successful project that actually delivers peace and quiet.
Once you've figured out where the noise is sneaking in, it's time to go after the main culprit. If you only do one thing to soundproof your door, make it this: seal the air gaps. This is where you'll see the most dramatic and immediate improvement for your effort. Hands down, it's the single most effective way to stop airborne noise.
Think of sound like water. If there’s even a tiny crack, it will find its way through. Sealing those gaps is like plugging the leaks, creating a solid barrier that forces sound to take a much harder path.
This guide will walk you through fitting the most common and effective types of acoustic seals. We'll cover everything from the door's perimeter to that notoriously tricky gap at the bottom, making sure you end up with a complete, airtight seal.
This simple diagnostic process shows how to spot, test for, and measure the gaps that are undermining your quiet space.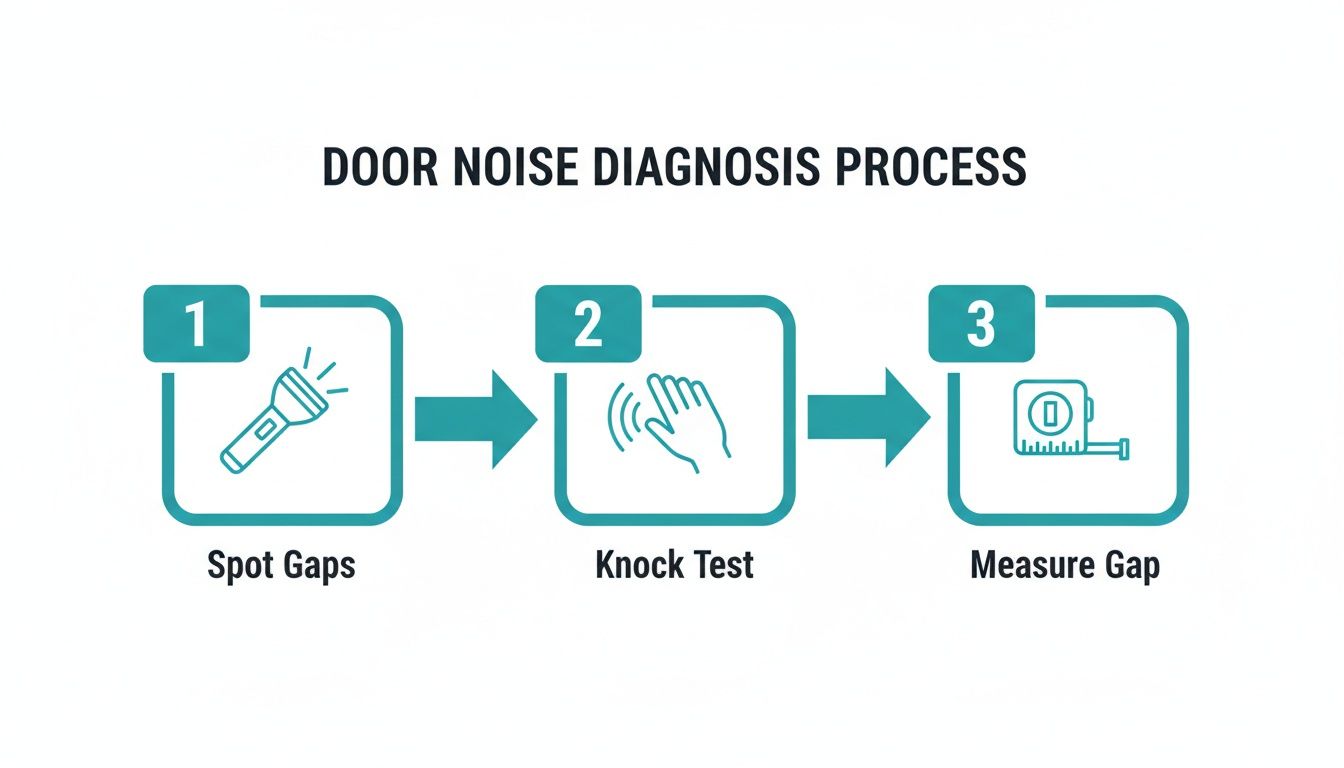
By following these steps—spotting light leaks, performing a knock test, and measuring gaps—you can create a targeted plan instead of just guessing which products to buy.
Your first target is the door frame's perimeter—the top and both sides. This is where you’ll typically use self-adhesive acoustic seals, which often come in a 'D', 'P', or 'E' shape and are made of rubber or silicone. These compression seals work by squashing down when the door is closed, creating a snug, airtight fit.
Preparation is Everything
Before you even think about peeling off that backing paper, you need to prep the surface properly. If you skip this, your new seals could start peeling away within weeks.
Application Tips
Start at one of the top corners and work your way down. Only peel back a small section of the adhesive backing at a time. Press the seal firmly into place along the door stop (that's the strip of wood the door closes against), making sure it's straight and making good contact all the way along.
A common mistake is stretching the seal as you apply it. Don't do it. The seal will eventually try to shrink back to its original length, which will create gaps at the corners. Just apply it naturally without any tension for a fit that will last.
The gap under the door is almost always the largest and lets in the most noise. You have two excellent options here, depending on your floor surface and what look you're going for.
Fitting a Threshold Seal
A threshold seal, sometimes called a saddle, is a raised strip you fix directly to the floor under the door. When closed, your perimeter seals will compress against this, creating a complete four-sided barrier. This is a brilliant solution for hard floors like wood, laminate, or tiles.
To install one, you’ll need to cut the threshold to the exact width of your doorway with a hacksaw. Position it carefully so the door closes snugly against it without catching. Then, screw it securely into the floor.
Installing an Automatic Drop-Down Seal
For a more discreet, seamless look, especially if you have carpets, an automatic drop-down seal is the professional's choice. This clever device is either morticed into the bottom of the door or surface-mounted.
Here’s how it works: when you close the door, a small plunger on the hinge side presses against the frame, which mechanically lowers a rubber seal onto the floor. Open the door, and the seal retracts back up. This gives you a perfect seal when you need it and a clear threshold when you don't. A surface-mounted product like the Norsound NOR810S Rebated Automatic Drop-Down Seal offers a fantastic balance of high performance and straightforward installation.
Getting the details right can make a huge difference in how well your soundproofing works and how long it lasts.
The demand for quieter homes has had a big impact on the UK market. The soundproofing door seal kits market is projected to grow from £1.52 billion in 2025 to £2.11 billion by 2029. This trend is largely driven by renovations in older housing stock, where draughty, ill-fitting doors are prime suspects for noise leakage. Gaps around doors, often between 5-10 mm, can let up to 40% of sound pass through, but a good kit can raise a door's acoustic rating significantly.
For the biggest soundproofing win, it's crucial to understand the different types of weatherstripping for exterior doors and how to apply them effectively, as many of the principles are the same for internal acoustic sealing.
So, you’ve sealed the gaps around your door frame and won a major battle against noise leakage. But what about the sound that punches directly through the door itself? This is where adding mass becomes your best friend, especially for stopping those low-frequency rumbles like traffic or a neighbour’s bass-heavy music.

Your strategy here really depends on what kind of door you have. A hollow-core door—basically a thin wooden skin over a cardboard honeycomb—acts like a drum, vibrating and transmitting sound with frustrating ease. A solid door is a much better starting point, but even that can be beefed up.
If you give your door a knock and it sounds hollow, it's a prime candidate for a mass-adding treatment. You can't easily fill the inside, but you can add dense layers to its surface. A pretty straightforward and decent-looking option is to use acoustic panels.
These are purpose-built panels designed to absorb sound waves and can be cut to fit the flat sections of your door. They come in various finishes and you can stick them on with a strong adhesive. For a home office or bedroom, this is a quick win for adding some much-needed density without kicking off a massive project.
But if you’re after a truly noticeable drop in noise, especially those deeper, more irritating sounds, you’ll want to reach for something more robust.
For the biggest improvement on any type of door, Mass Loaded Vinyl (MLV) is the gold standard. This stuff is a dense, heavy, yet flexible material engineered specifically to block sound waves. It’s thin, so it doesn't add a ton of bulk, but its sheer weight is incredibly effective at stopping sound dead in its tracks.
UK building codes have gotten much stricter lately, reflecting a growing demand for quieter living spaces. A standard timber door might only block 25-30 dB of noise. Adding a layer of MLV—which you can easily source from a good supplier like Neasden Hardware—can boost this to 45 dB, effectively blocking around 90% of mid-frequency sounds like conversations. That difference is huge; a 45 dB rating makes shouting barely distinguishable, while a 55 dB rating makes it completely inaudible.
Key Takeaway: Adding mass doesn't just muffle sound; it physically blocks it. MLV is a top performer because its flexibility also helps to damp vibrations, preventing sound from passing through the door structure. It's the reason why it's a favourite in professional settings like recording studios.
Applying MLV is a very manageable DIY project that delivers professional-grade results. Here’s how to get it done right.
Tools and Materials You’ll Need:
Installation Steps:
While MLV is fantastic at its job, its raw black finish isn't exactly a design statement. To make your newly soundproofed door blend in with your decor, you’ll want to add a finishing layer.
Covering with a Door Skin or Plywood
A thin layer of plywood (around 3-6 mm) or a purpose-made door skin is the perfect solution here.
Once everything is dry and secure, re-install your door furniture and hang the door back on its hinges. You'll immediately notice the extra weight—and more importantly, the peace and quiet.
When the basic seals and a bit of extra mass don't quite cut it, it’s time to look at more specialised solutions. If you’re soundproofing a home office for confidential calls, setting up a recording studio, or need to meet specific building regulations, stepping up your game is the next logical move. This is where we go from simply dampening noise to properly isolating a room.
Let’s be honest, sometimes the door itself is the problem. If you're starting with a flimsy, hollow-core door and need serious sound reduction, no amount of tweaking will be enough. In these cases, replacing the entire door with a purpose-built acoustic door set is the most effective, long-term fix.
Once you start shopping for high-performance doors, you’ll come across the Rw rating. This stands for Weighted Sound Reduction Index and is measured in decibels (dB). In simple terms, it tells you how good a door is at stopping airborne sound.
It’s important to remember that the dB scale is logarithmic. A 10 dB increase actually represents a halving of the perceived noise. So, jumping from a 25 dB door to a 35 dB one makes a huge, noticeable difference in the real world.
Even the best acoustic door in the world will be a let-down if you neglect the small stuff. These seemingly minor components can completely undermine an expensive upgrade if they aren’t up to the job.
Upgrading Your Hinges
An acoustic door, or even a standard door beefed up with MLV, is a lot heavier than your average hollow-core one. Your existing hinges will likely sag under the strain, causing the door to drop. This creates new gaps and stops it from latching properly, undoing all your hard work.
Always check the weight rating on your hinges. For a heavy, soundproofed door, you'll need at least three robust, high-quality ball-bearing hinges to handle the load and give you a smooth, reliable swing for years to come.
Acoustically Treating Hardware
Sound is like water; it will find any weak point to leak through. This includes your letterbox and keyhole.
Beyond just adding mass and sealing gaps, it’s worth thinking about the bigger picture. Things like acoustic treatment for the room itself can make a massive difference. After all, a perfectly soundproofed door in a room full of hard, reflective surfaces will still feel noisy because of echoes.
Here’s a critical point you absolutely cannot ignore, especially if you live in a flat, a commercial property, or a house with an integral garage: fire safety. Many doors are legally required to be fire-rated (e.g., an FD30 door, which provides 30 minutes of fire resistance).
When you’re soundproofing a fire-rated door, you must use seals that are also fire-rated. These are often called intumescent seals. If a fire breaks out, these strips expand dramatically to seal the gaps around the door, stopping the spread of fire and smoke.
Luckily, many products now offer both acoustic and fire-rated protection in one strip. But be warned: using non-rated acoustic seals on a fire door is not only incredibly dangerous but will also invalidate its fire rating and violate building regulations. Always, always check the product specifications to ensure you’re installing the correct, compliant hardware.
When you're diving into a project like this, it’s only natural for questions to pop up. Let's tackle some of the most common queries we hear from customers to give you clear, straightforward answers and help you get the best possible result.
This really depends on how far you want to go. A simple but surprisingly effective DIY job using high-quality adhesive perimeter seals might only set you back £20-£50. It's a great starting point.
If you're after a more noticeable reduction in noise, a comprehensive solution that includes a high-performance automatic drop-down seal and a layer of Mass Loaded Vinyl could be in the range of £100-£250 for materials. For professional installation or a complete acoustic door set replacement, costs can easily run into several hundred or even over a thousand pounds. It all comes down to balancing your budget with the level of quiet you're aiming for.
It’s important to have realistic expectations here. Achieving total, studio-grade silence is practically impossible without some serious construction work. The real goal of soundproofing a door is to knock noise down to a comfortable, non-intrusive level.
A well-executed project can cut noise transmission by over 75%. This means conversations, the telly, and traffic rumble will become distant murmurs or disappear entirely. You'll gain a massive improvement in privacy and peace, but it's about significant reduction, not total elimination.
Yes, absolutely. This is great news for renters or anyone who doesn't want to make permanent alterations to their property. Many of the most effective methods are completely reversible.
You can achieve a substantial reduction in noise without leaving a lasting mark.
For the vast majority of door soundproofing tasks, you’ll only need a basic toolkit. A tape measure, a sharp utility knife, some cleaning supplies like methylated spirits, and a screwdriver will get you through most installations of seals and sweeps.
If you’re fitting a new threshold or tackling a more complex morticed drop-down seal, you might need a drill and a hacksaw. These are all standard tools you can find at any good hardware supplier, and they're straightforward to use.
Ready to start your soundproofing project and reclaim your quiet space? At Neasden Hardware, we stock a wide range of high-quality acoustic seals, drop-down seals, and all the essential ironmongery you need to get the job done right. Explore our collection today and get fast, reliable delivery across the UK. Visit us at https://neasdenhardware.co.uk to find your solution.